Custom MCP Services
A custom MCP service is an MCP server you build and register on the Tuya platform to expose your own tools to an agent. This guide walks through creating, configuring, debugging, and adding one to an agent.
Create a custom MCP server
-
Log in to the Tuya Developer Platform.
-
Go to MCP Management > Custom MCP Service, then click Add custom MCP.
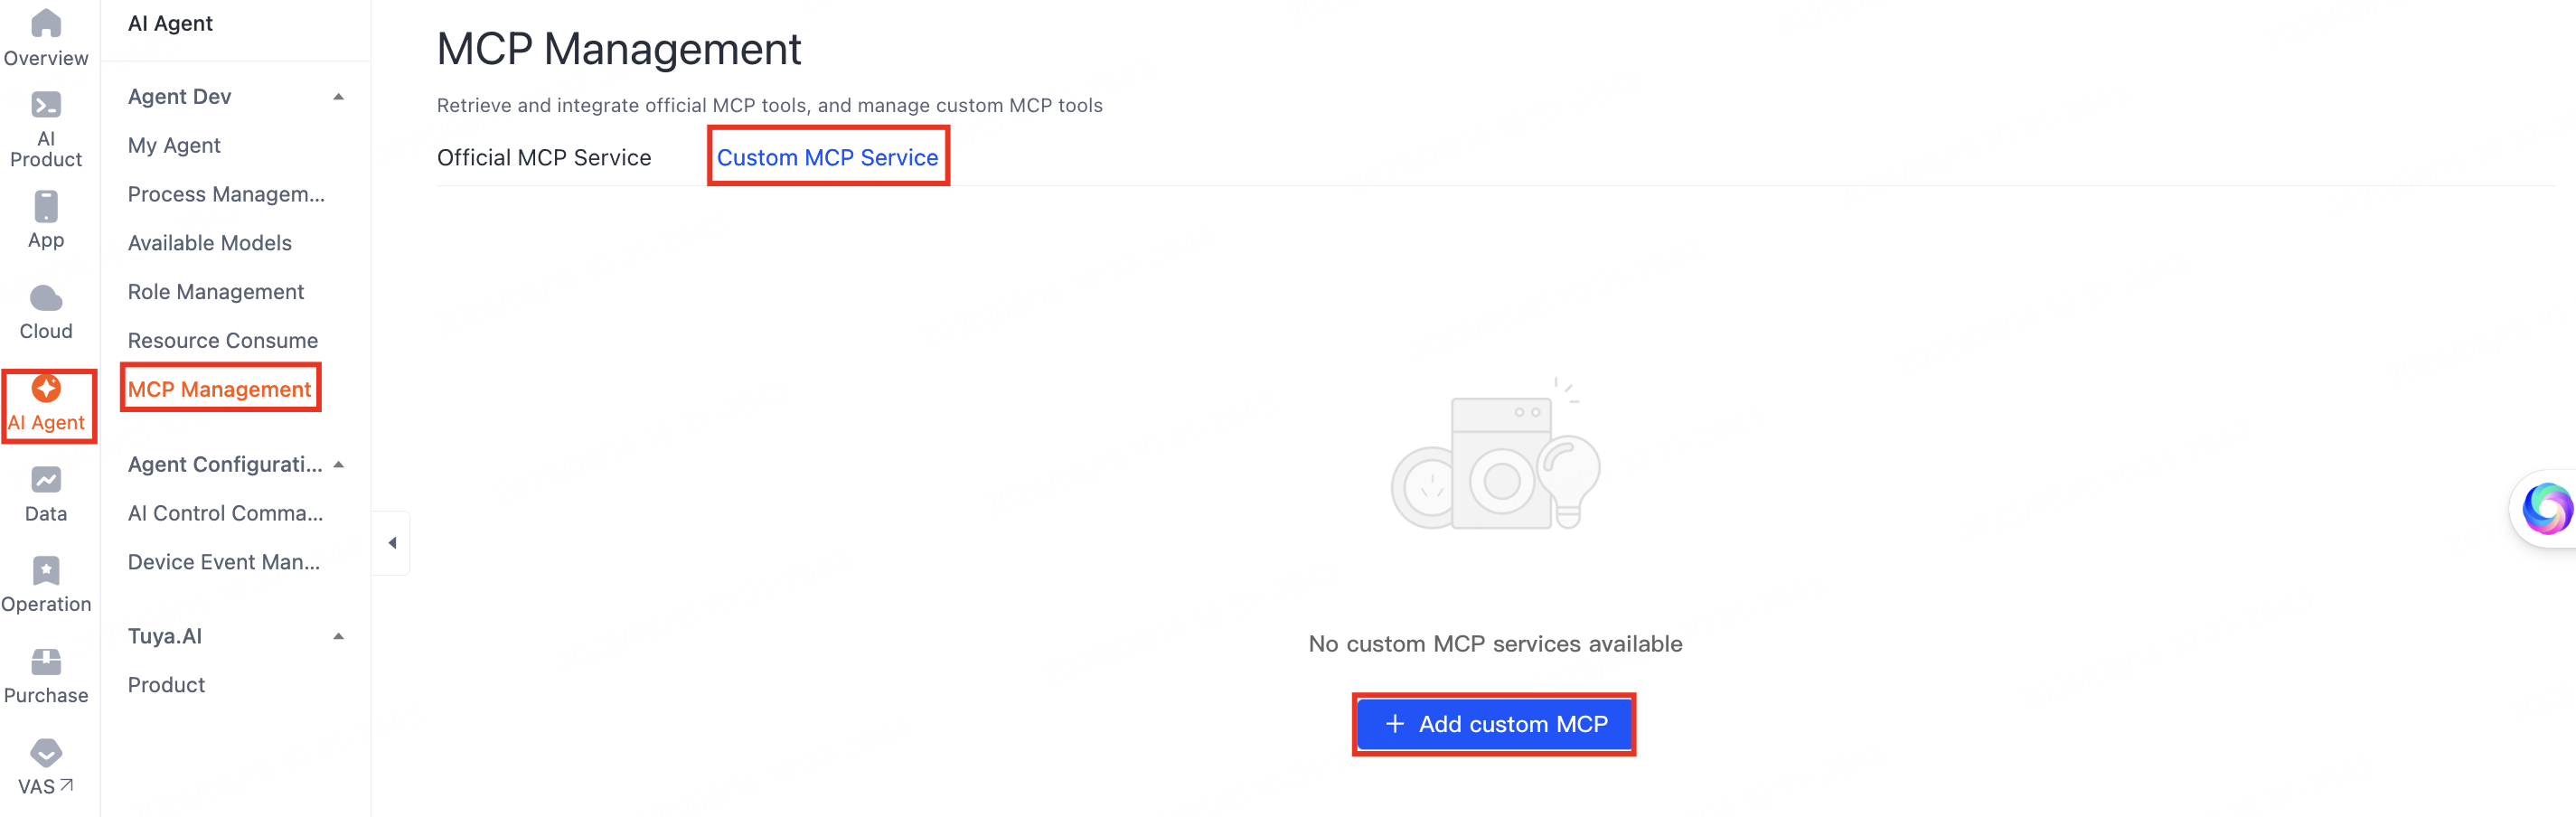
Add custom MCP entry -
In the Sign up MCP Server dialog, enter the service name and description in Chinese and English, upload an image as the icon, then click Confirm to save.
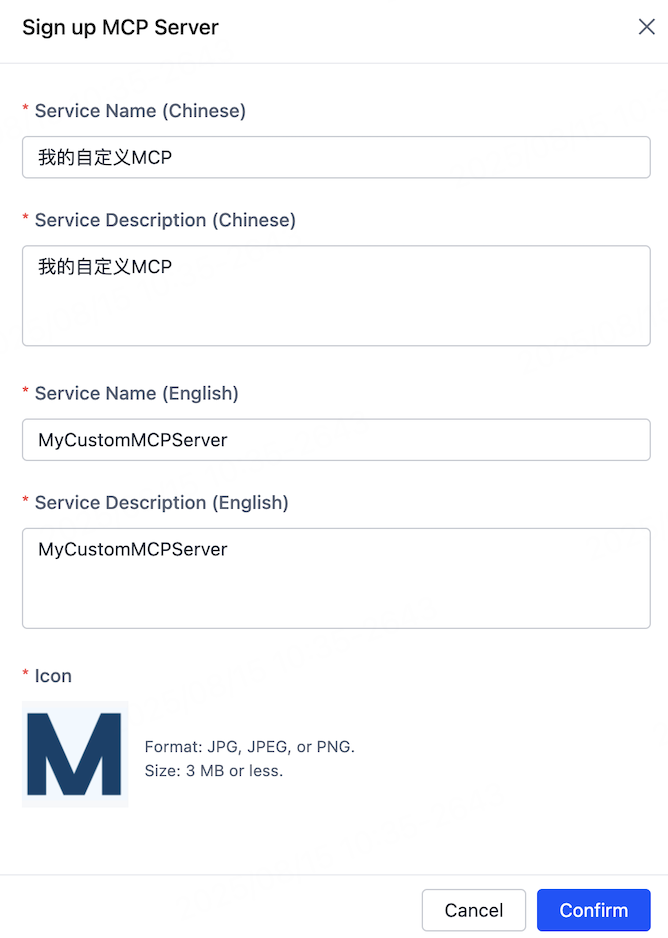
Sign up MCP Server dialog
Configure the custom MCP server
If your custom MCP service is deployed across multiple data centers, keep the service version and tool configuration consistent in every data center. Inconsistencies can disrupt agent orchestration or cause functional failures.
-
After you create the MCP server, the platform redirects you to its Service Details page.
-
Under Service Access Configuration Management > Data Center, click Add Data Center on the right, select a data center, then click OK.
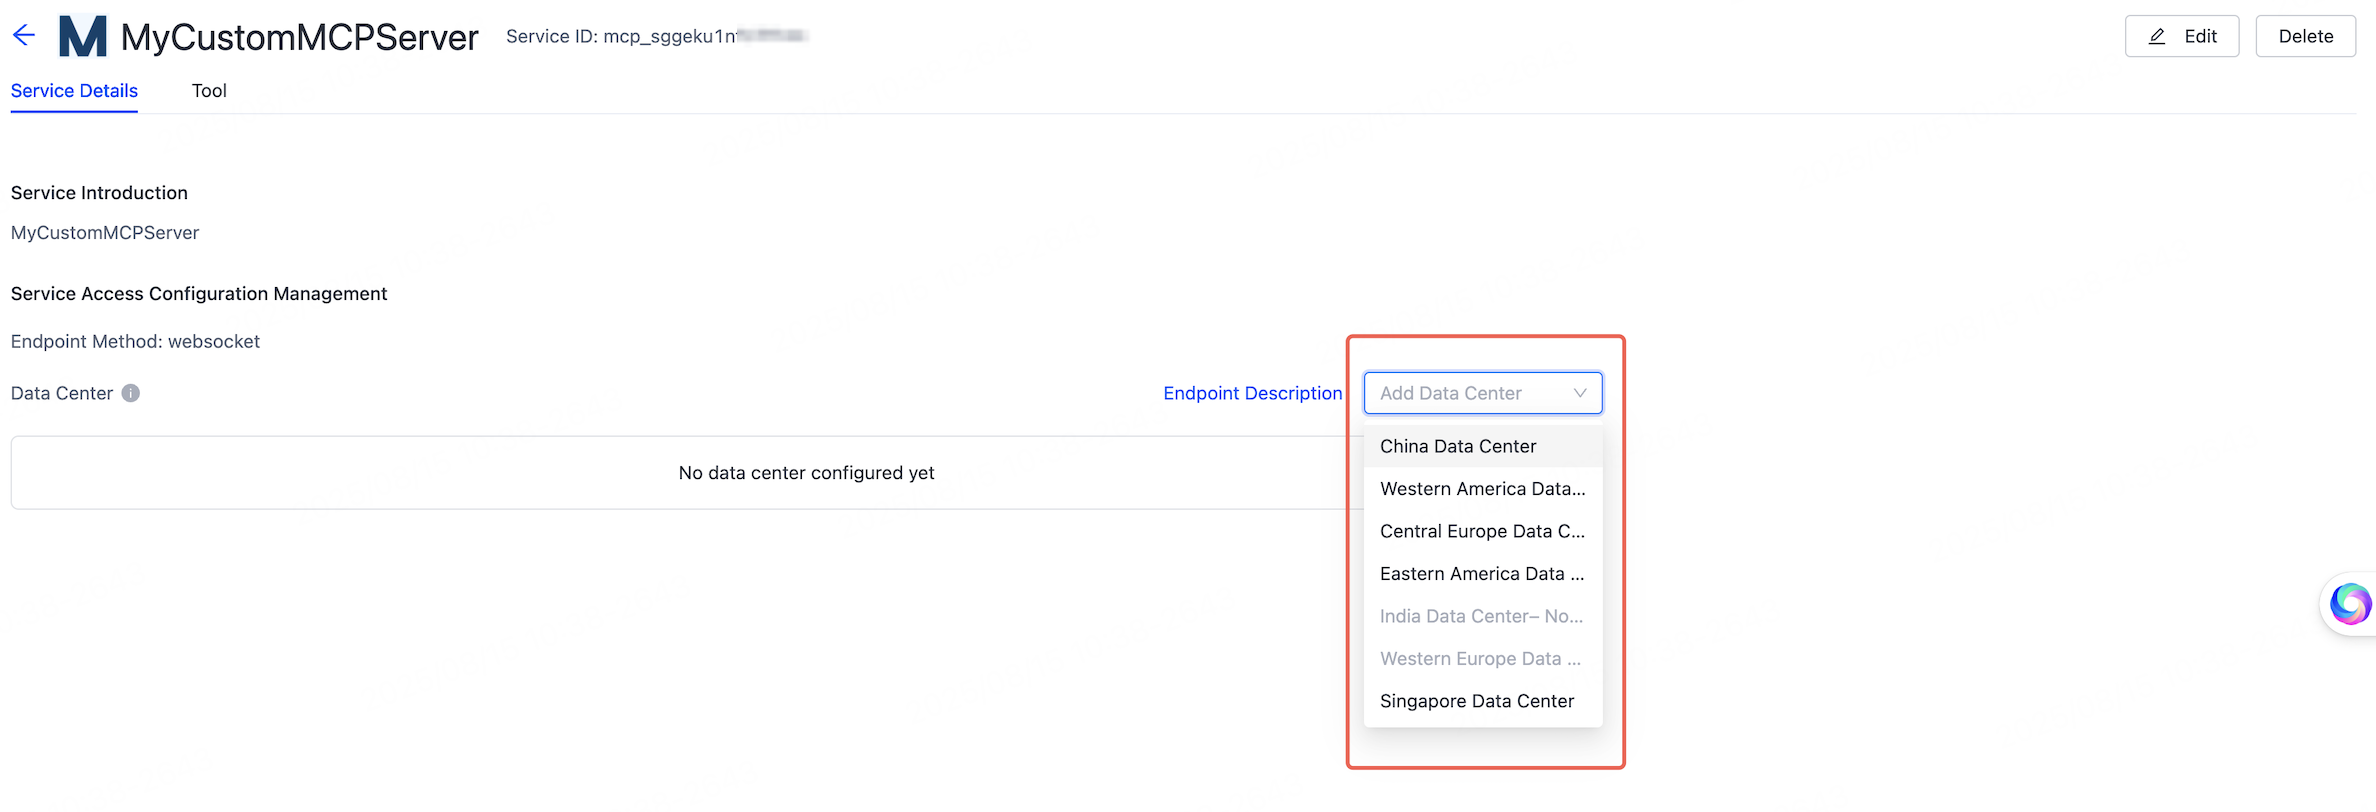
Add Data Center to a custom MCP server -
Click the selected data center to see the Endpoint, Access ID, and Access Secret. Copy these values to your local device — you need them when running the MCP SDK later. For more information, see the README in the GitHub source.
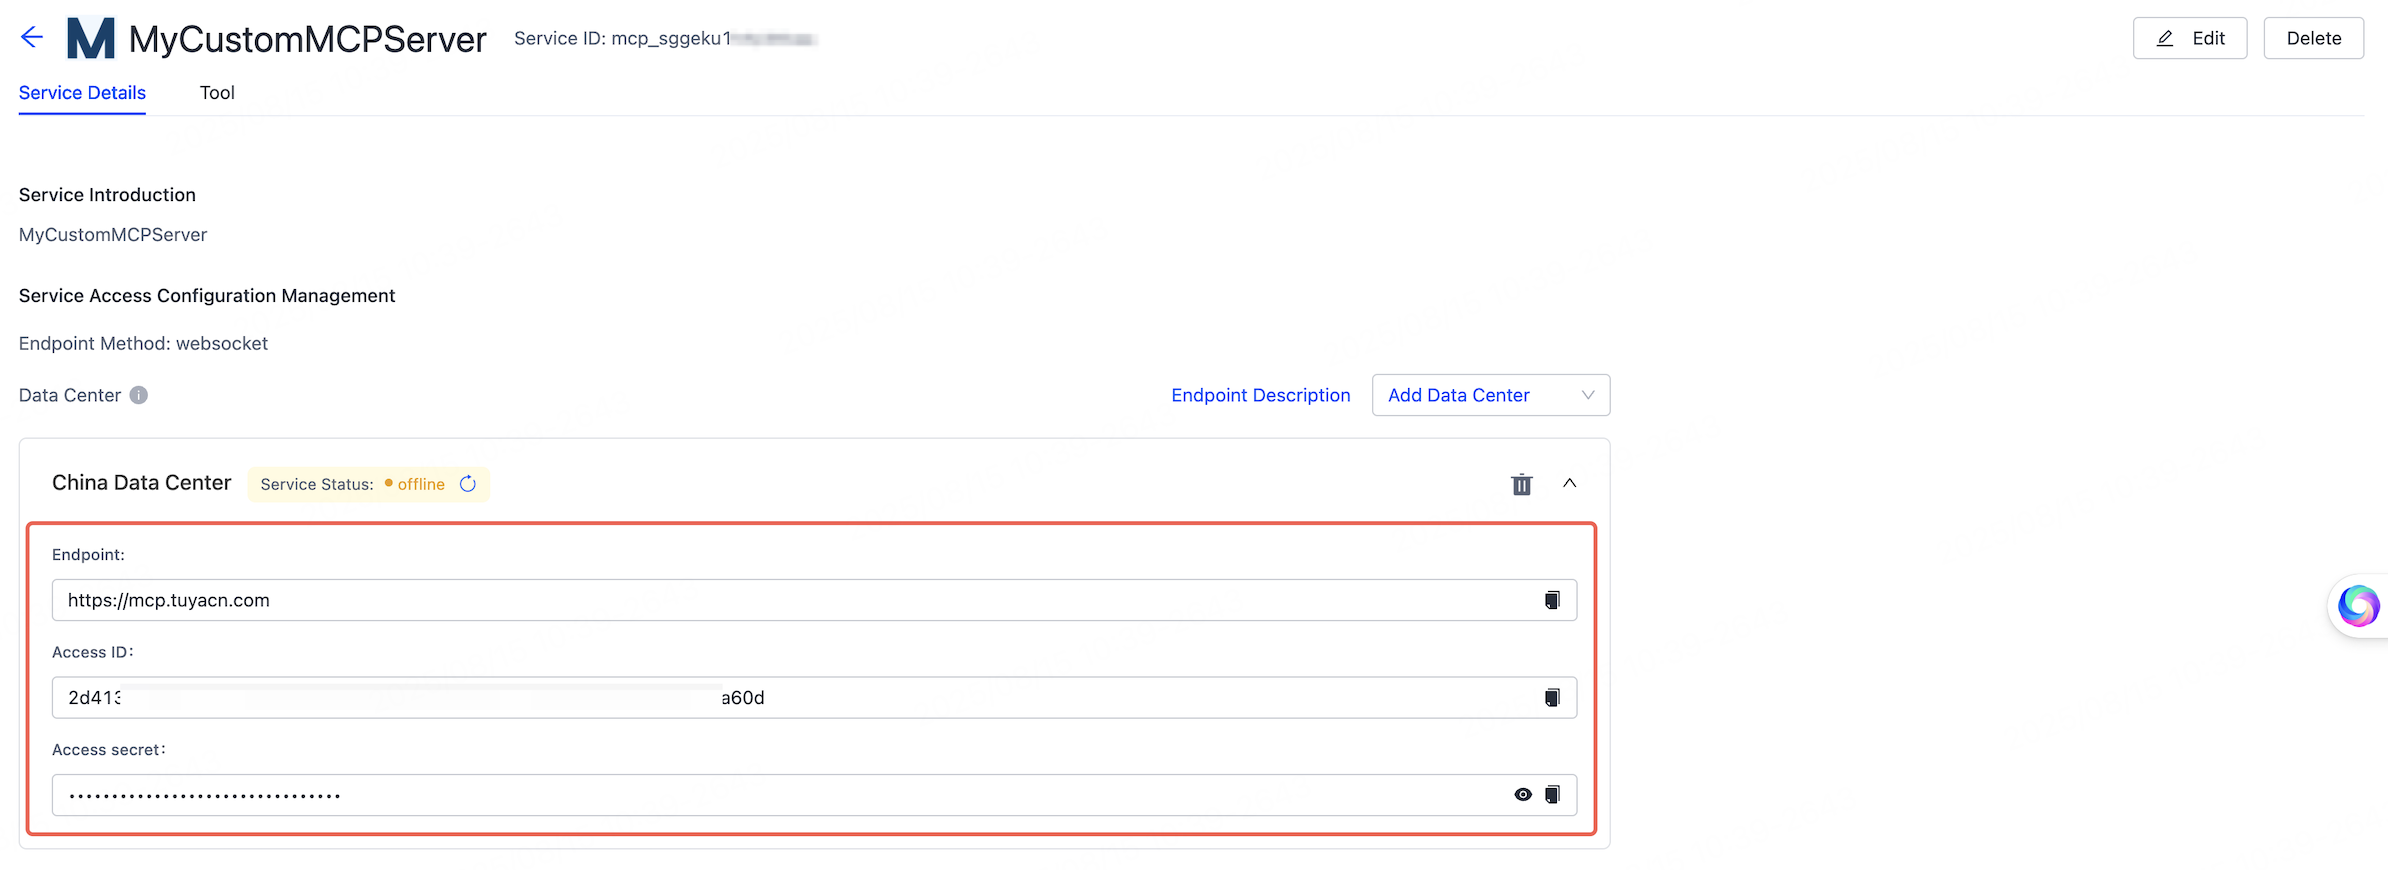
Endpoint, Access ID, and Access Secret
Access the MCP server via the SDK
Download the MCP SDK from GitHub and read its documentation. Only SSE mode is supported today.
Run and debug the MCP server
To confirm your custom MCP server works, run and debug it within the agent environment.
Run and debug
-
In the selected data center, check the MCP server's service status.
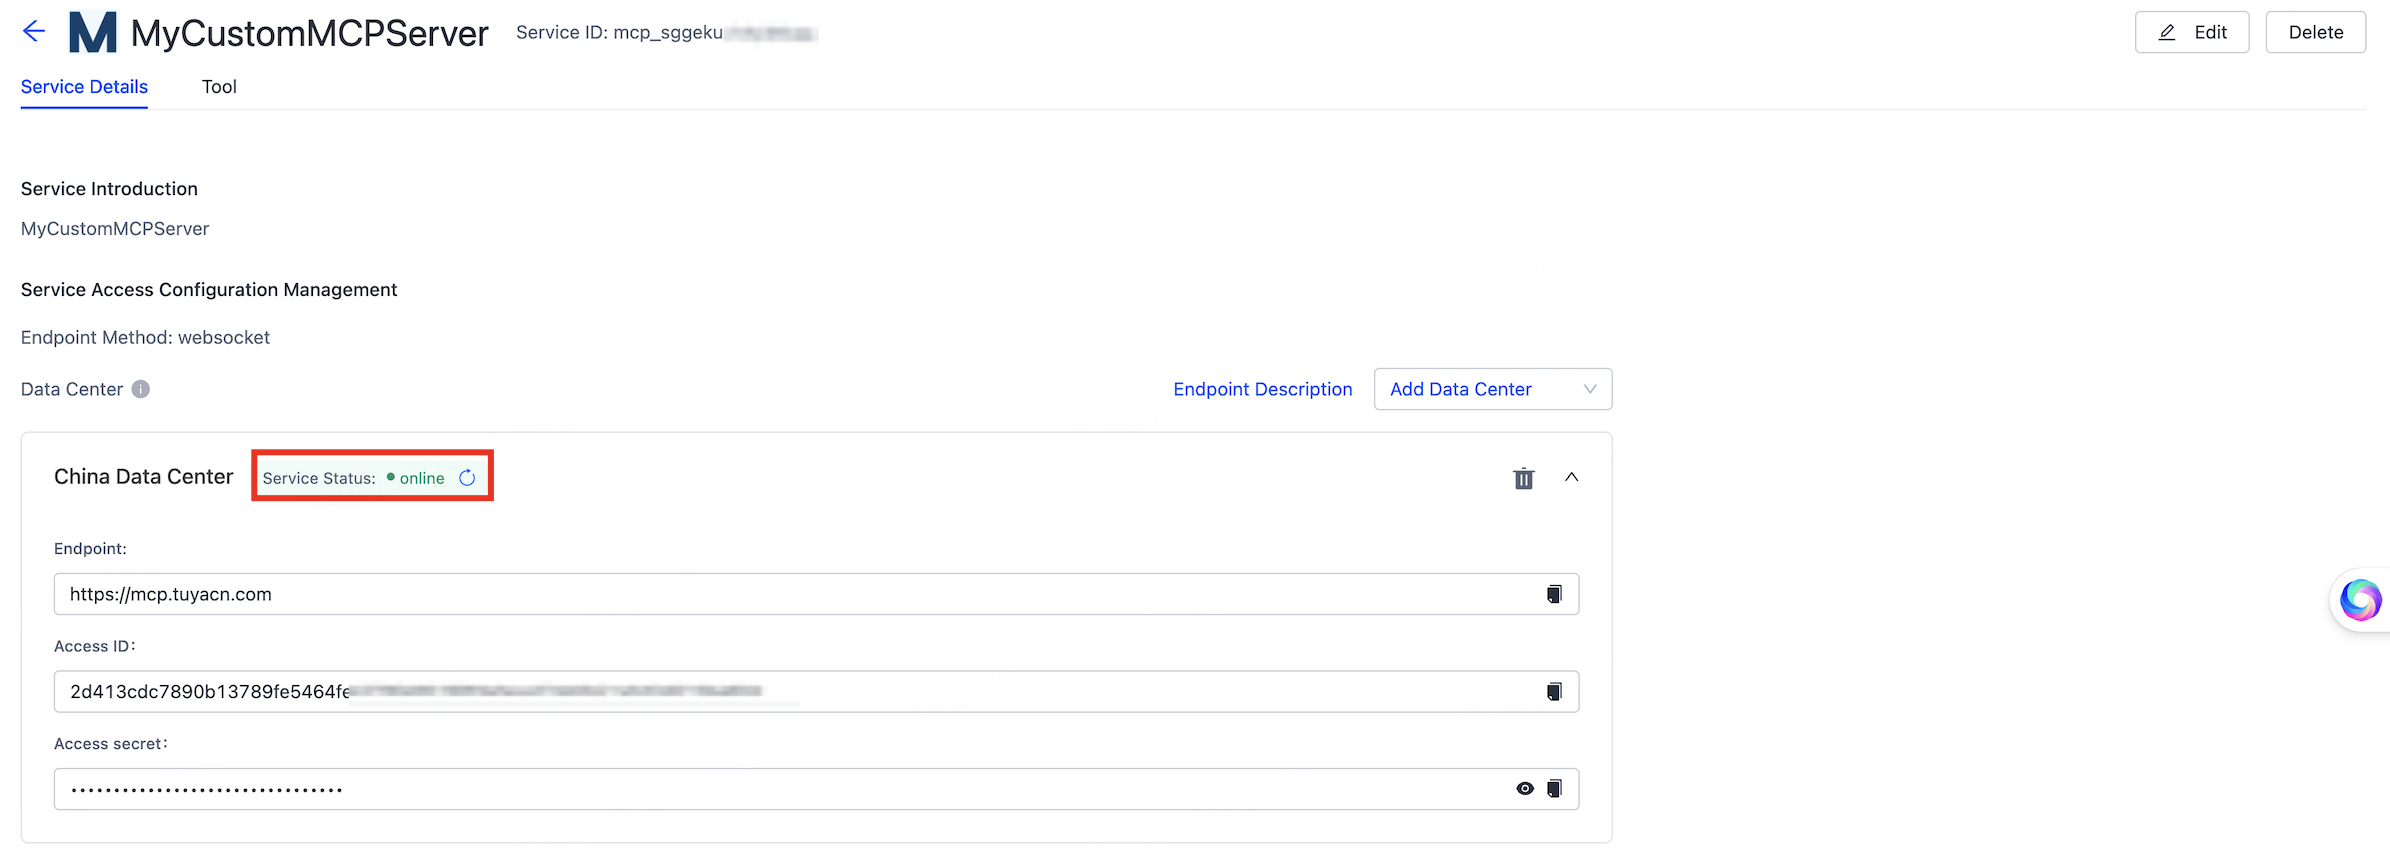
MCP server service status -
On the Tool tab, view the available tools for your MCP server.
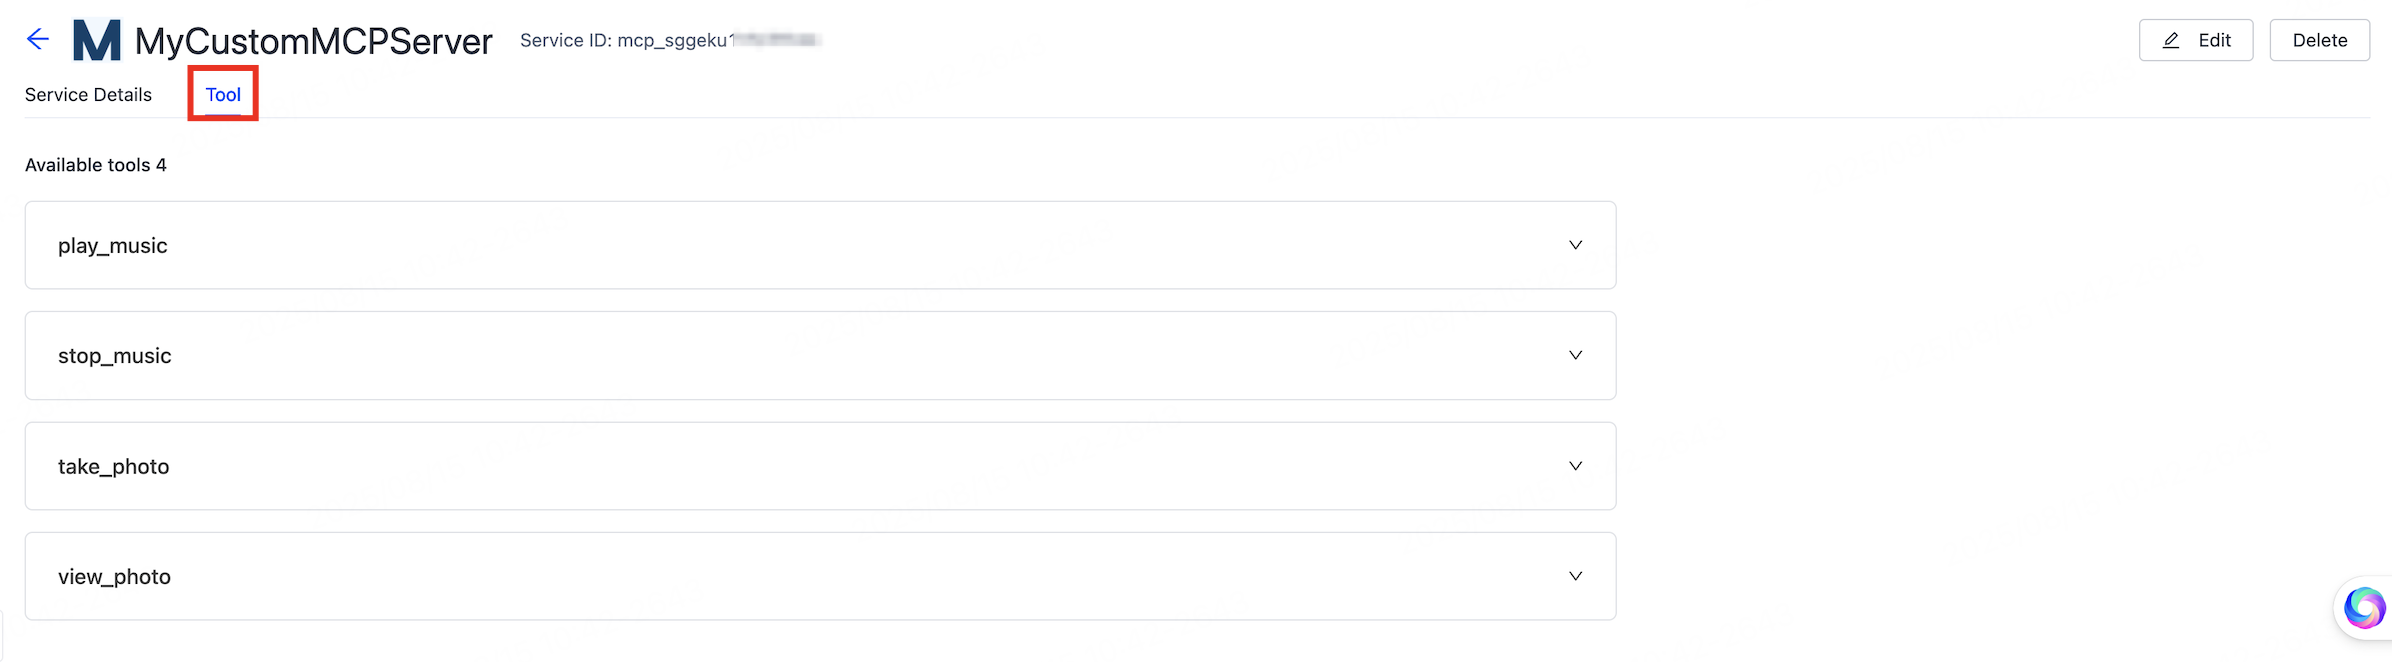
Available tools on the Tool tab -
Click Test Run on the tool you want to test.
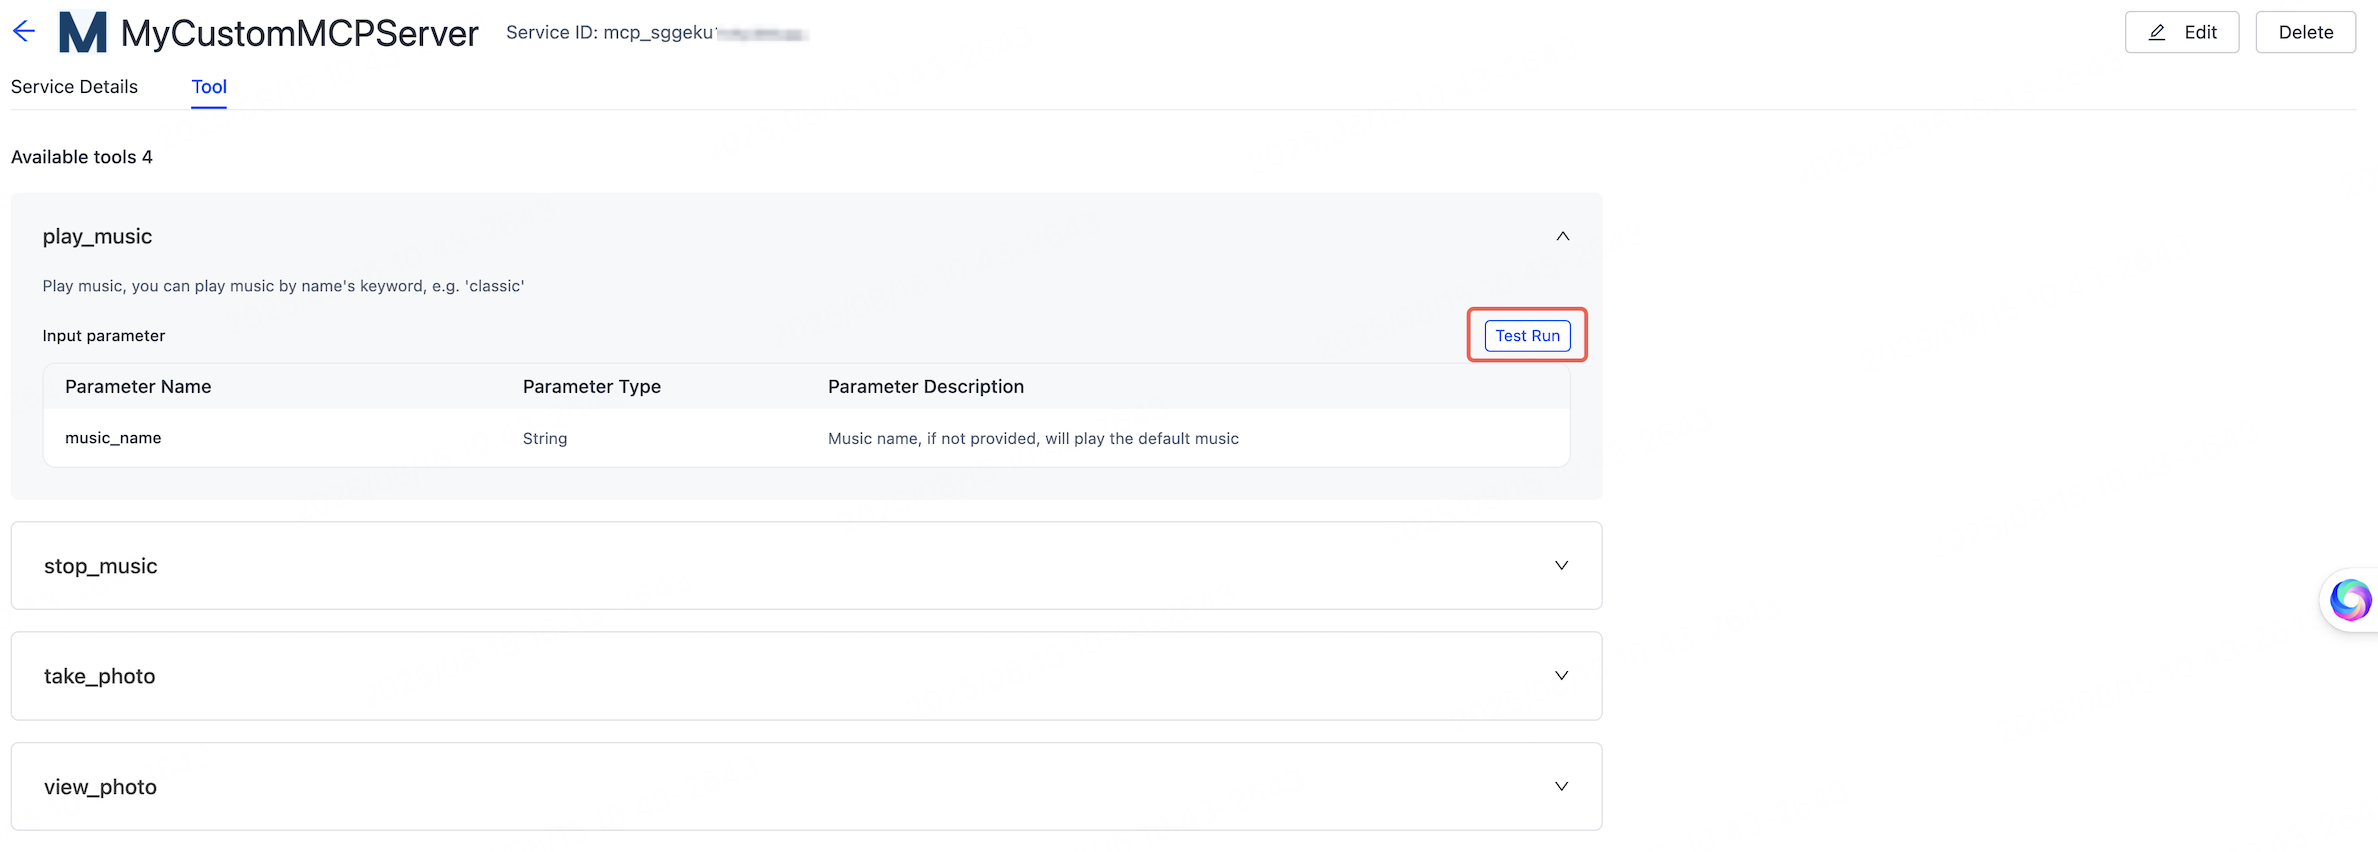
Test Run on a tool -
In the Test Run window, click Run. When Commissioning passed appears in the lower-left corner, the MCP tool is debugged successfully.
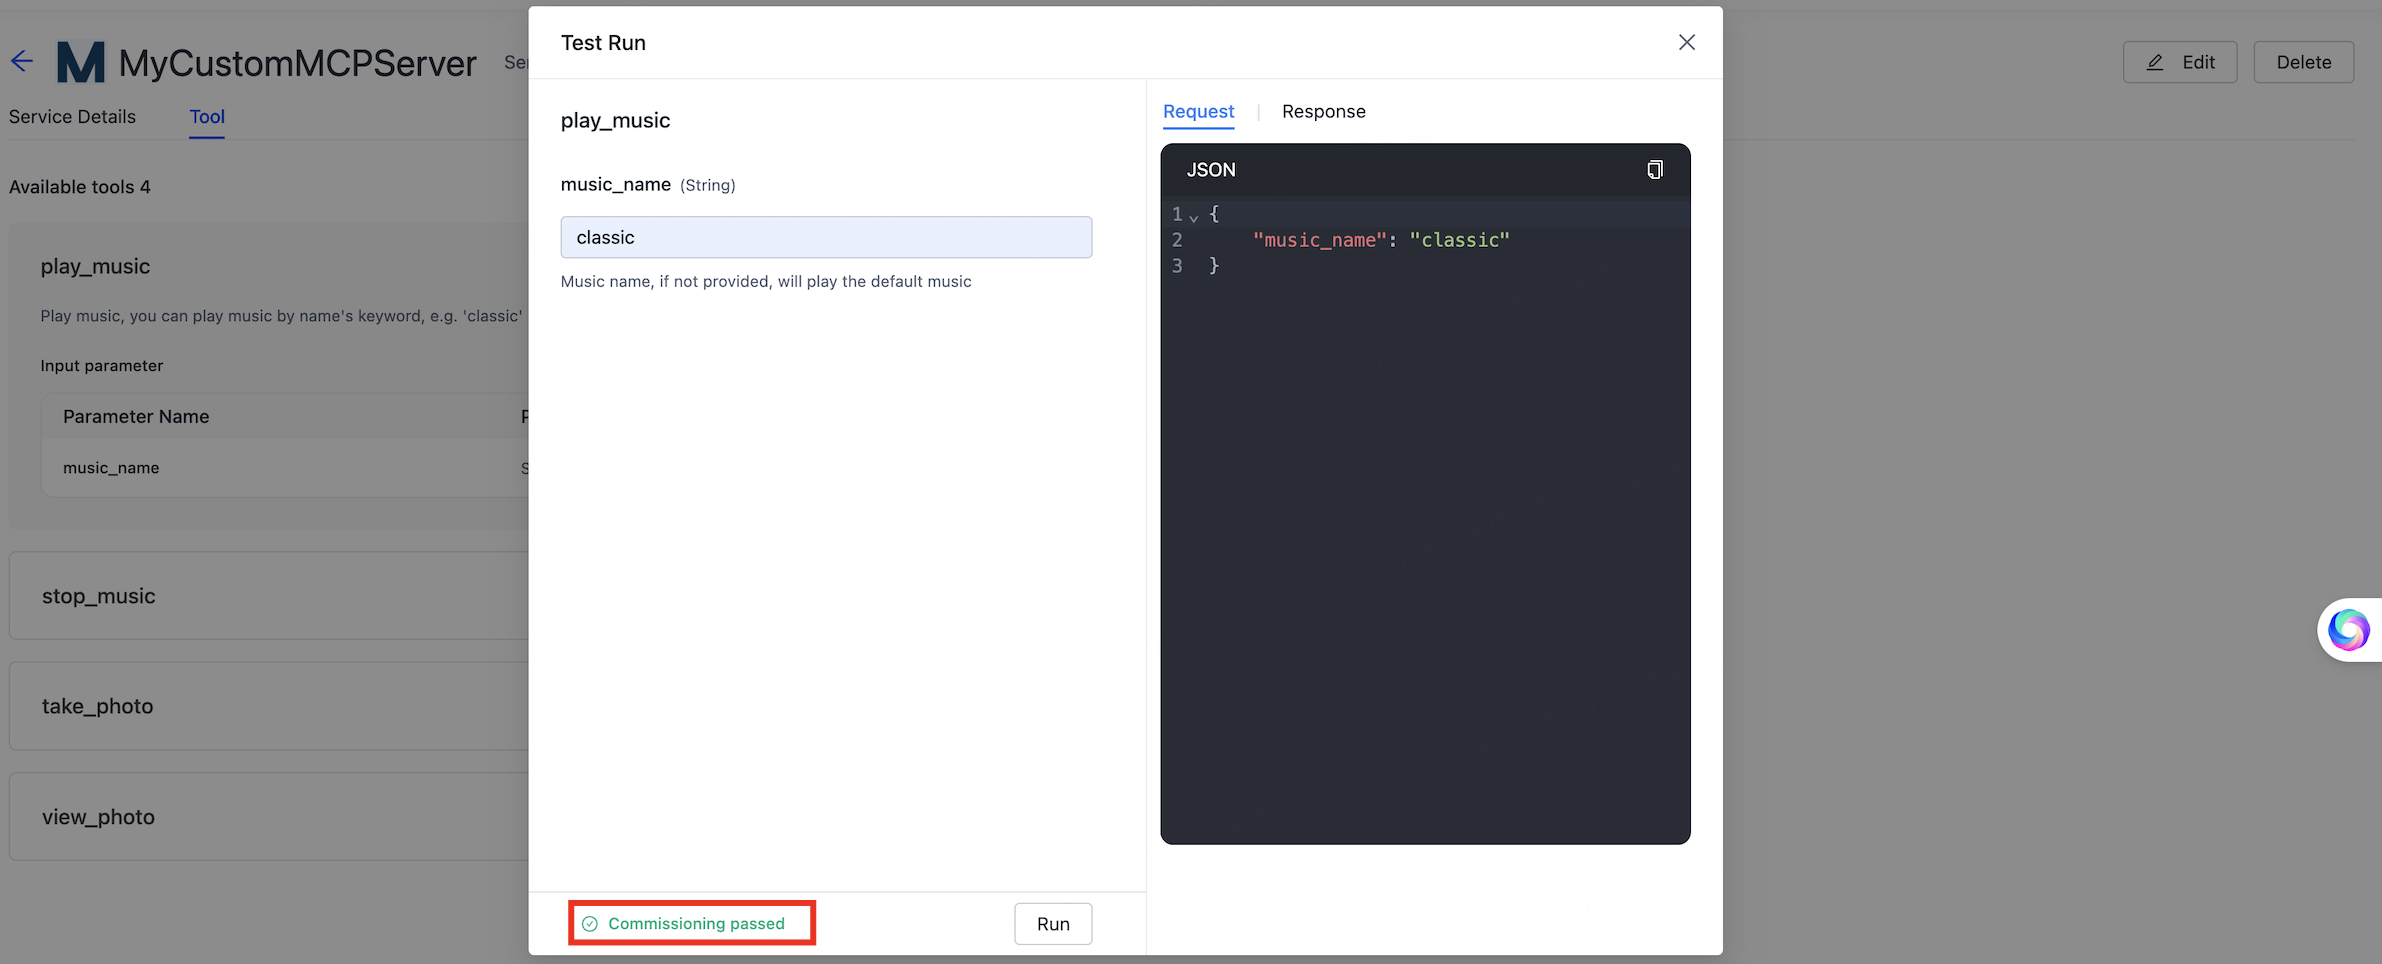
Commissioning passed in the Test Run window
Add the server to an agent
-
Go to the My Agent page and click Develop in the Operation column.
-
Under 01 Model Configuration > Skills Configuration, find Plugin and click + on the right.
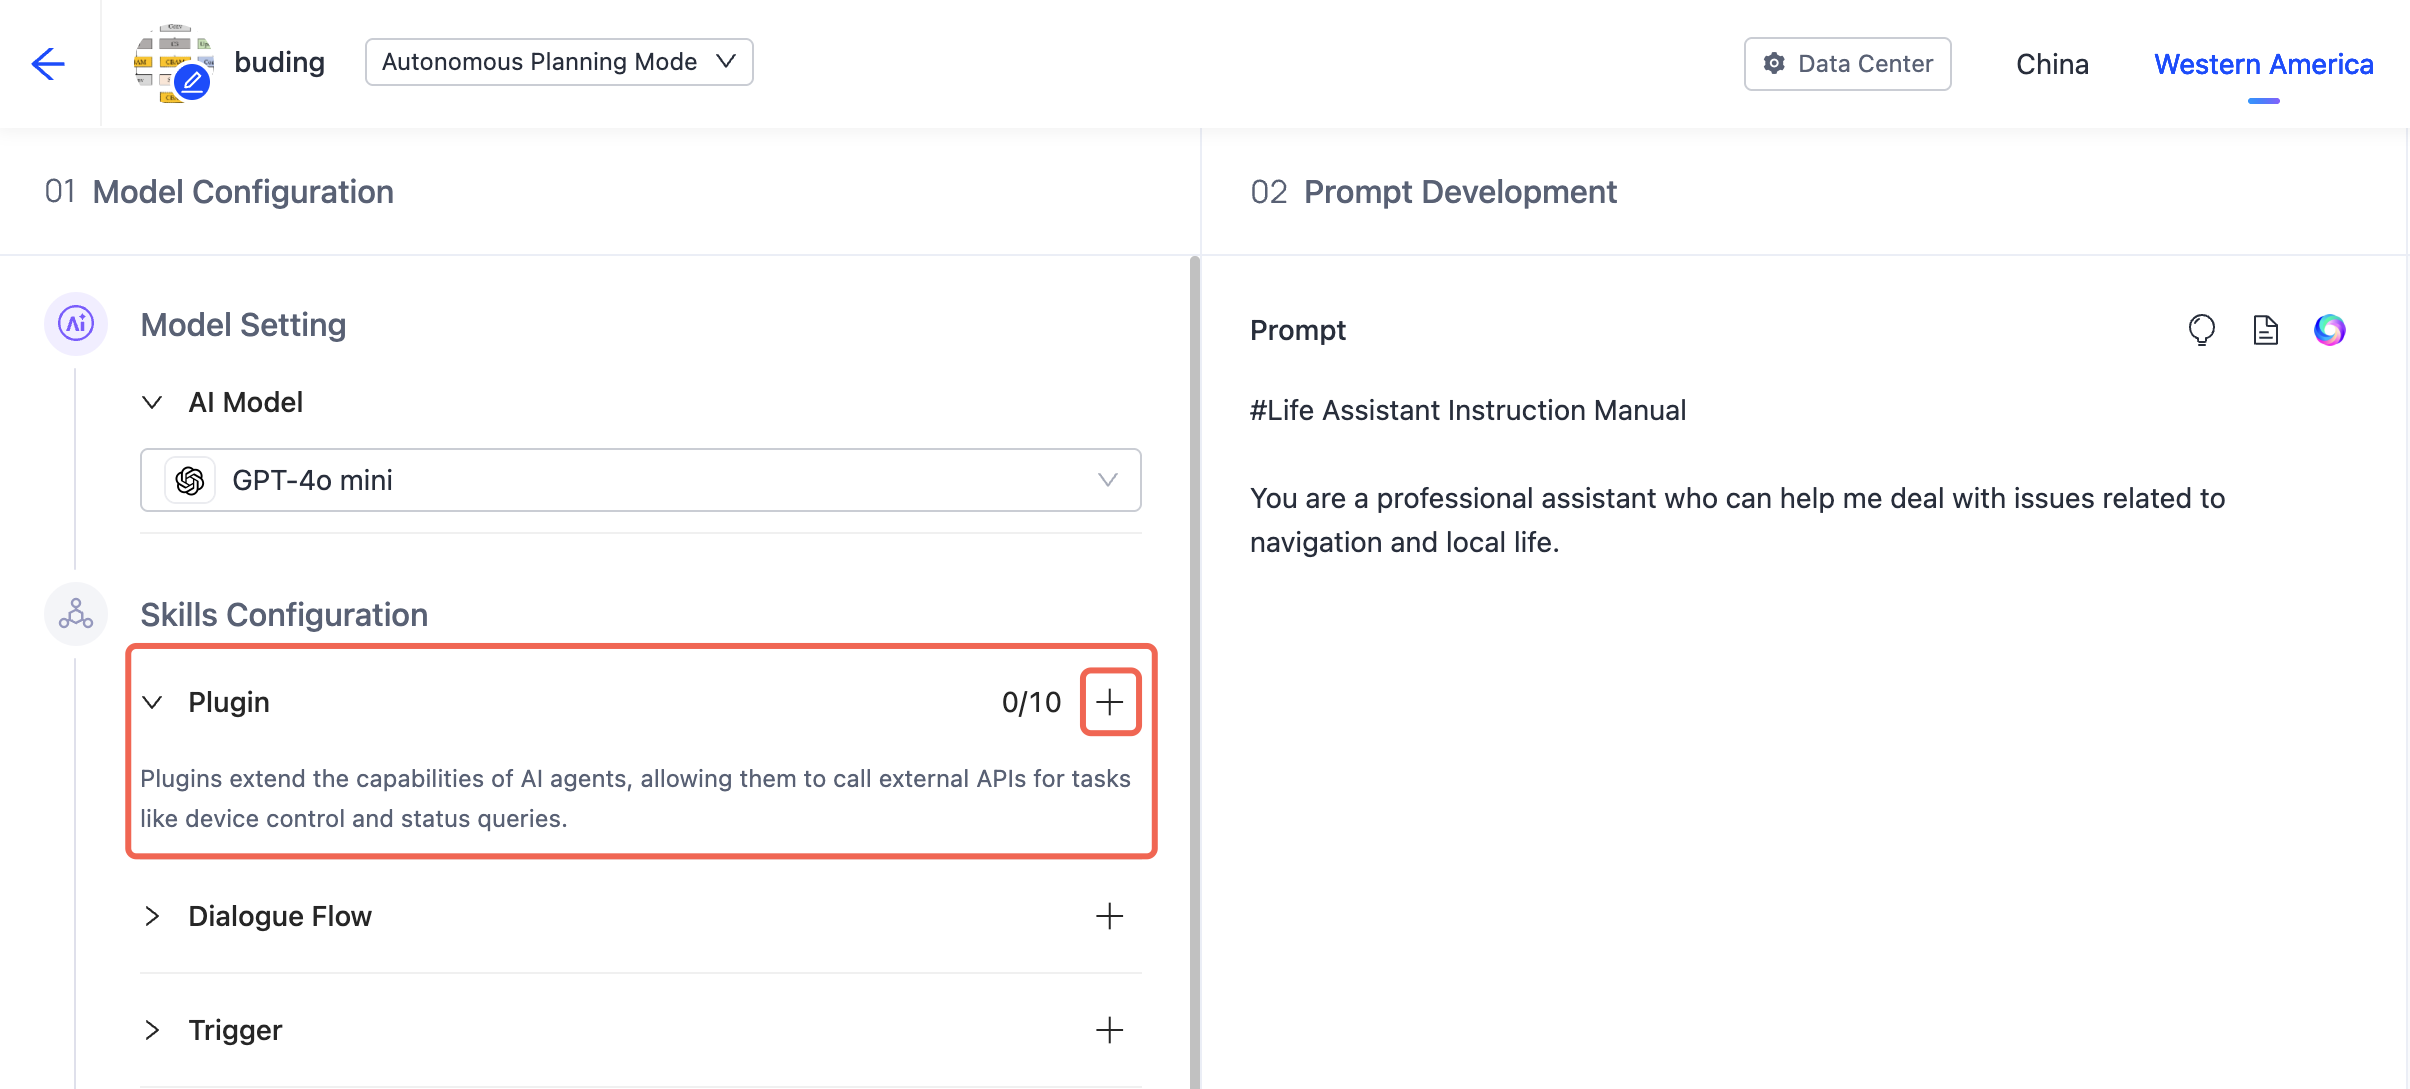
Plugin add button under Skills Configuration -
On the Add Tool page, select the MCP tab, click Custom MCP Service, and add the MCP server to your agent.
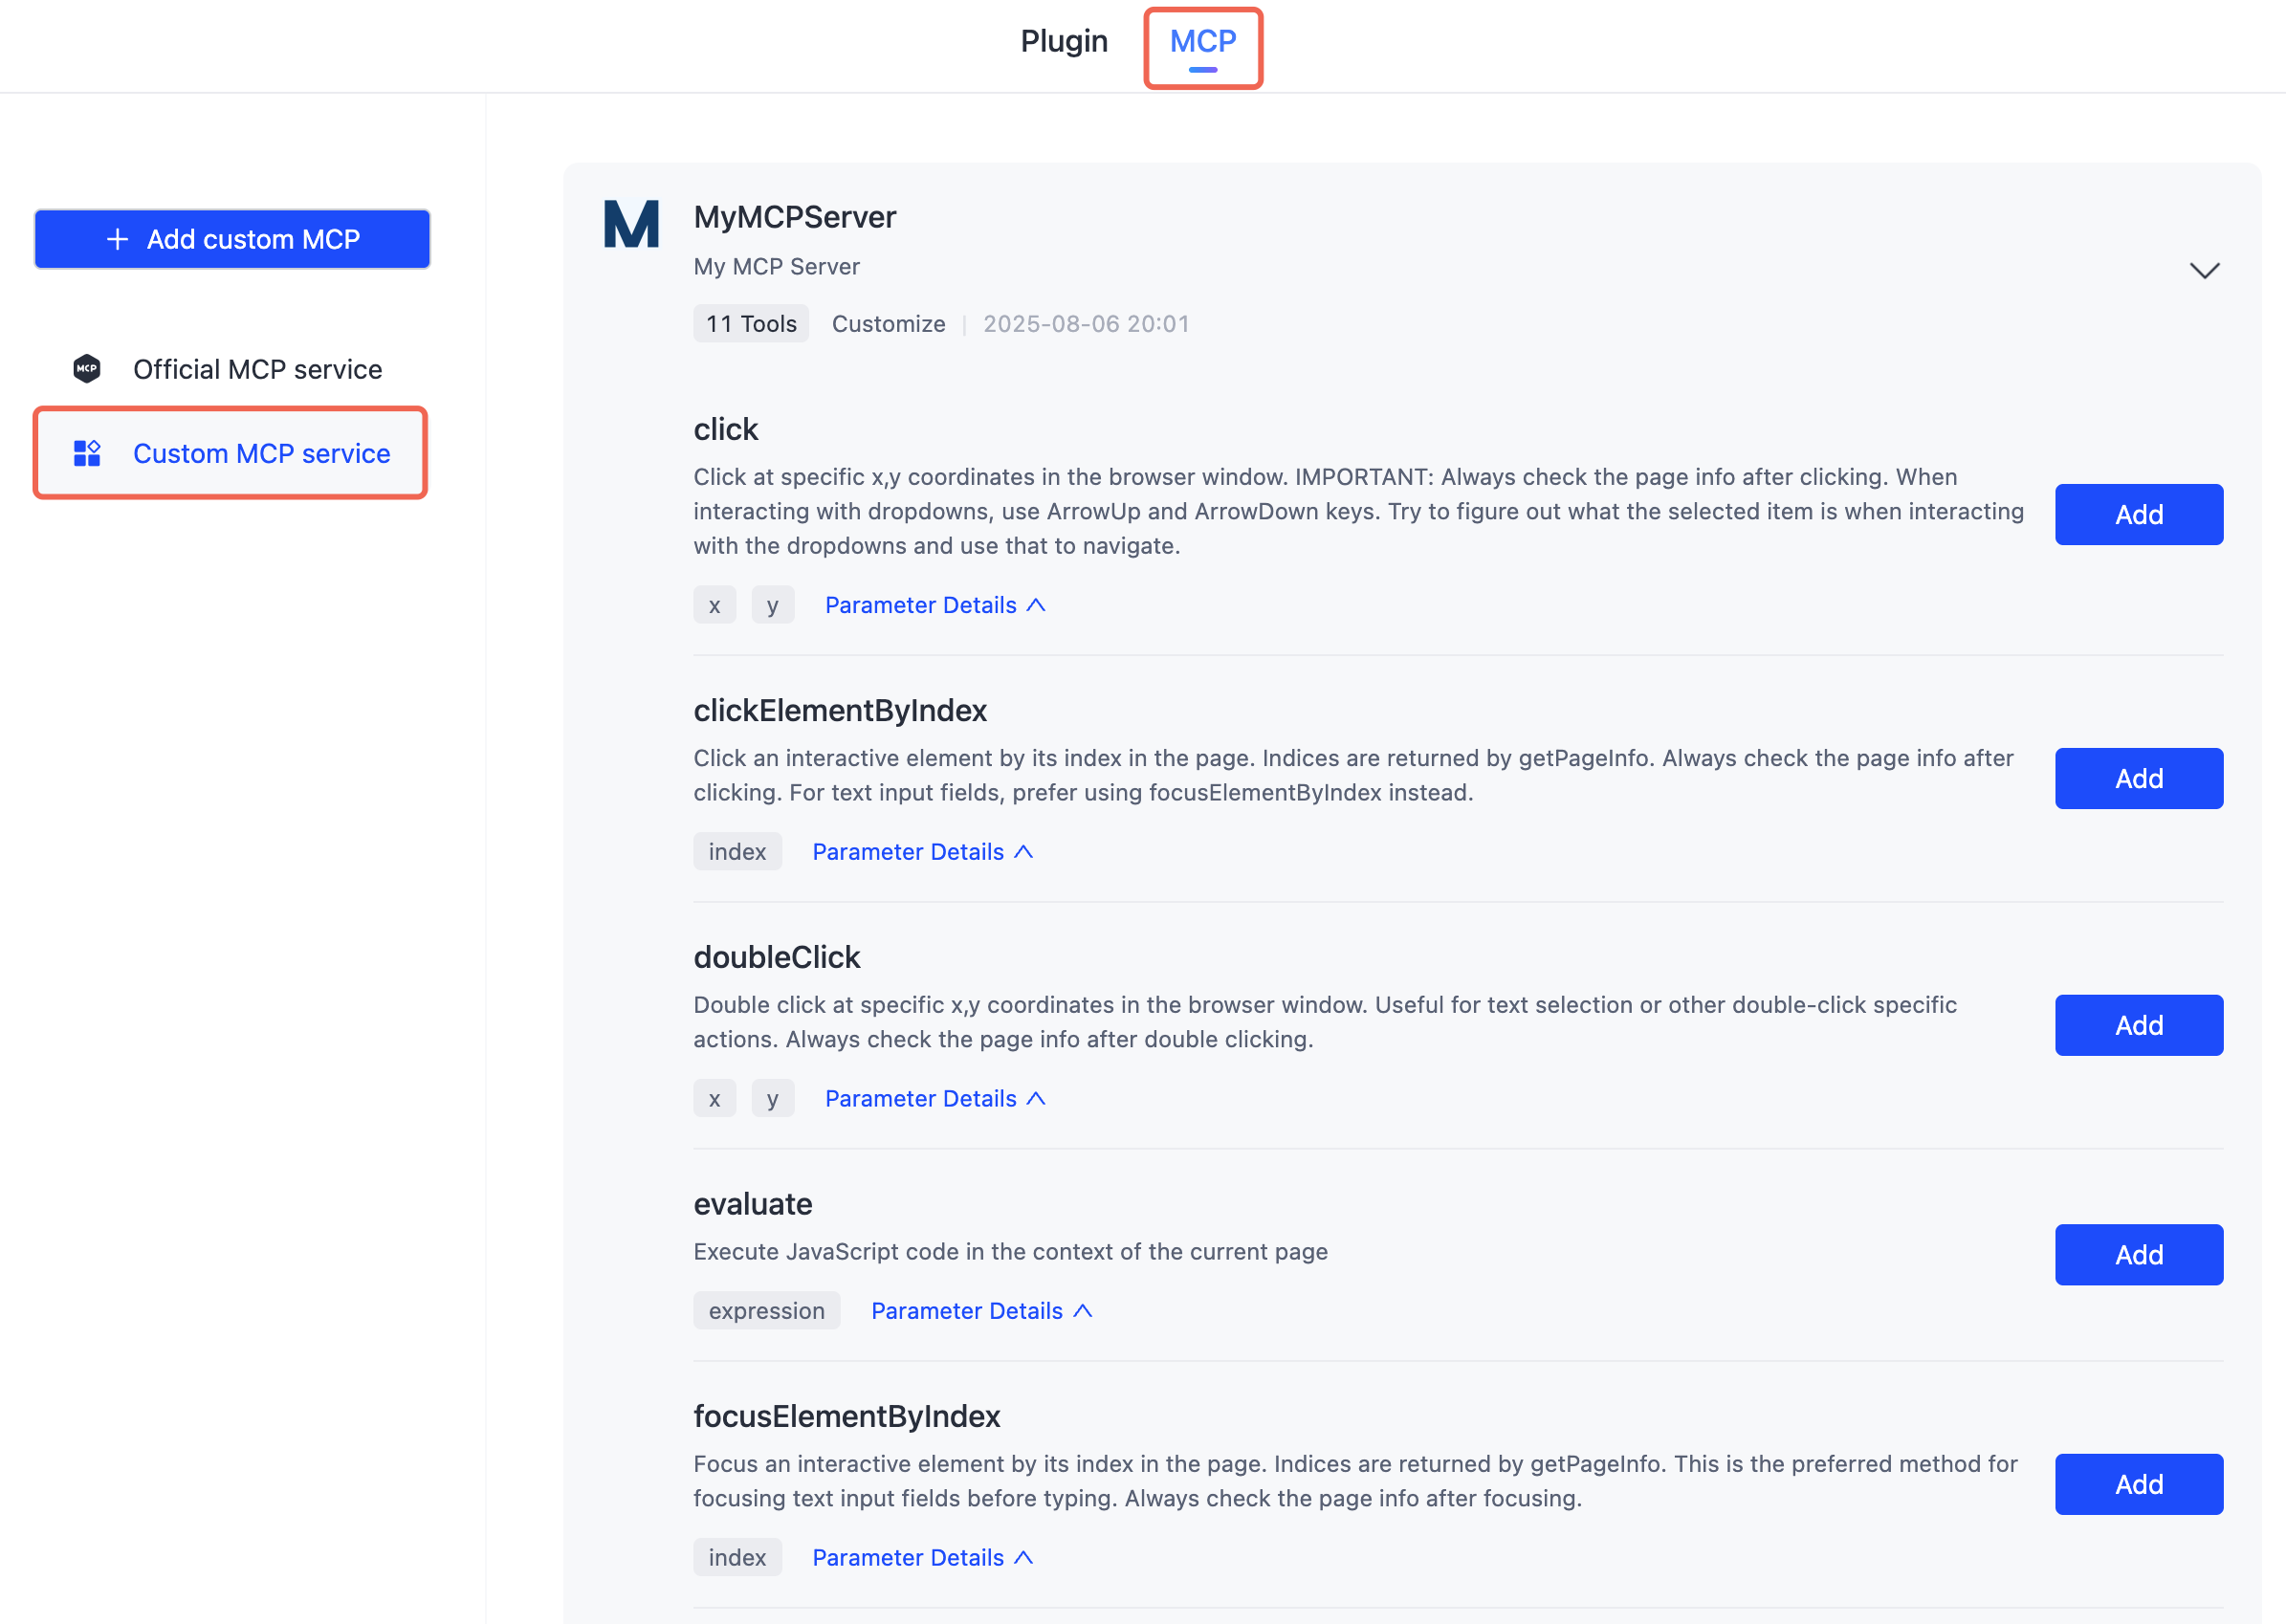
Add Tool page with the MCP tab
You have now completed the development and debugging of a custom MCP server.
See also
- MCP Management — view official services and manage custom ones.