AI Product Commands
AI product commands map natural-language phrases (such as "Turn on the lights") to device actions, so an AI agent can control home devices like lights and sockets. You configure them on the Tuya Developer Platform, then publish the command solution to make it live.
Prerequisites
To let an agent control a home device, meet all three requirements:
- Extend agent capabilities: Add the device control tool to the agent so it has permission to interact with hardware.
- Bind device AI commands: Configure standardized AI commands for the target device (such as a smart light or socket) and map each command to a device action — for example, "Turn on the lights" triggers power on.
- Link with the ecosystem: Add the device in the Tuya app or SmartLife app to complete onboarding and account binding, so the agent can control it.
When the product ID (PID) of a device is configured with AI commands and the agent has the Device Control plugin enabled, a chat with the AI achieves semantic understanding and then device control. This applies to scenarios such as home lighting control (lights on/off, temperature) and thermostat control (temperature settings).
Configure AI product commands
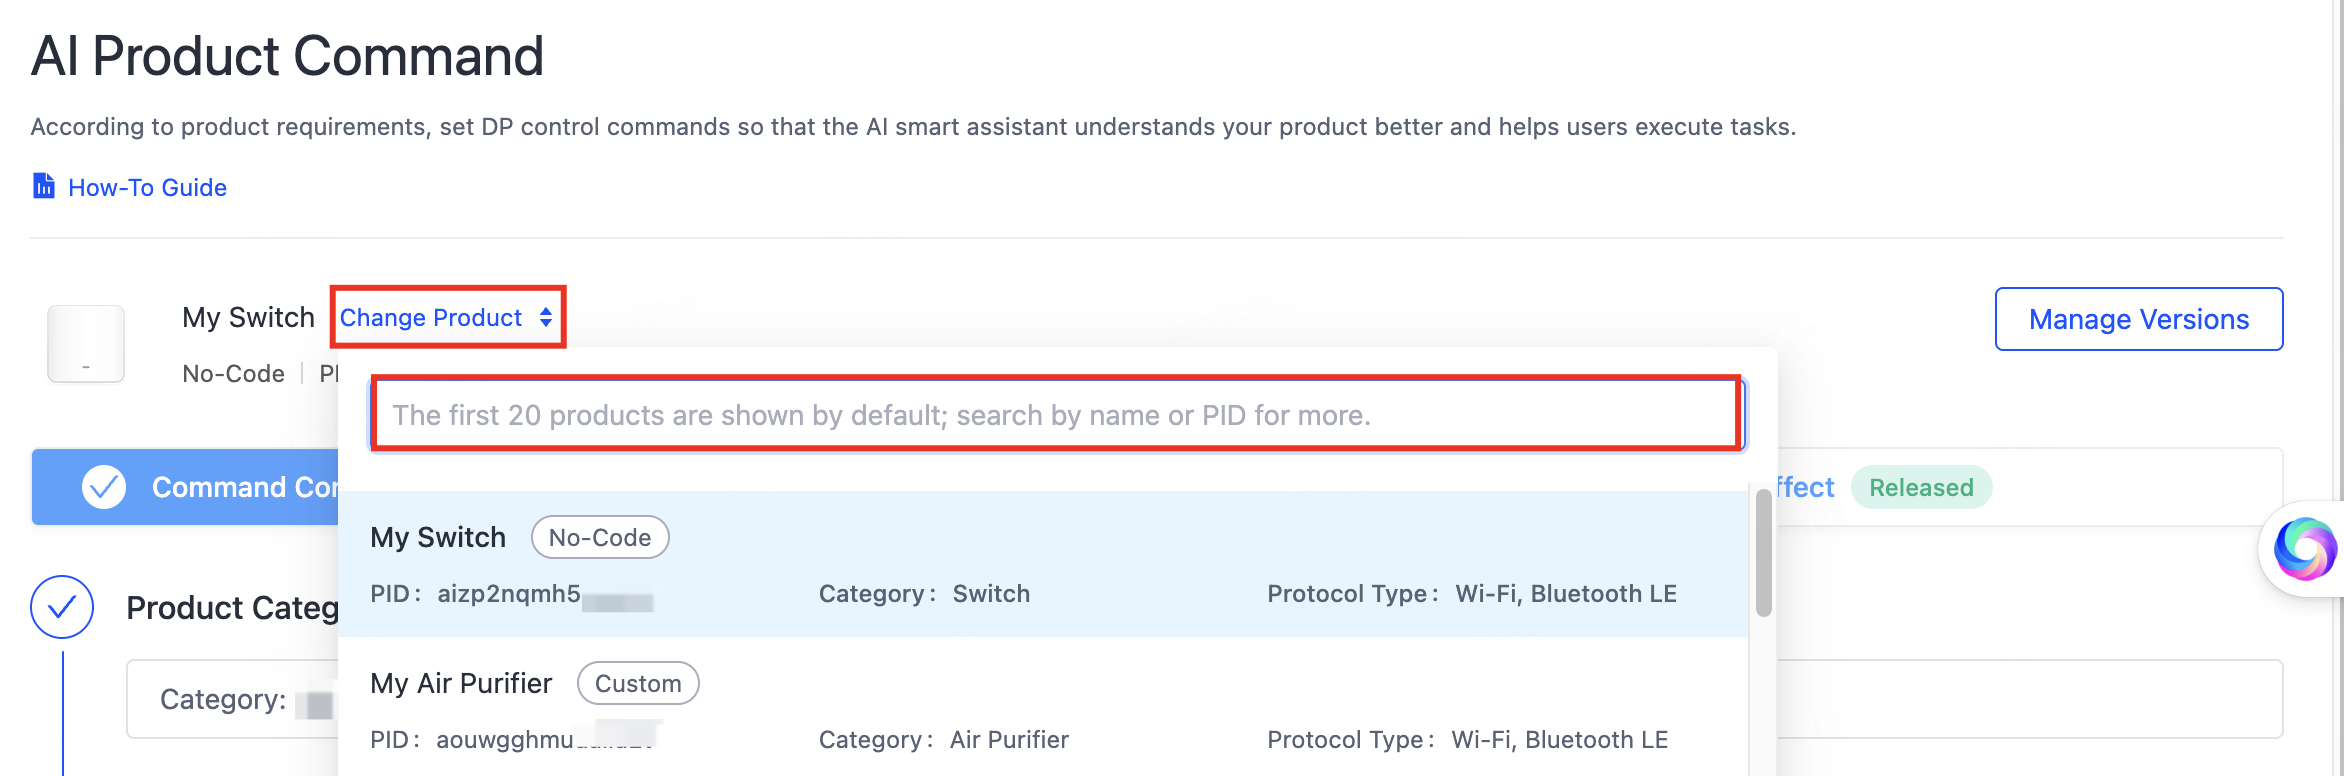
Log in to the Tuya Developer Platform. In the left-side navigation, choose AI Agent > Agent Configuration > AI Control Command Configuration to open the AI Product Command page.
To the right of the product name, click Change Product to select a product, or search for one. The first 20 products appear by default; if yours is not listed, search by product name or PID.
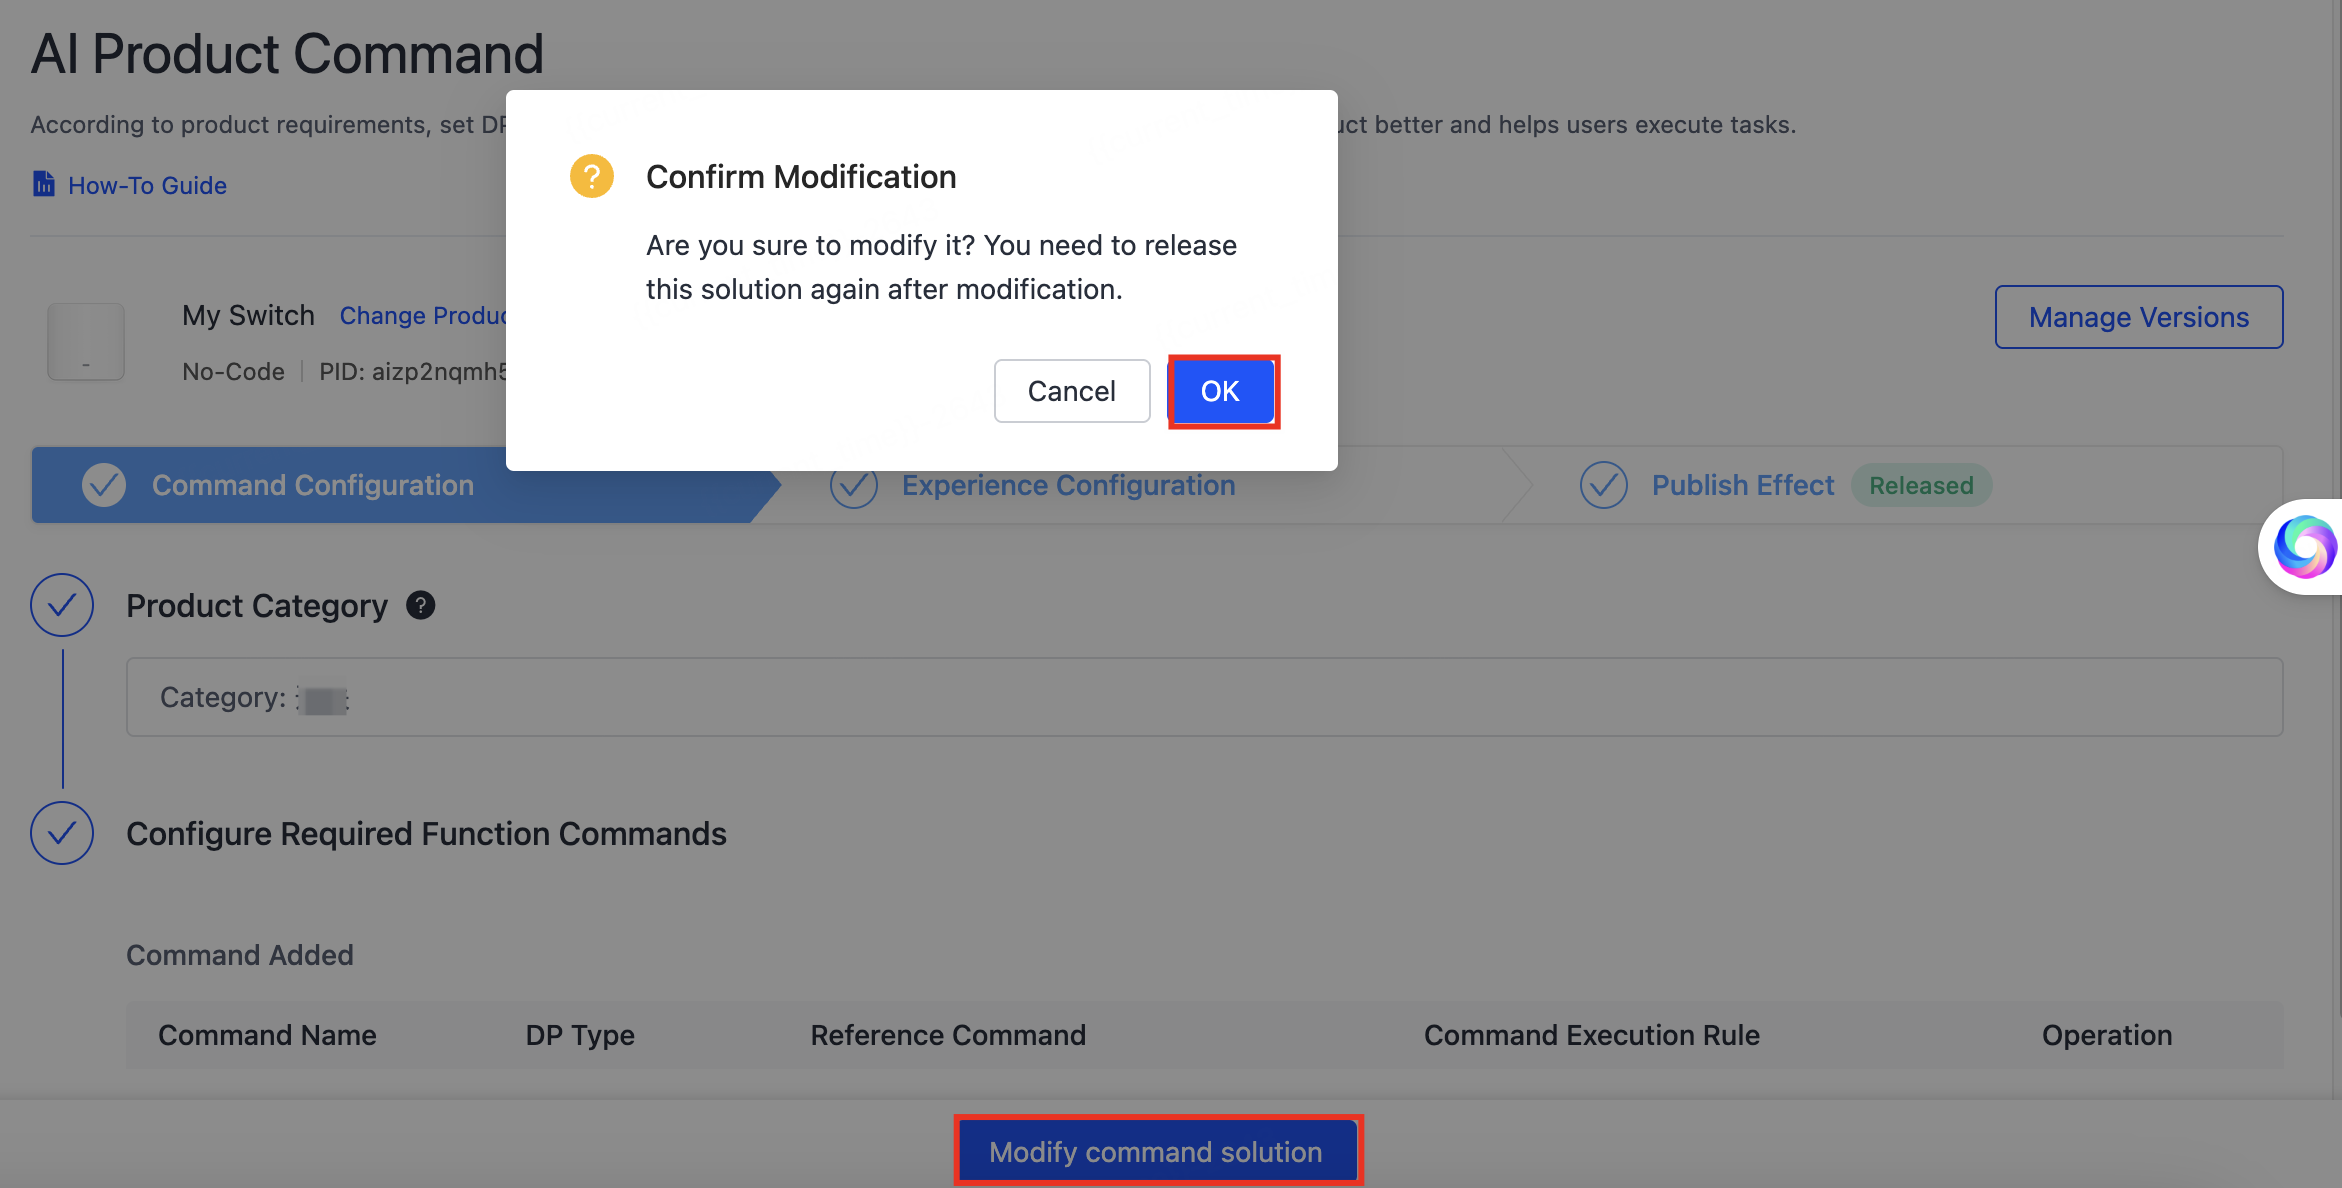
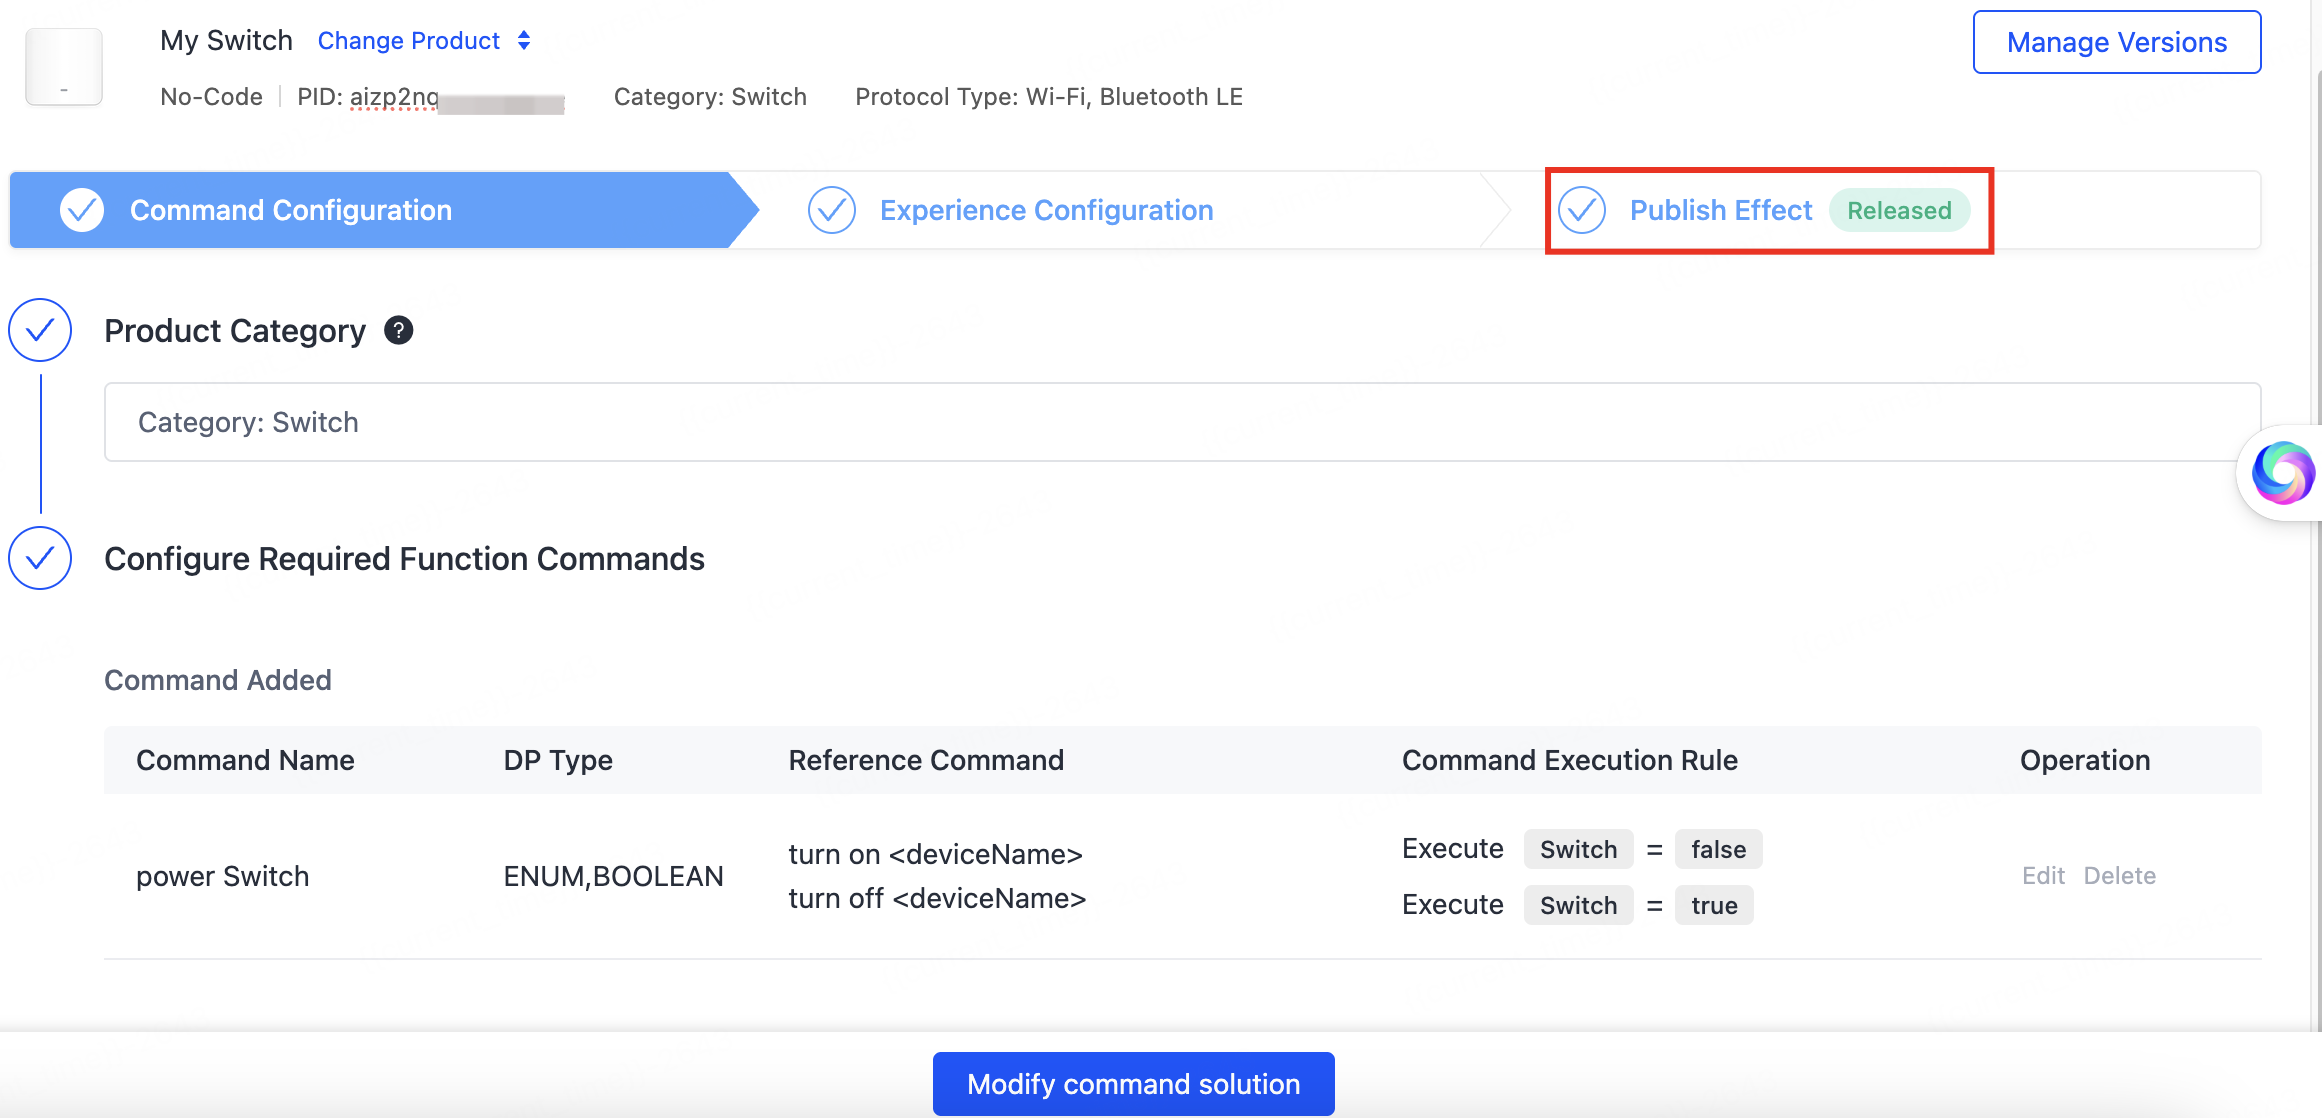
If the product has pre-configured commands, the page shows the functional commands already set for that product category. Click Modify command solution at the bottom of the page to confirm changes to the existing version, then click OK.
After you modify a command solution, you must release it again for the changes to take effect.
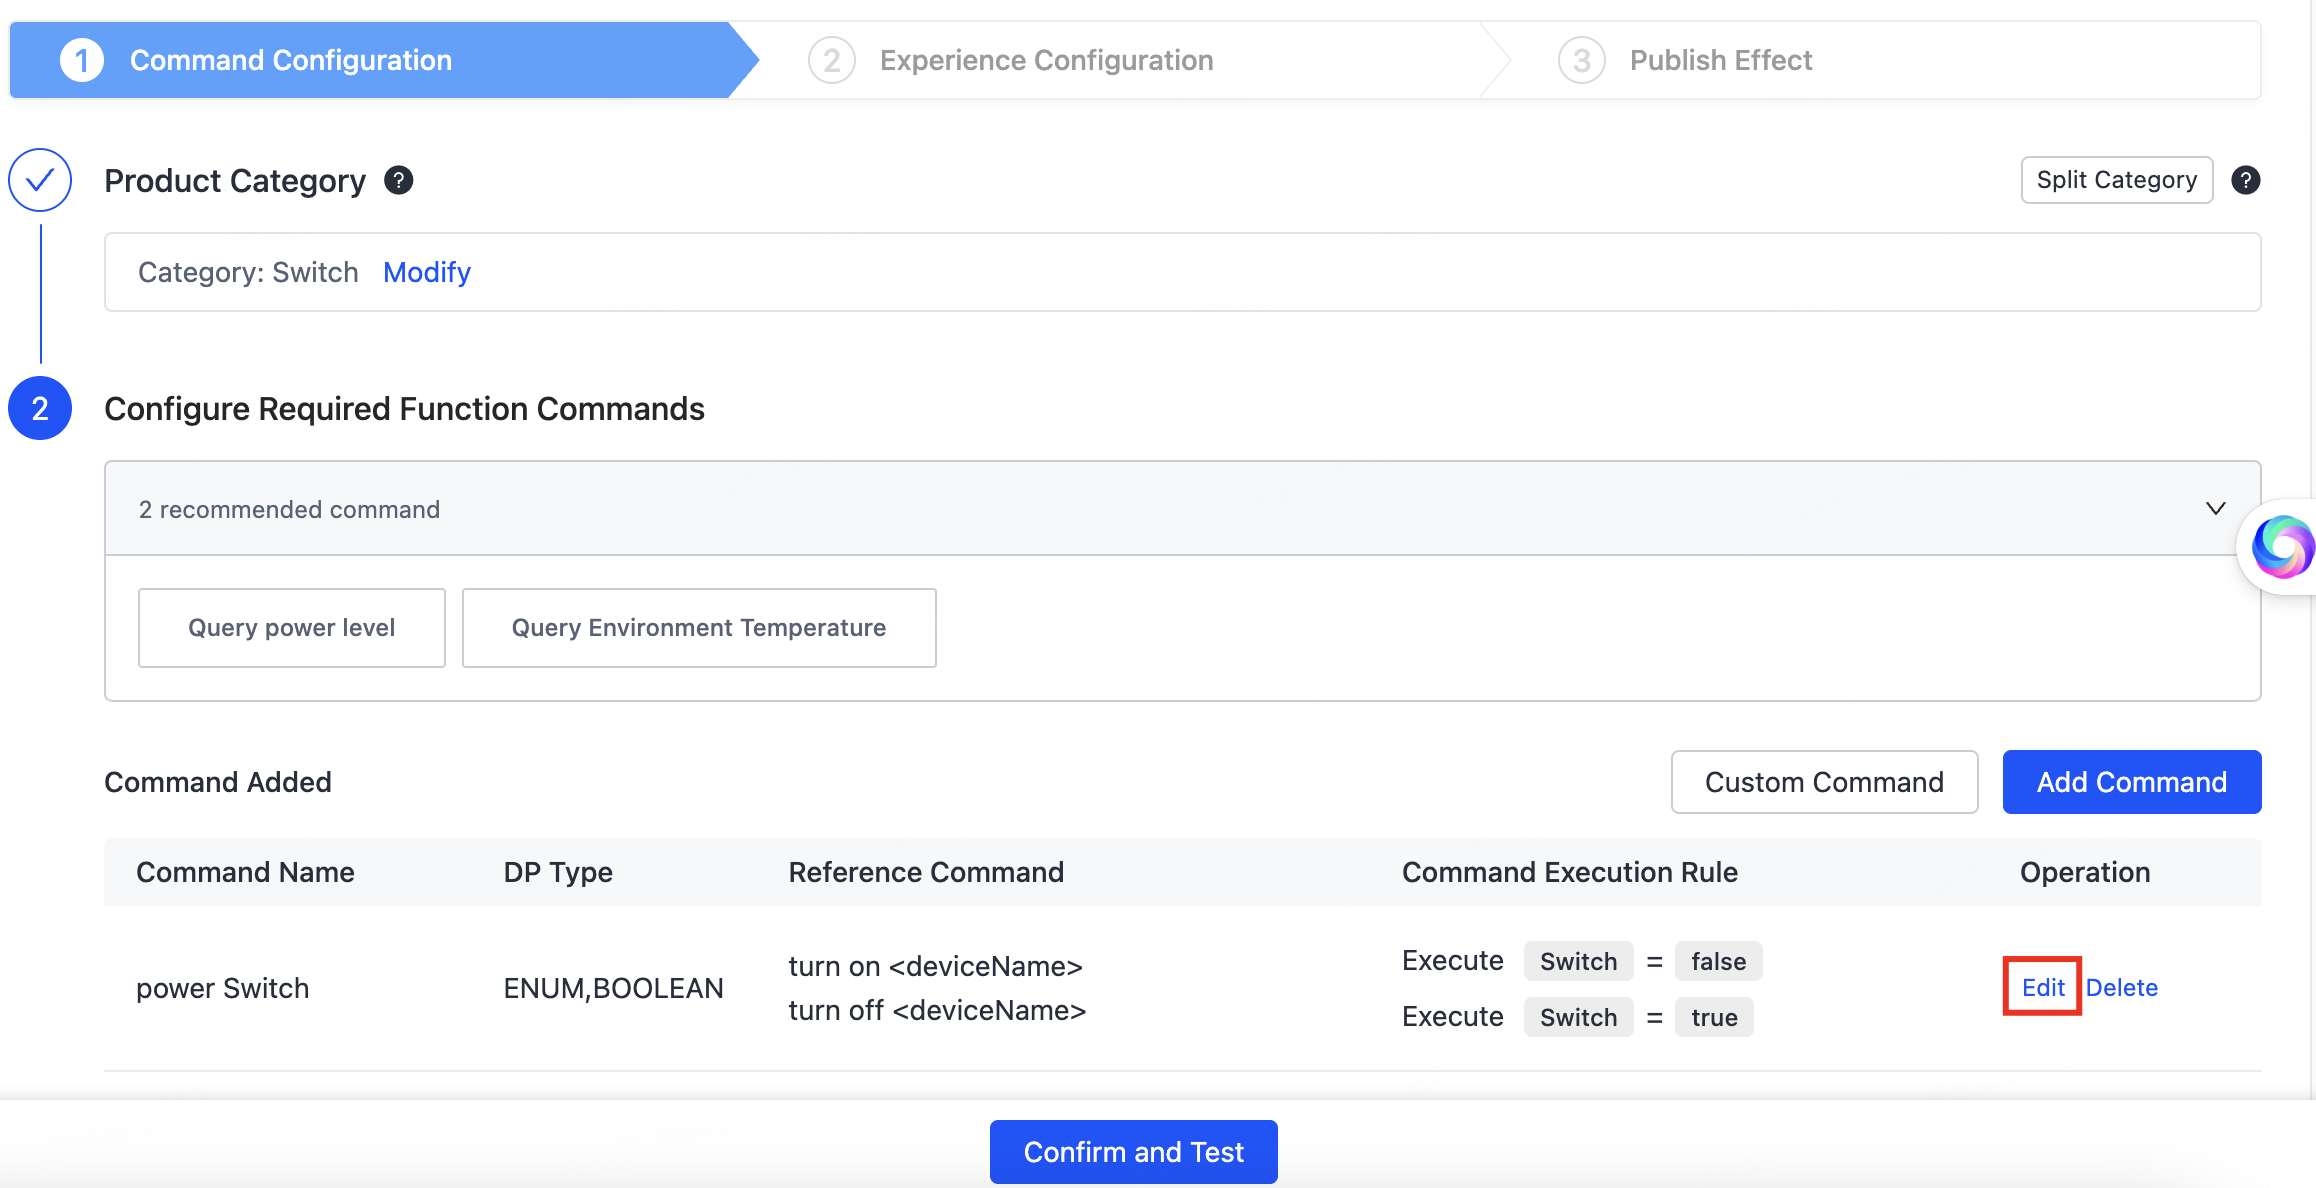
Step 1: Configure commands
Select a product category
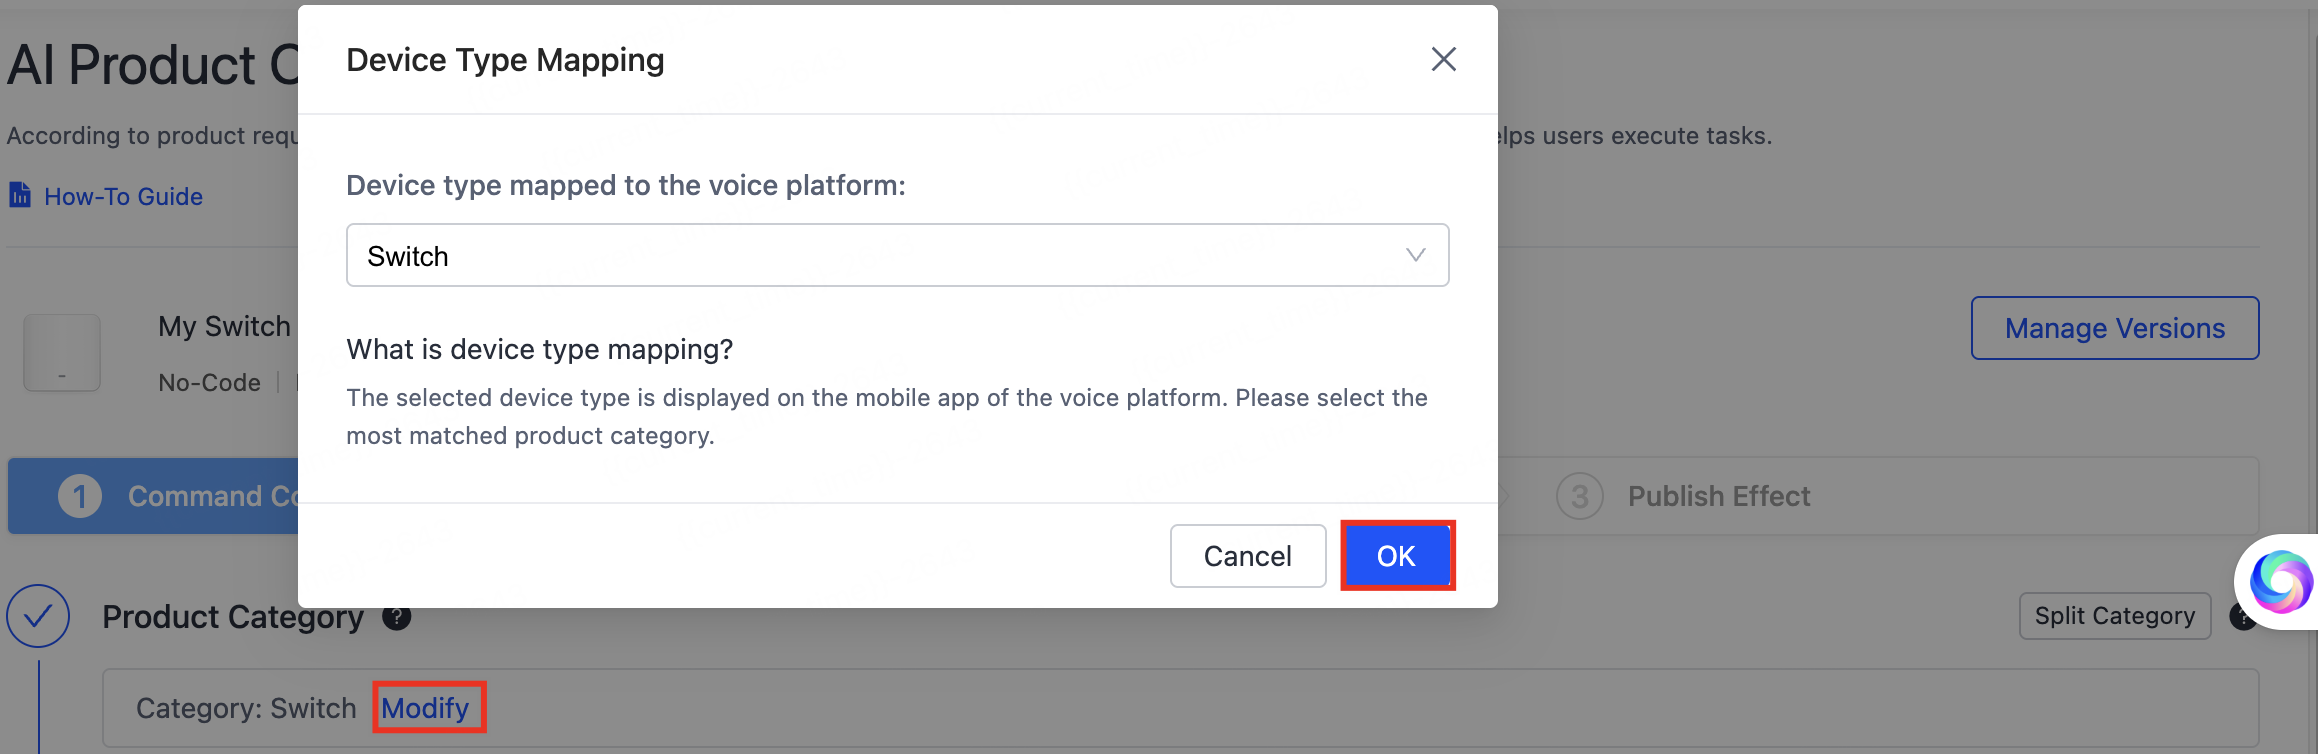
The product category determines the device type shown in voice platform apps. Select the category that most closely matches your device.
If the category is not set, click Set Category. To change an existing category, click Modify. Select the device type to map to the voice platform, then click OK.
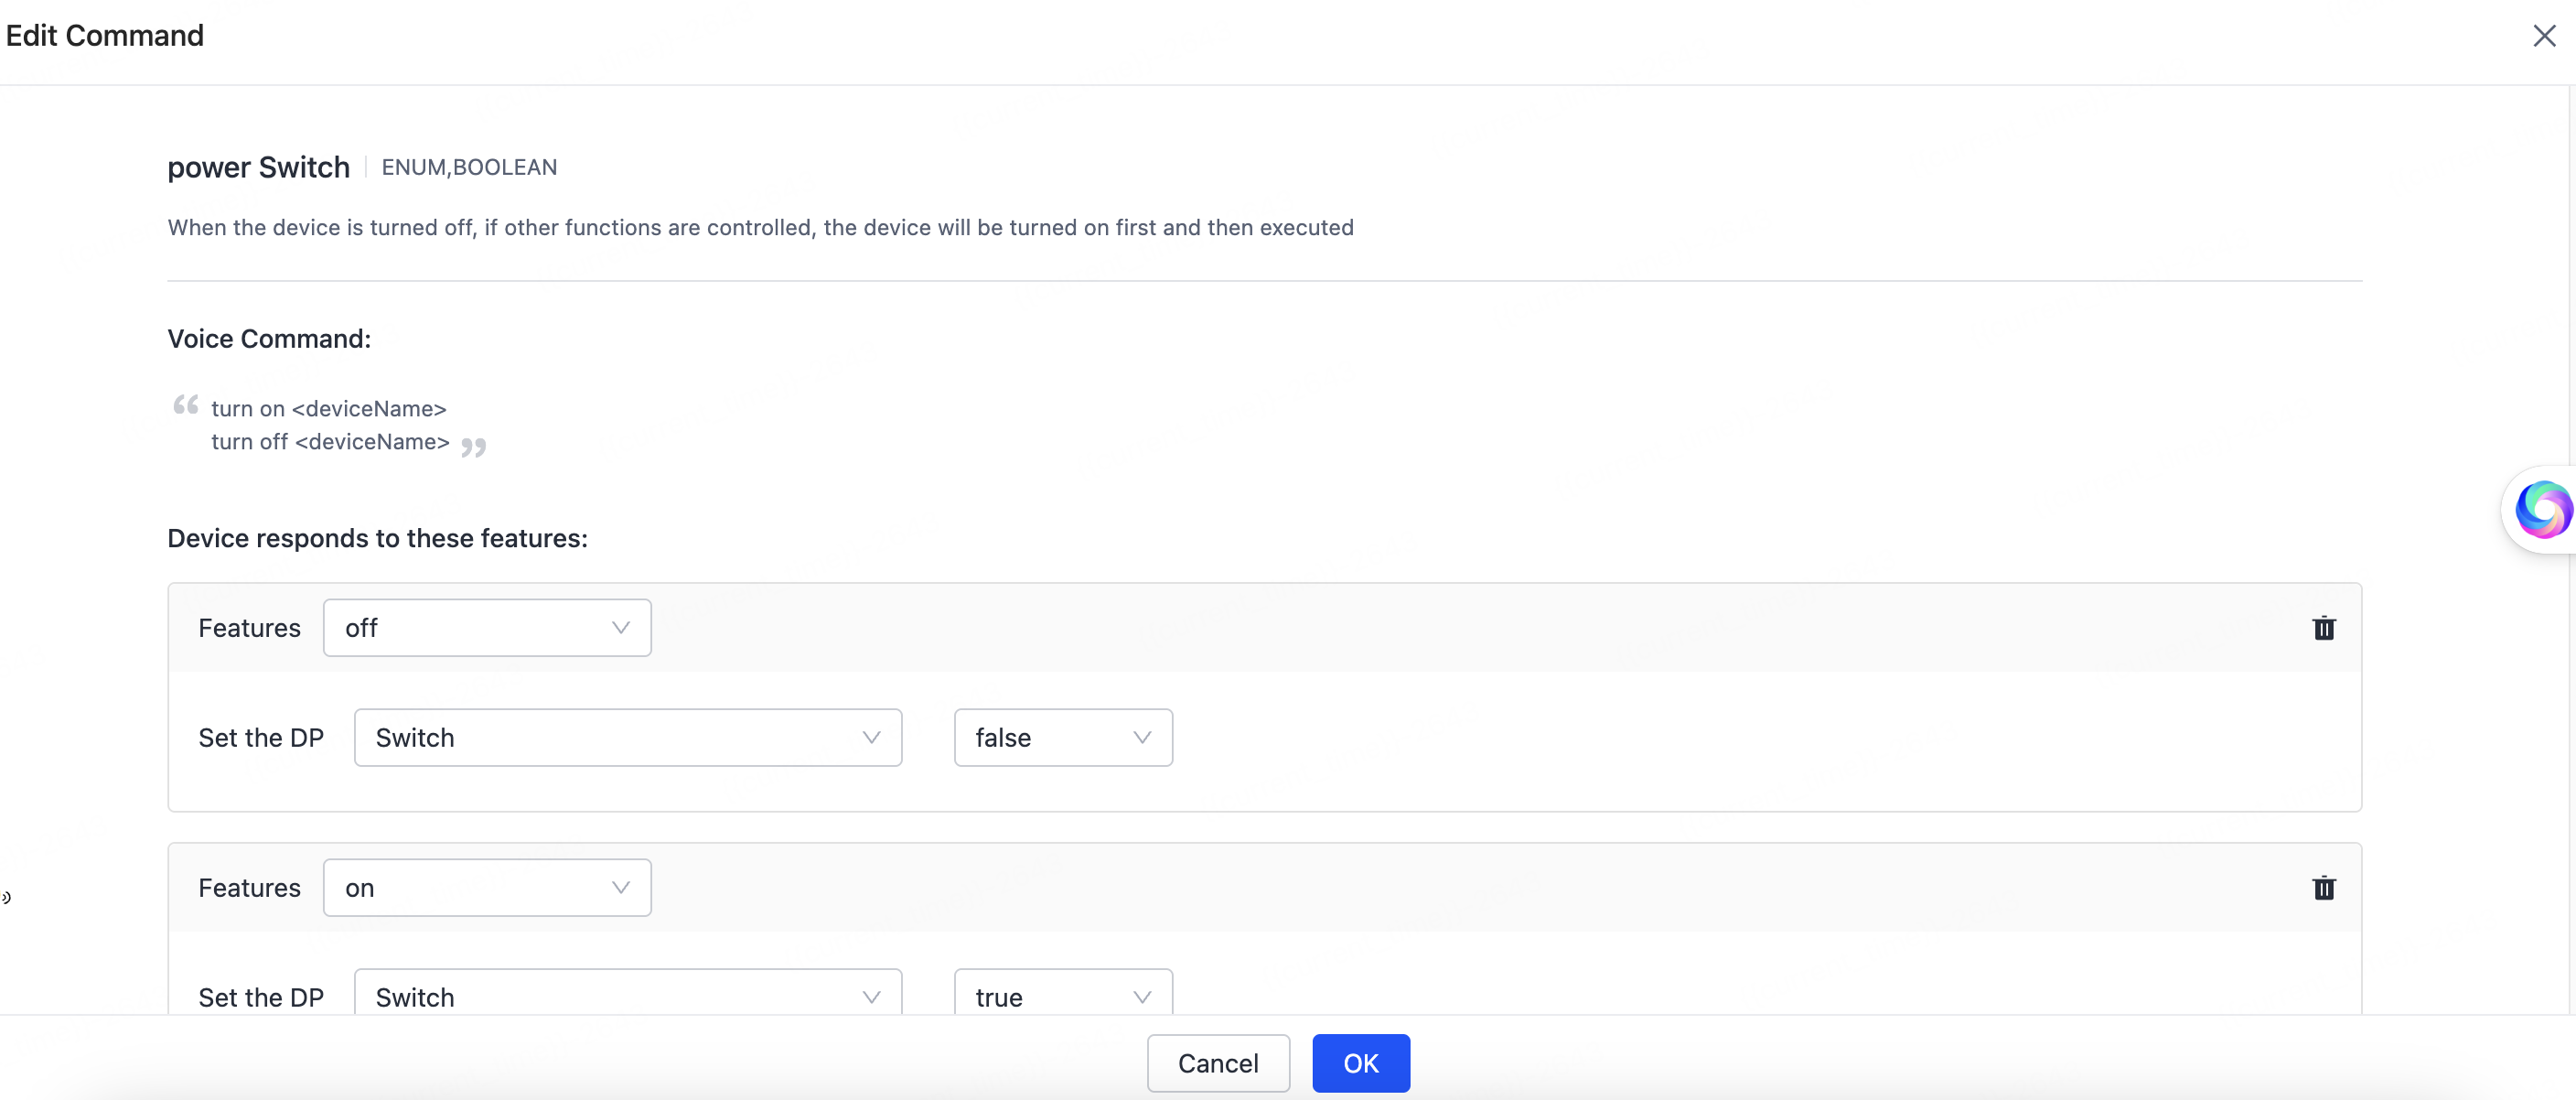
Edit existing commands
Click Edit in the Operation column, modify the commands on the Edit Command page, then click OK.
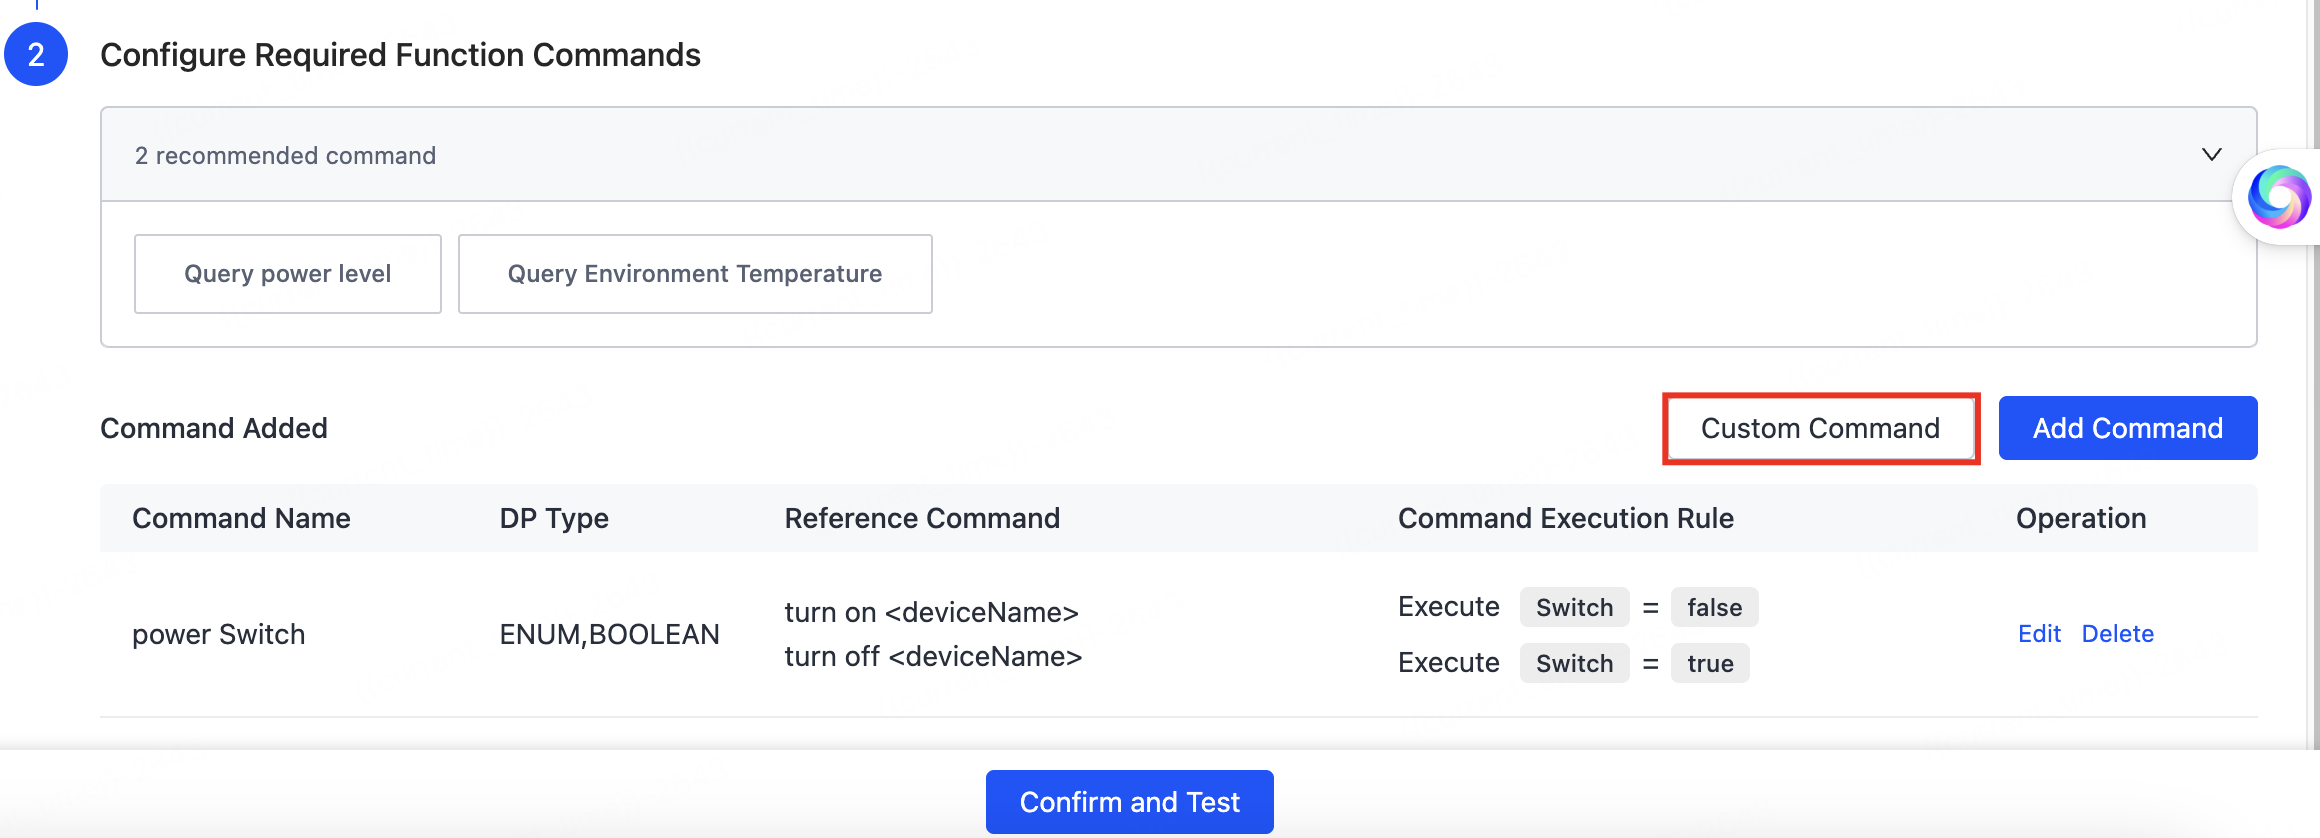
Add a custom command
Customize Toggle, Mode, and Range commands to fit your product. Click Custom Command, then configure the following on the Add Function Command page:
- Custom Command Language: Select the supported languages.
- Function Command Name: Enter the command name, for example fan switch.
- Capability Type: Select the capability type to implement, then complete its configuration. For example, when you select Toggle, configure the applied data point (DP) and friendly name, and enter a voice capability description.
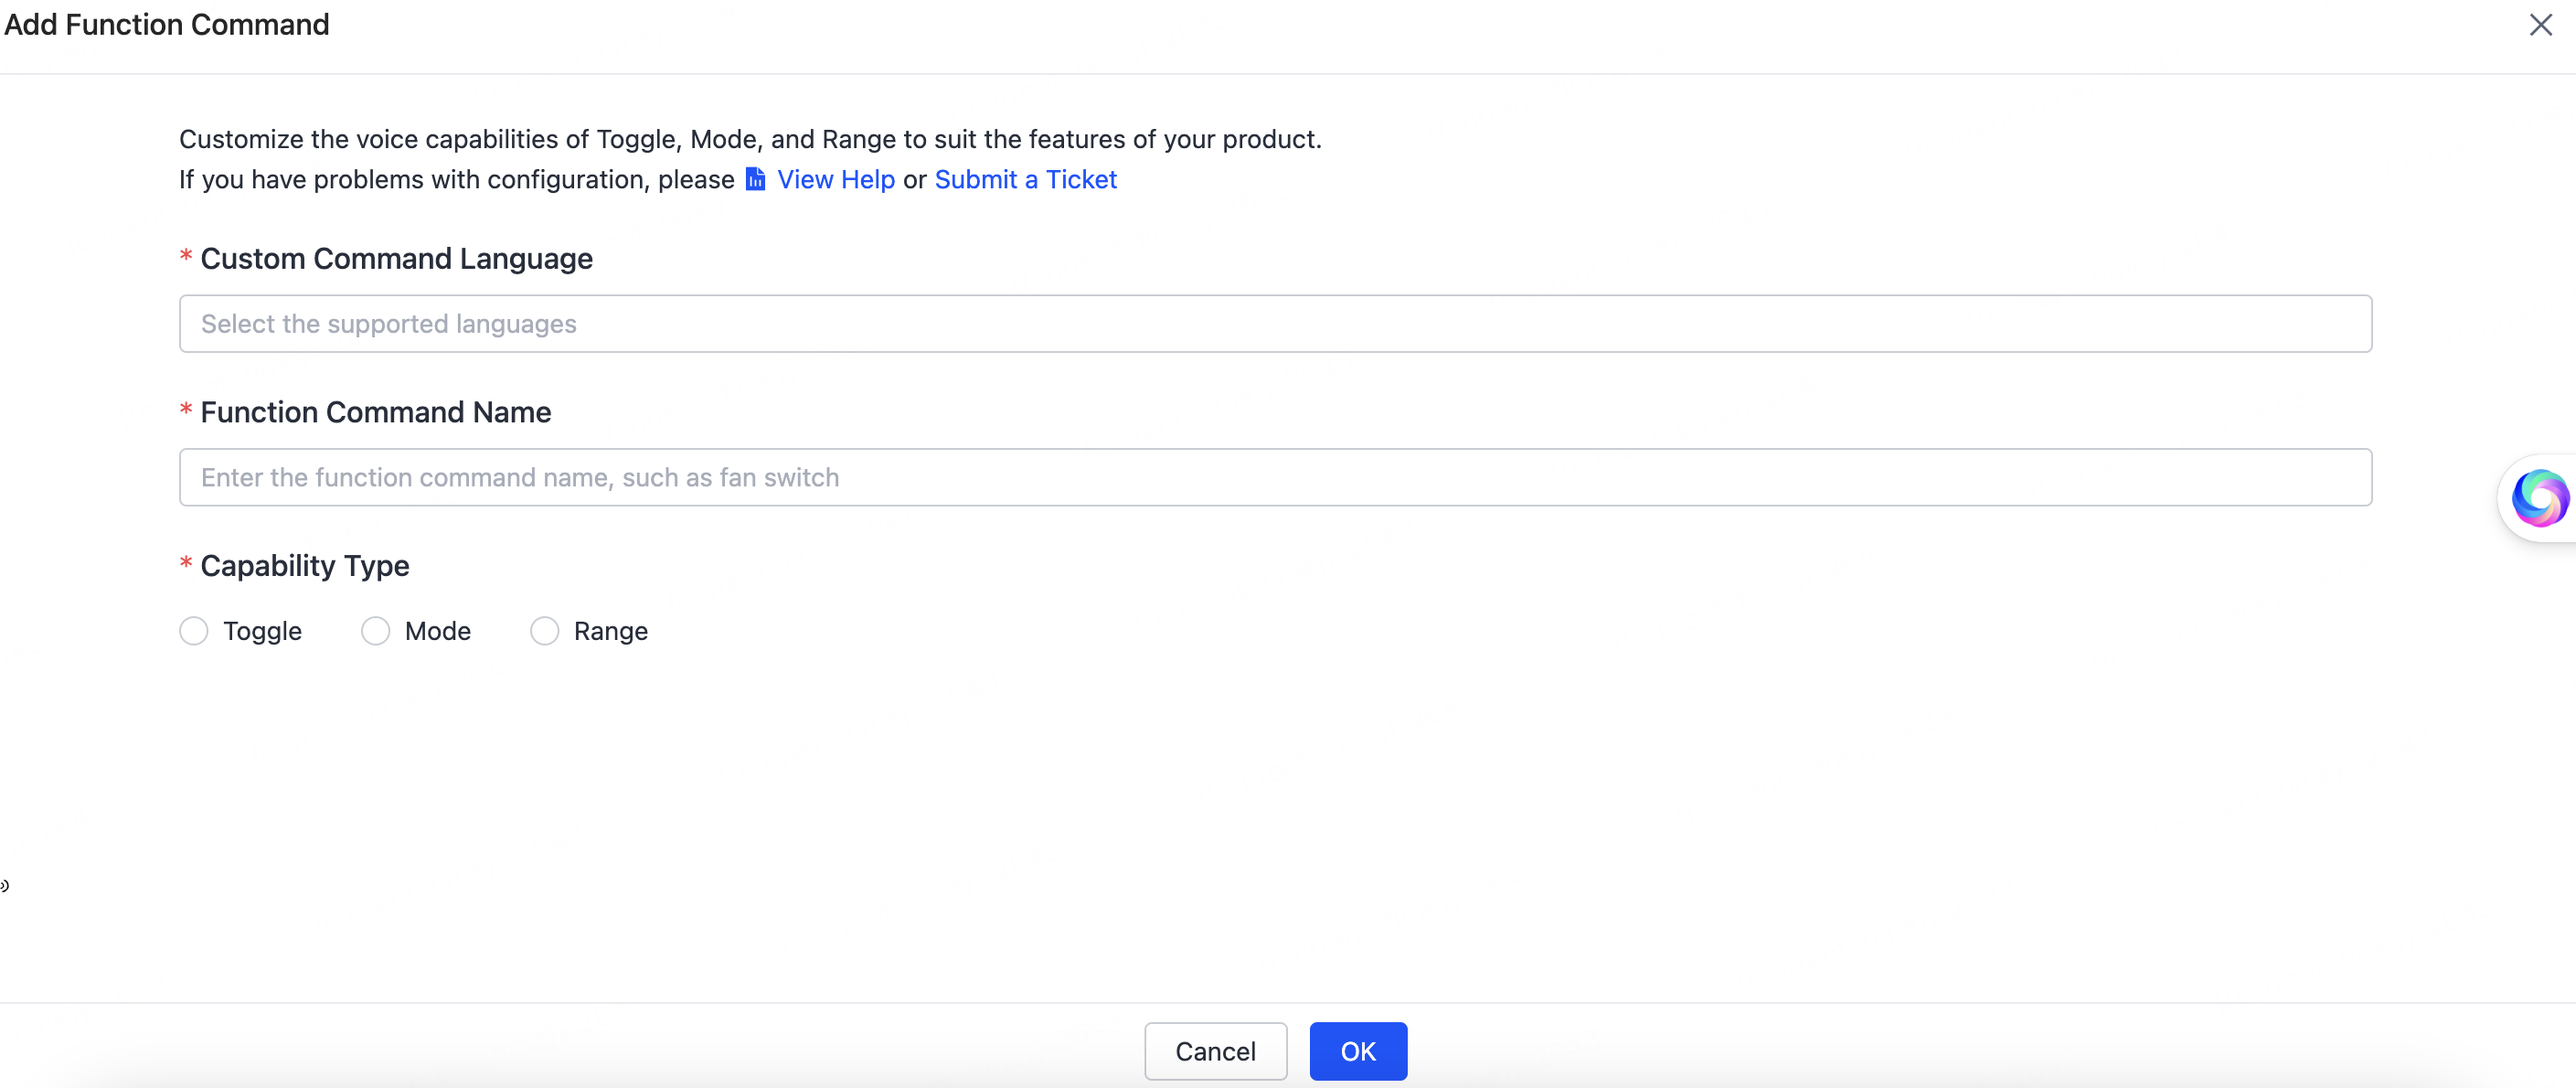
When configuration is complete, click OK.
For more about configuring custom voice capabilities, see Set Custom Capability or submit a service ticket.
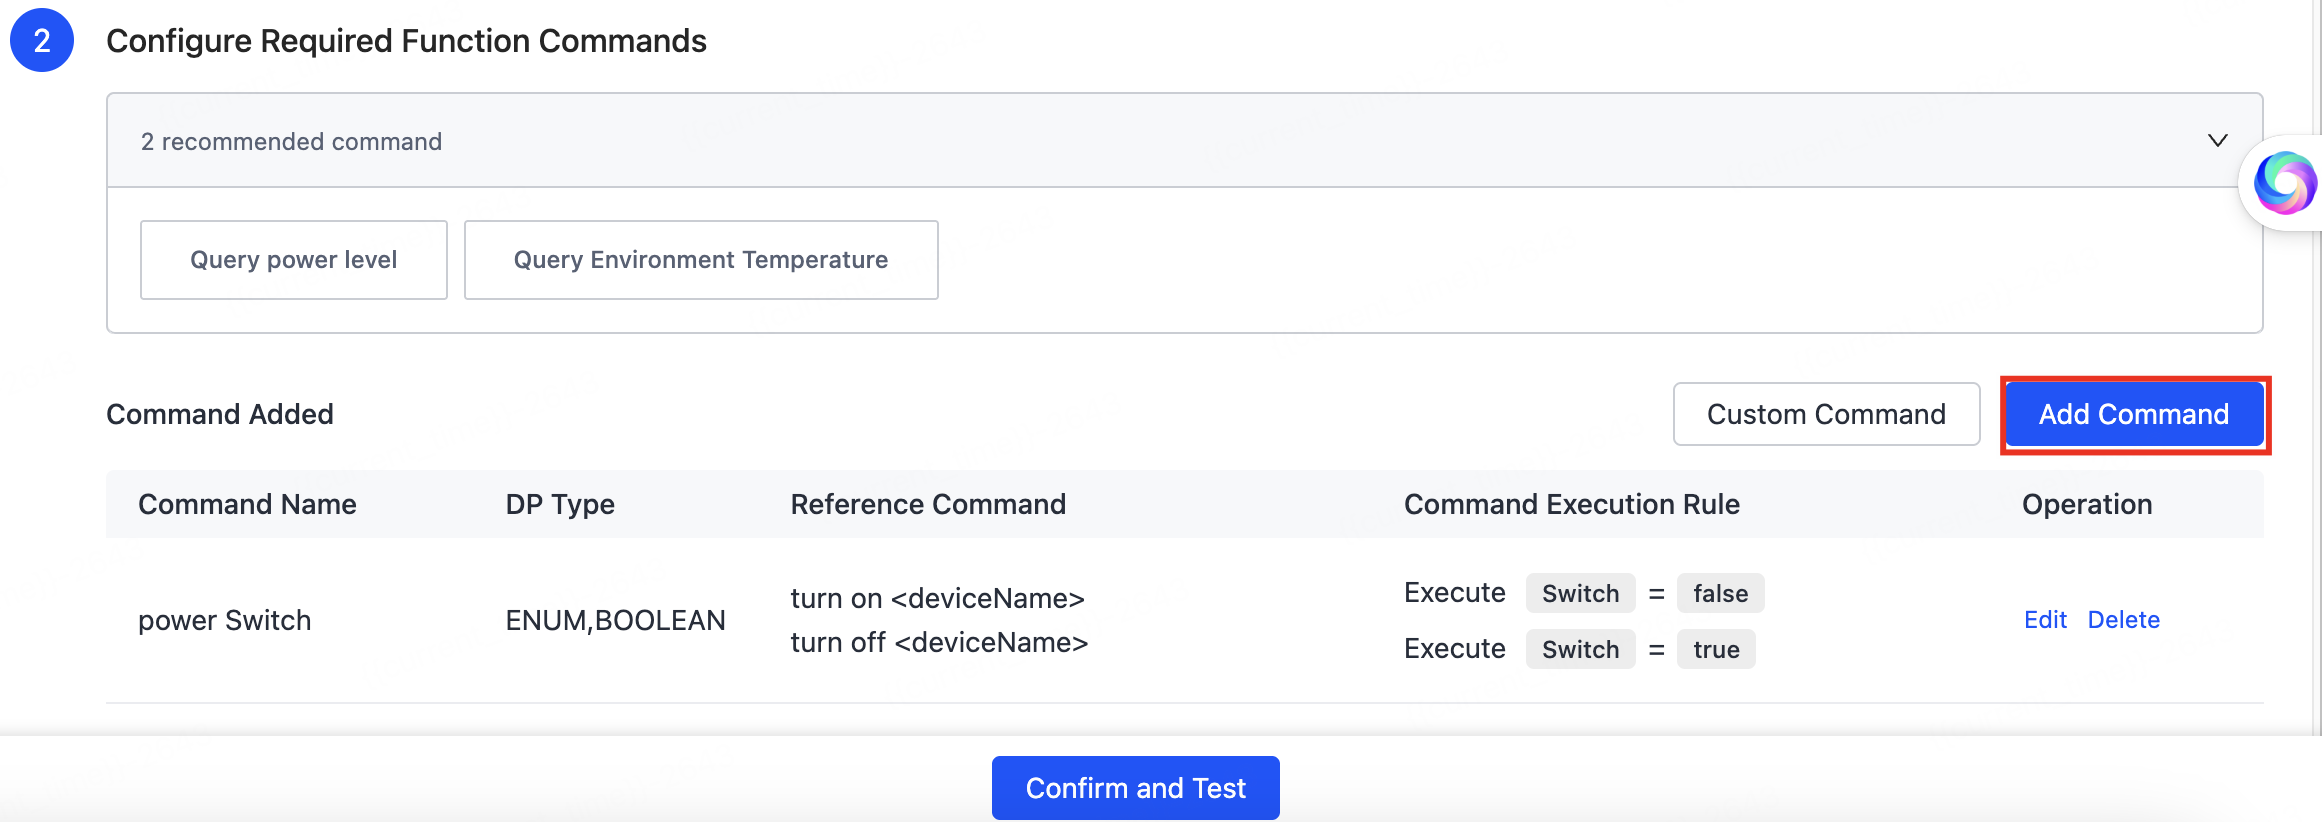
Add functional commands
To add commands, click Add Command and complete the following:
-
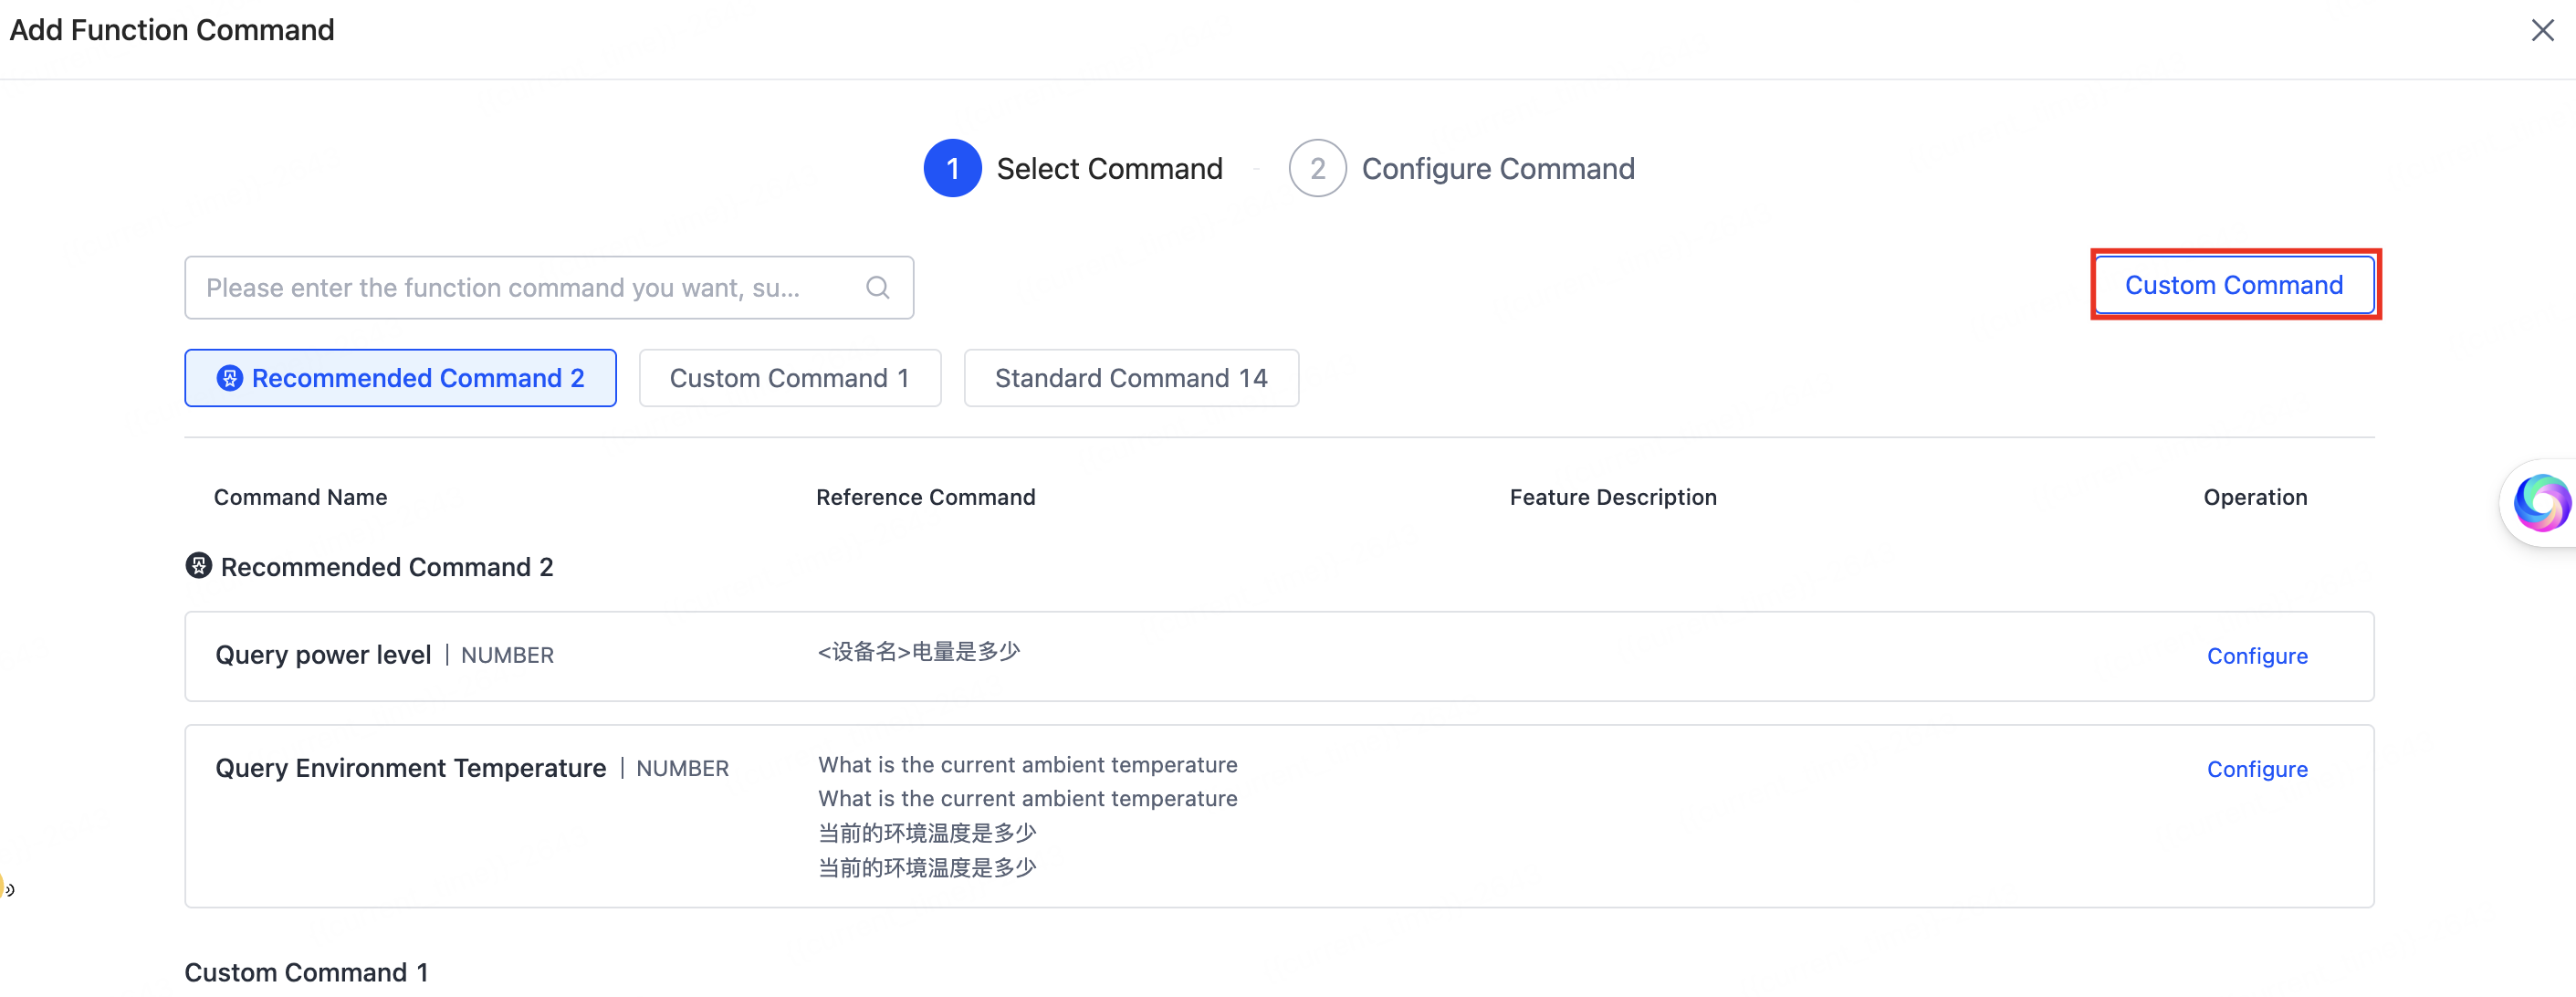
Select Command: From the list, select or search for the command to add, then click Configure in the Operation column of the target command.

AI Product Commands -
Configure Command: Edit the relationship between capability parameters and DP parameters for recommended commands, custom commands, or general commands, then click OK.
Taking the power switch as an example, select the DPs, configure the feature property, and query the power status.
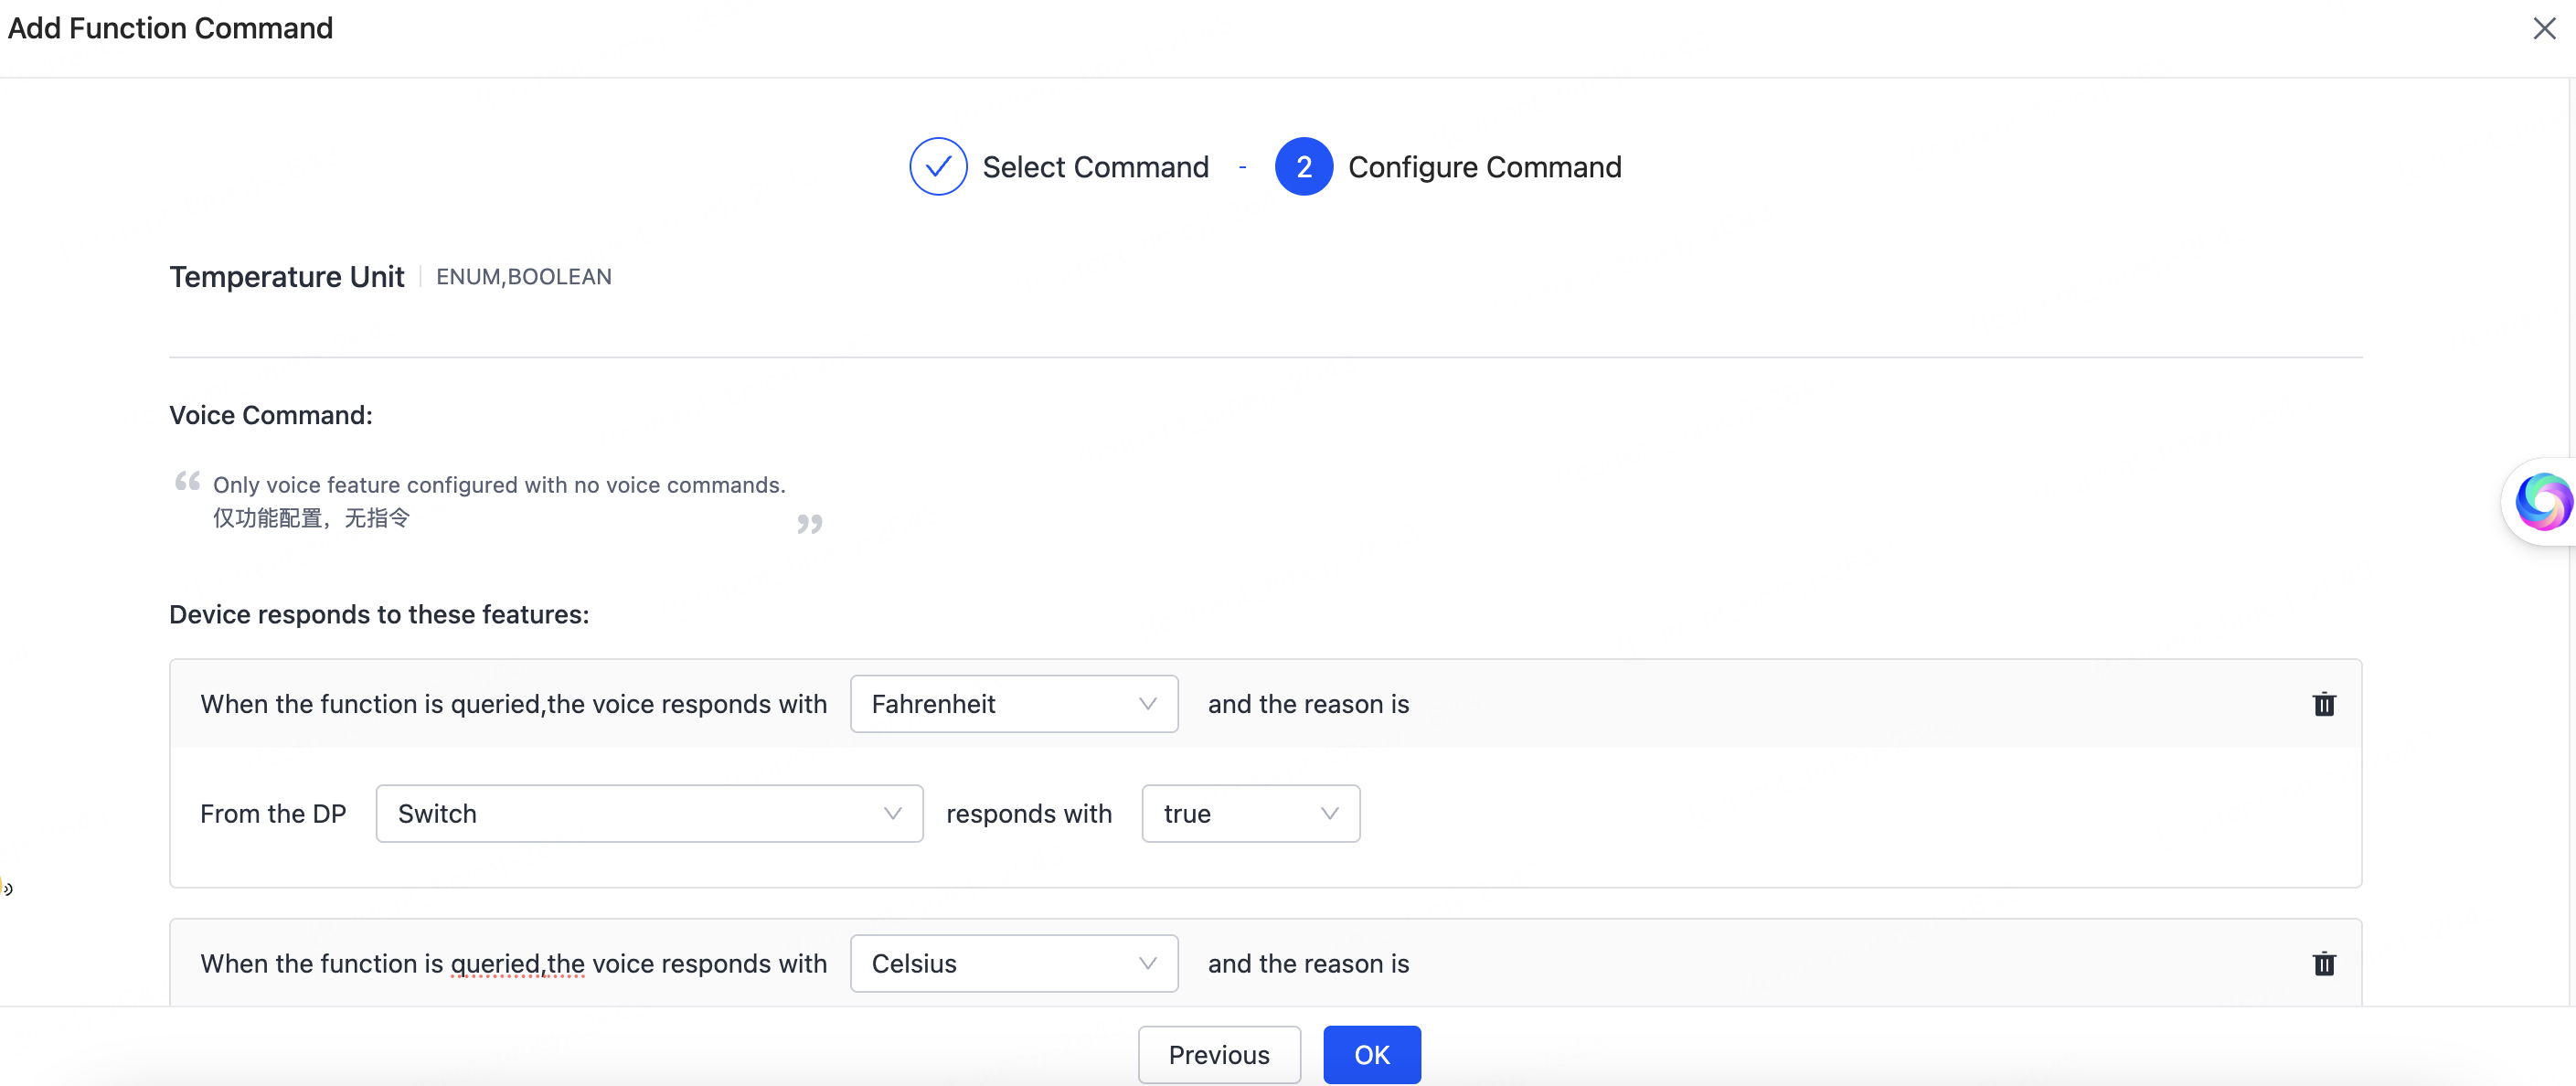
AI Product Commands -
(Optional) If you do not find the capability you need, click Custom Command. For more information, see Set Custom Capability.
AI Product Commands
After you configure the command solution, click Confirm and Test.
Step 2: Configure the experience
To try out the command, follow these steps:
-
Configure allowlist accounts. In the Allowlist Account section, click Configure Now. On the Allowlist Configuration page, select the mobile app and add allowlist accounts. You can add up to three.

AI Product Commands 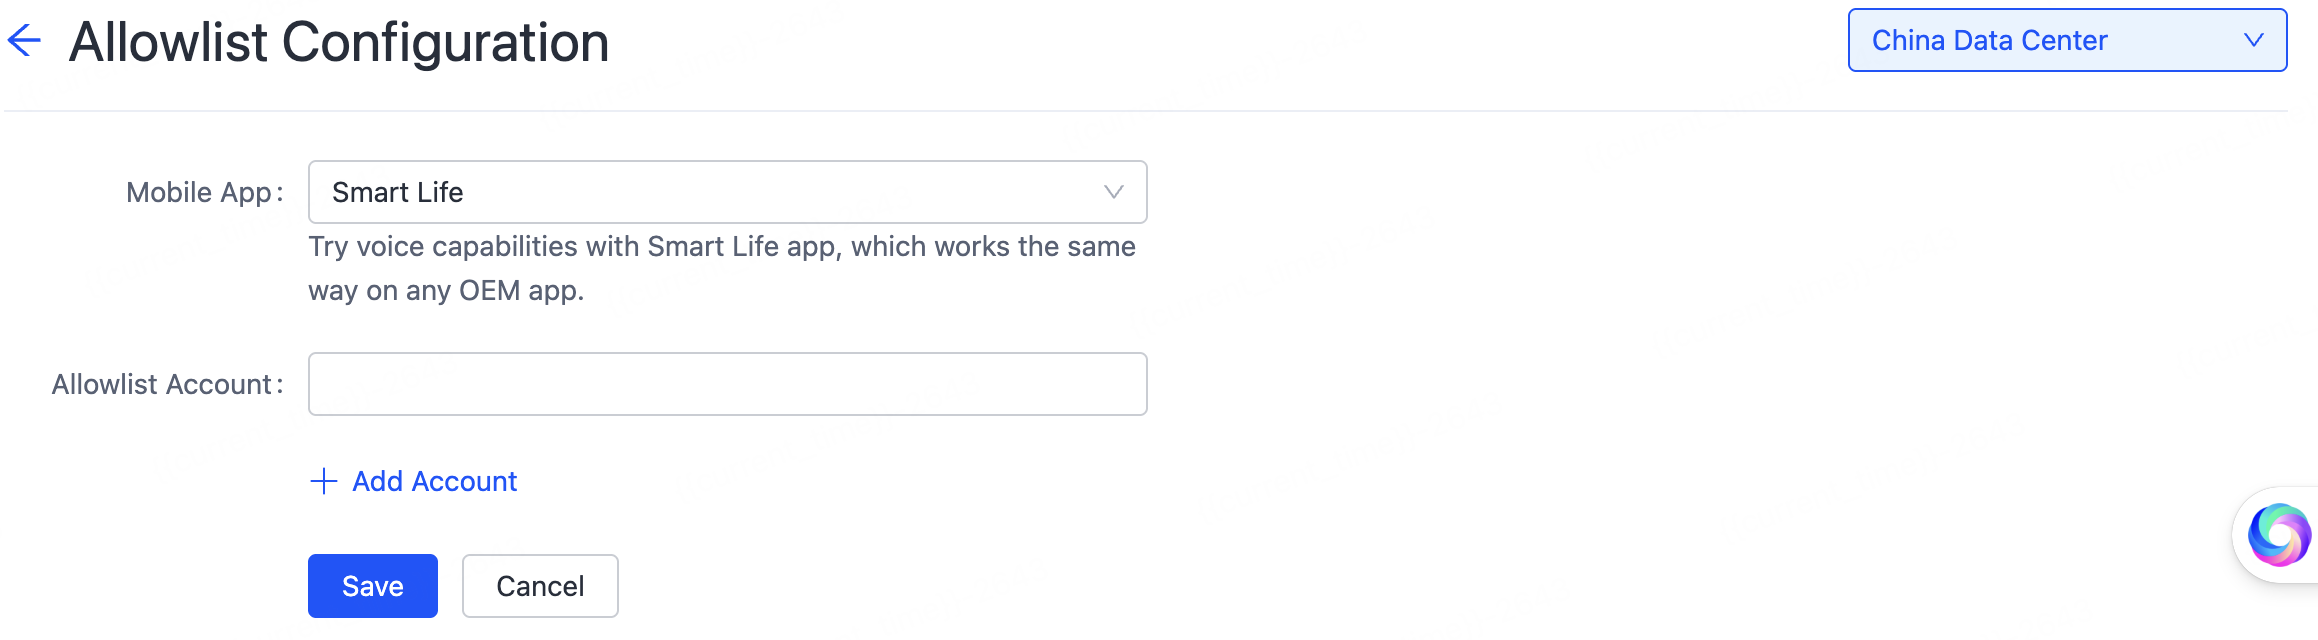
AI Product Commands -
Add a virtual device. Use the OEM app or the SmartLife app to scan the QR code, then add the virtual device.
-
Scan and test. Scan the QR code to enter the AI Smart Assistant and test the commands.
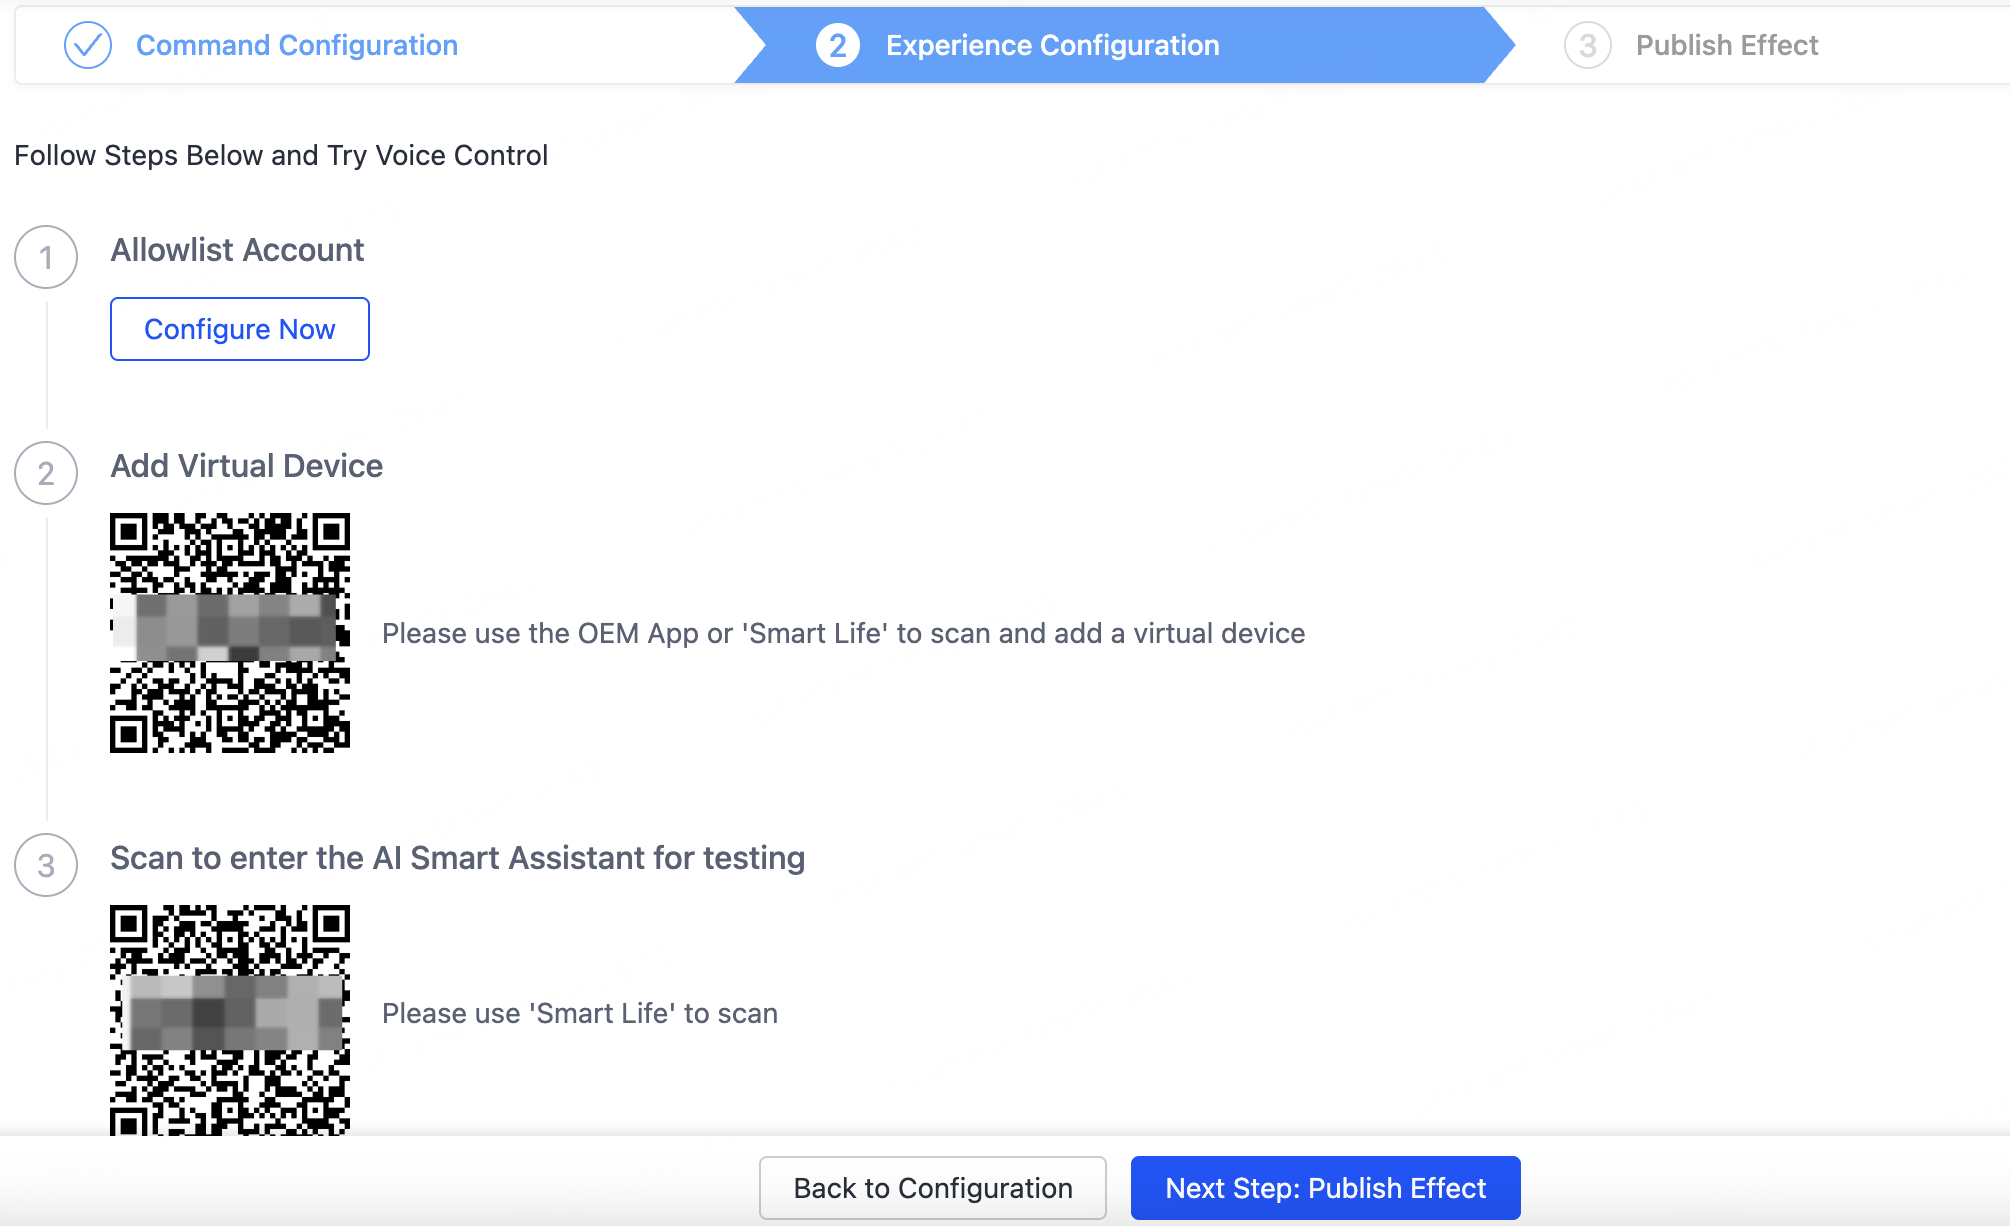
AI Product Commands
Step 3: Publish the commands
Click Next Step: Publish Effect to publish the commands. Confirm the settings and click OK.
Published commands cannot be revoked. Confirm the settings before you publish.
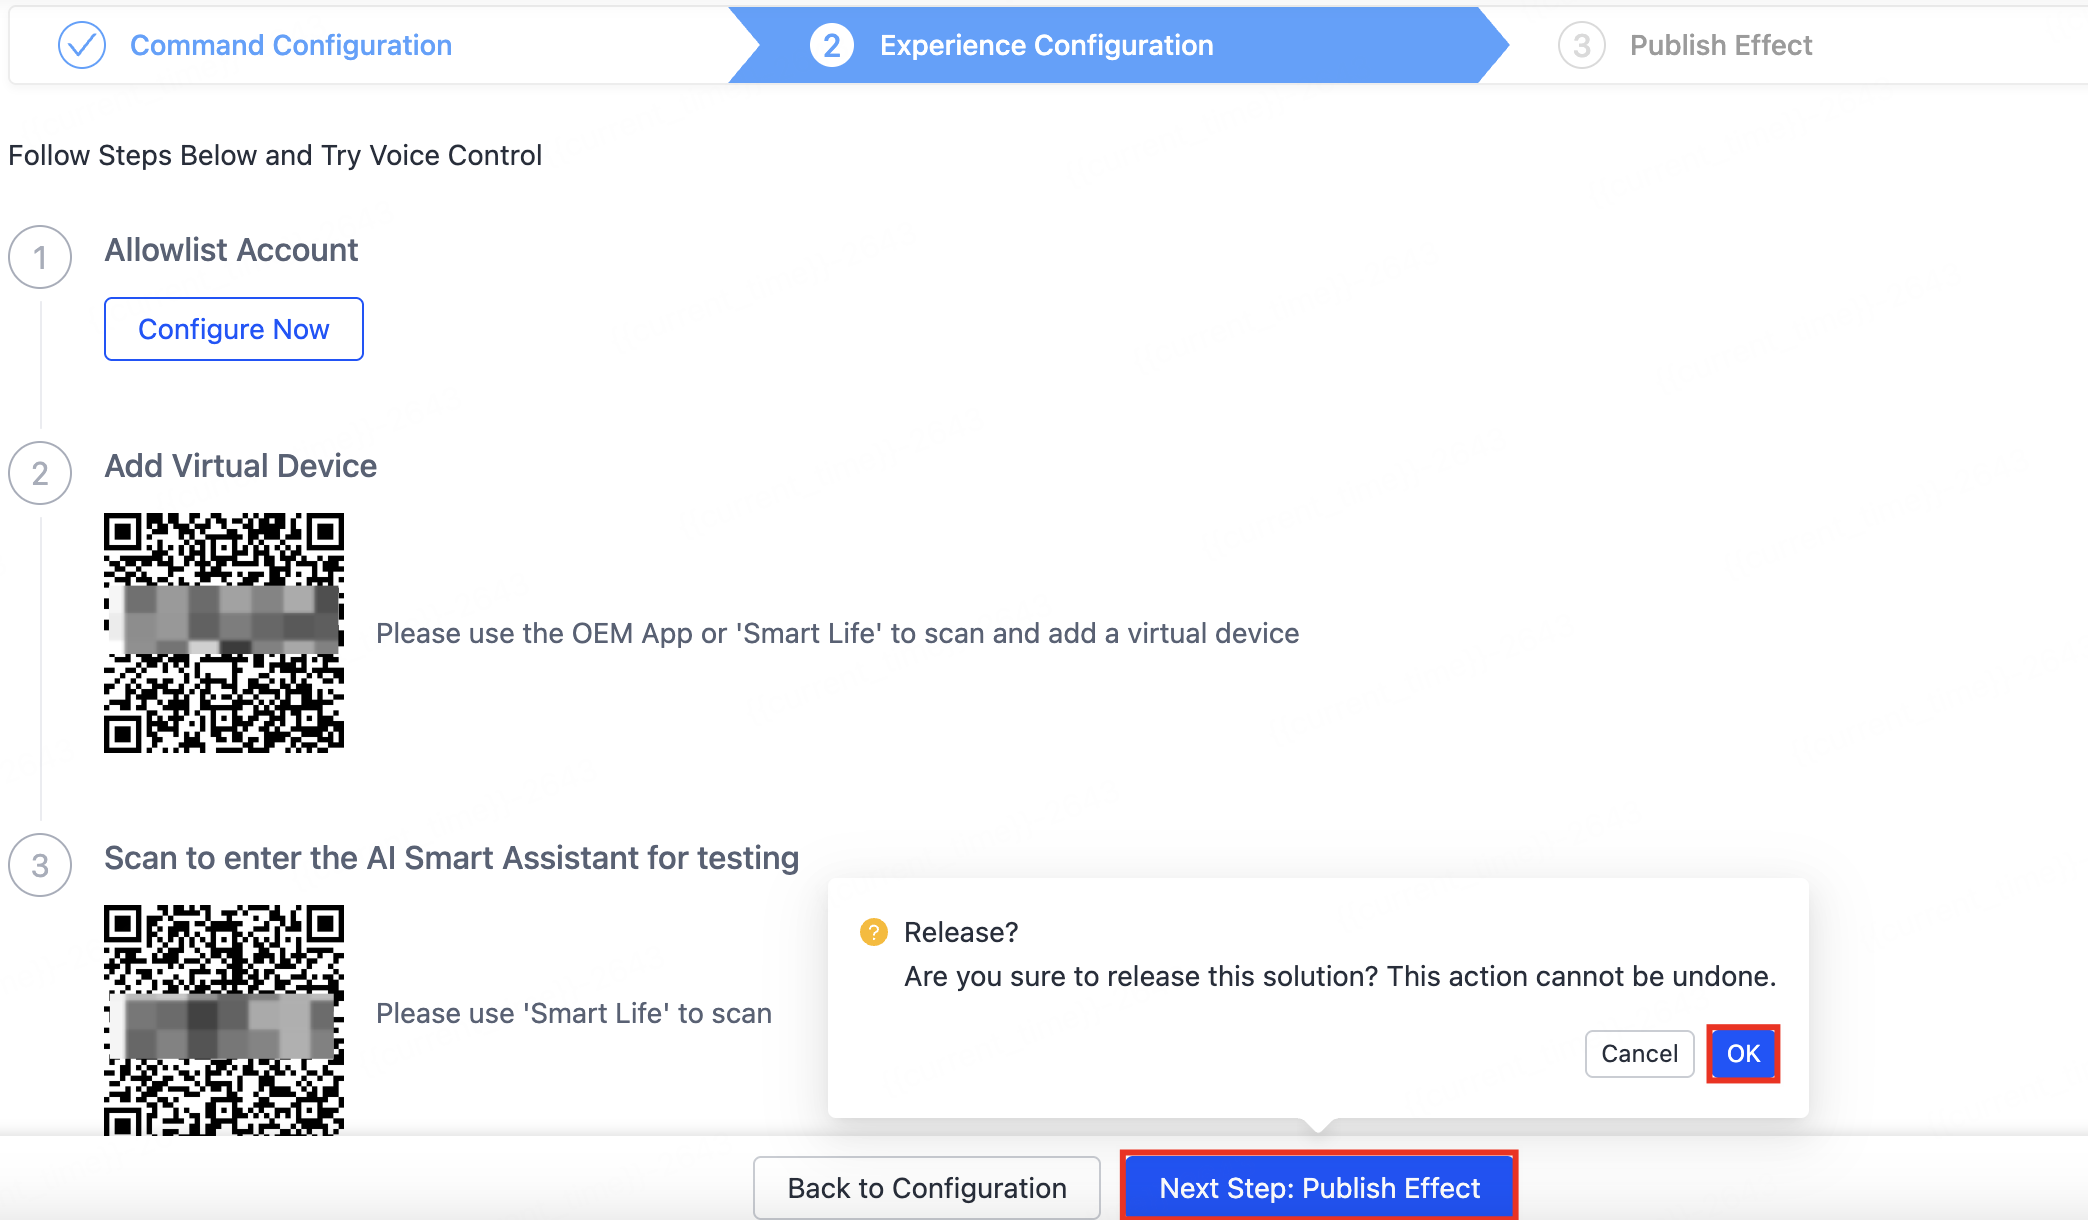
The page then shows Released.
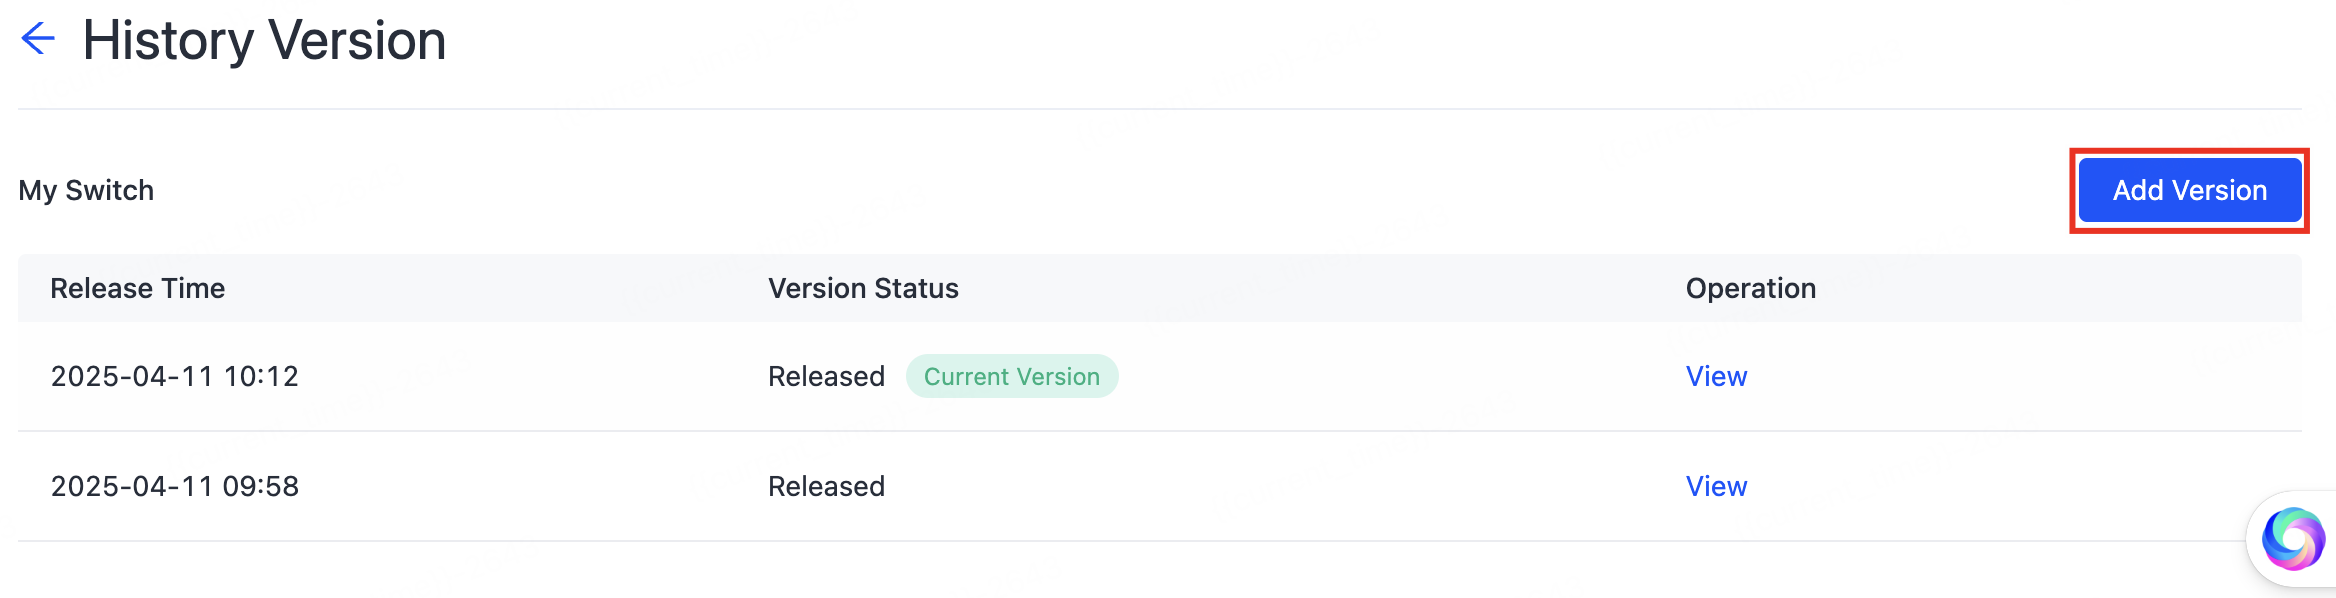
Manage versions
Click Manage Versions to view and edit released versions on the History Version page.
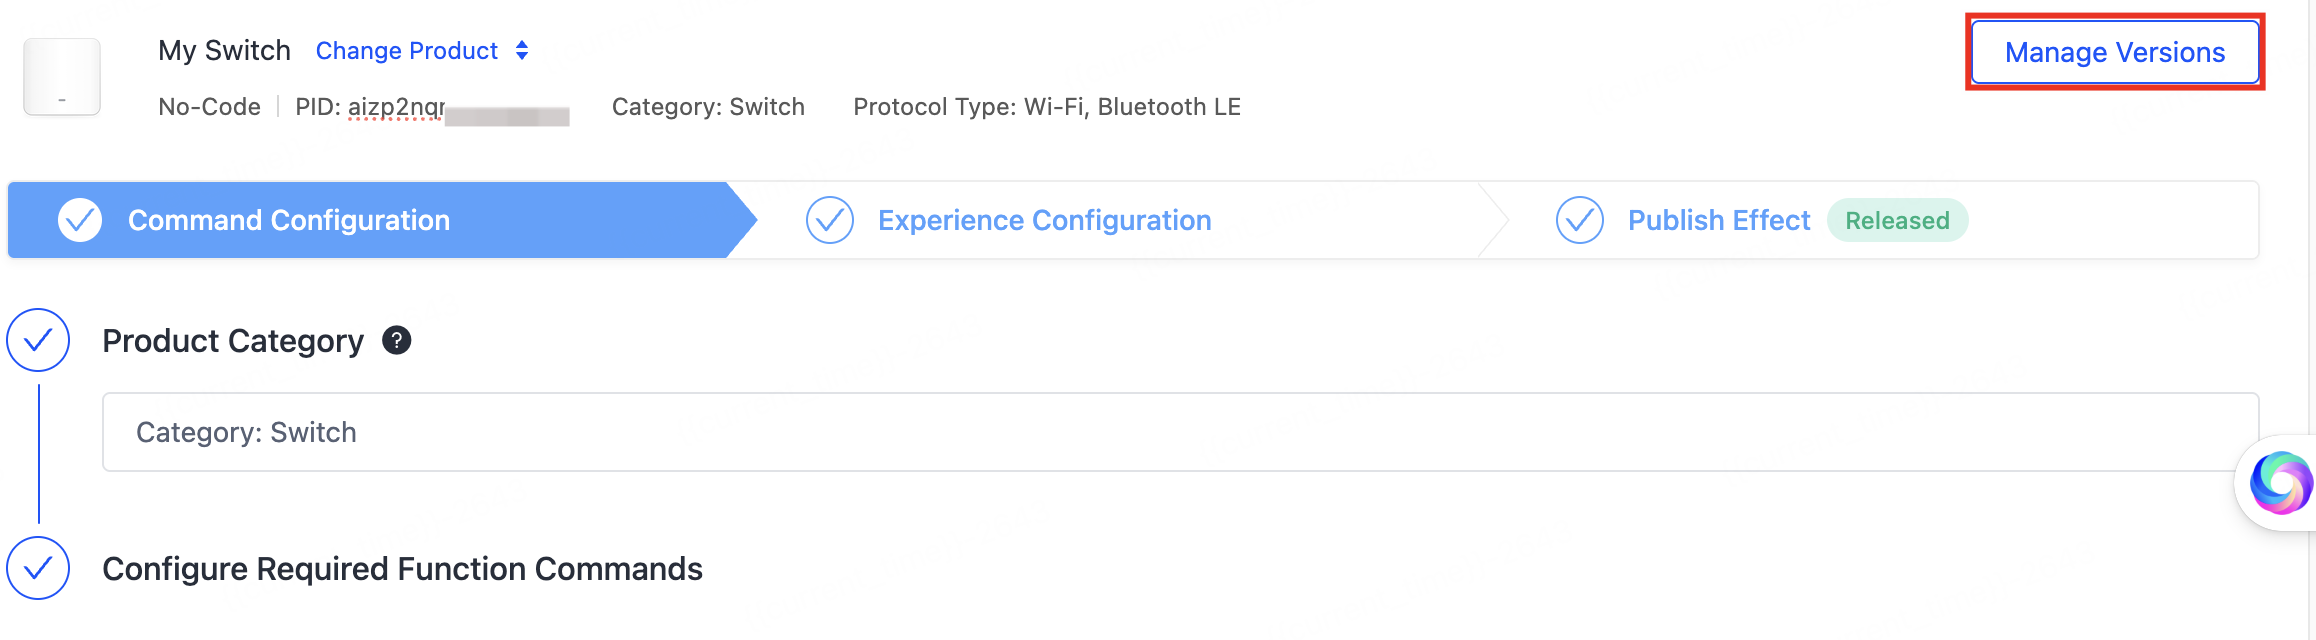
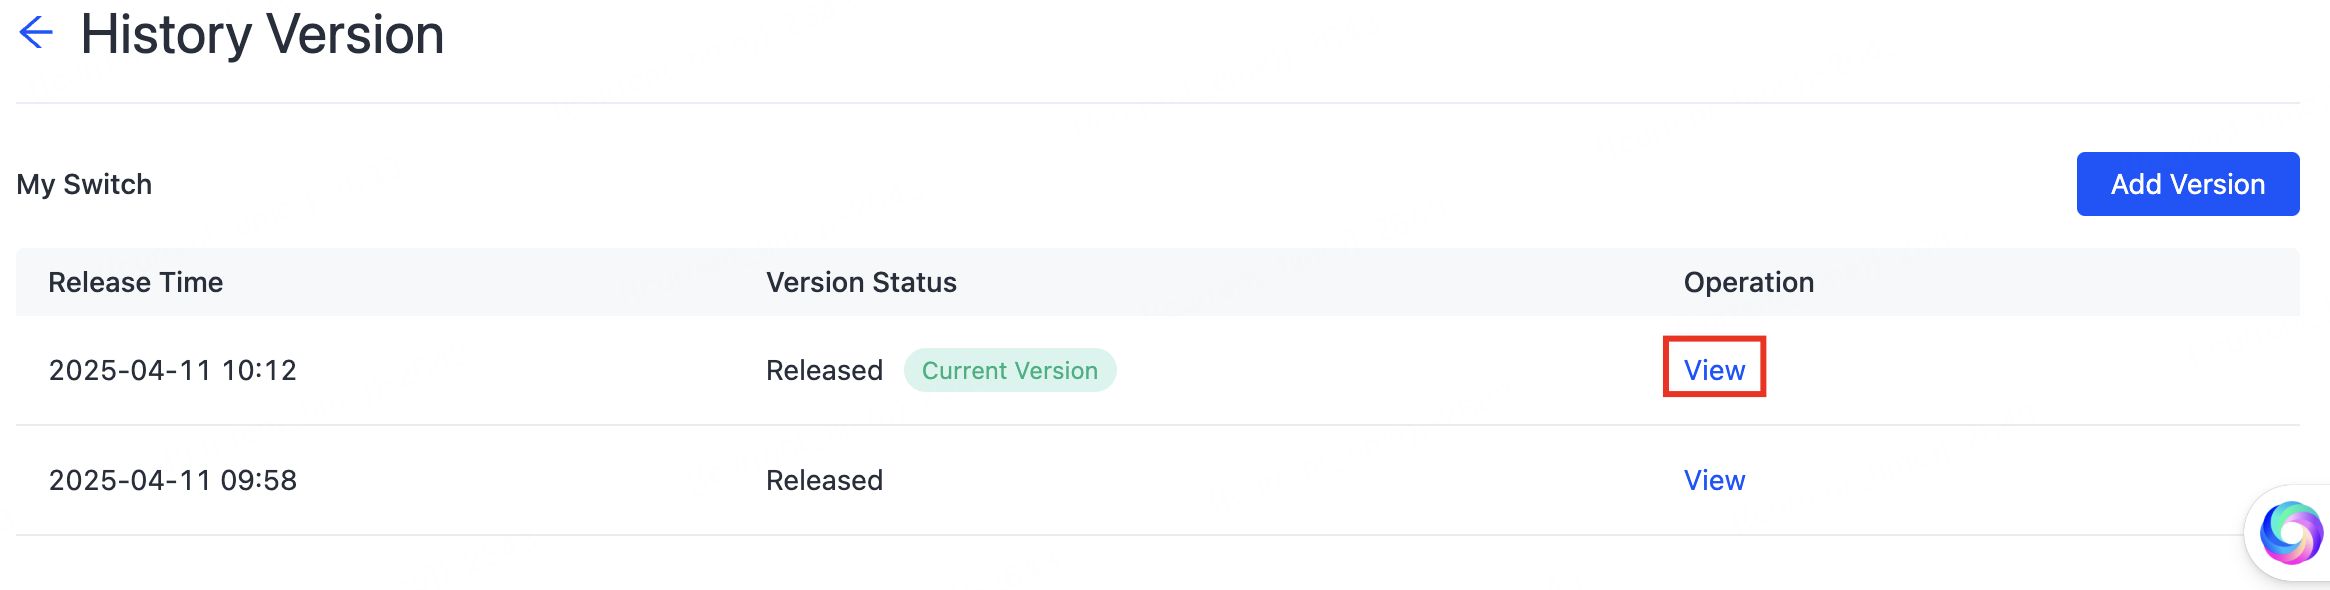
To try a configuration and release a new version, click Add Version.