Create Your Product & Agent
Creating a product is the cloud-side half of device–cloud binding: you define your device model on the Tuya platform — its functions, its AI agent, and a firmware entry — and get the PID that the device will activate against. This guide walks the full path from an empty product to a flashed, bound board.
This flow uses Tuya Cloud, so it needs a license key (授权码). New to the moving parts? Read How device–cloud binding works first.
Prerequisites
- A development environment with the TuyaOpen SDK — see the TuyaOpen documentation center.
- A Tuya Developer Platform account.
- A license (
UUID+AuthKey) for the board — see Equipment authorization.
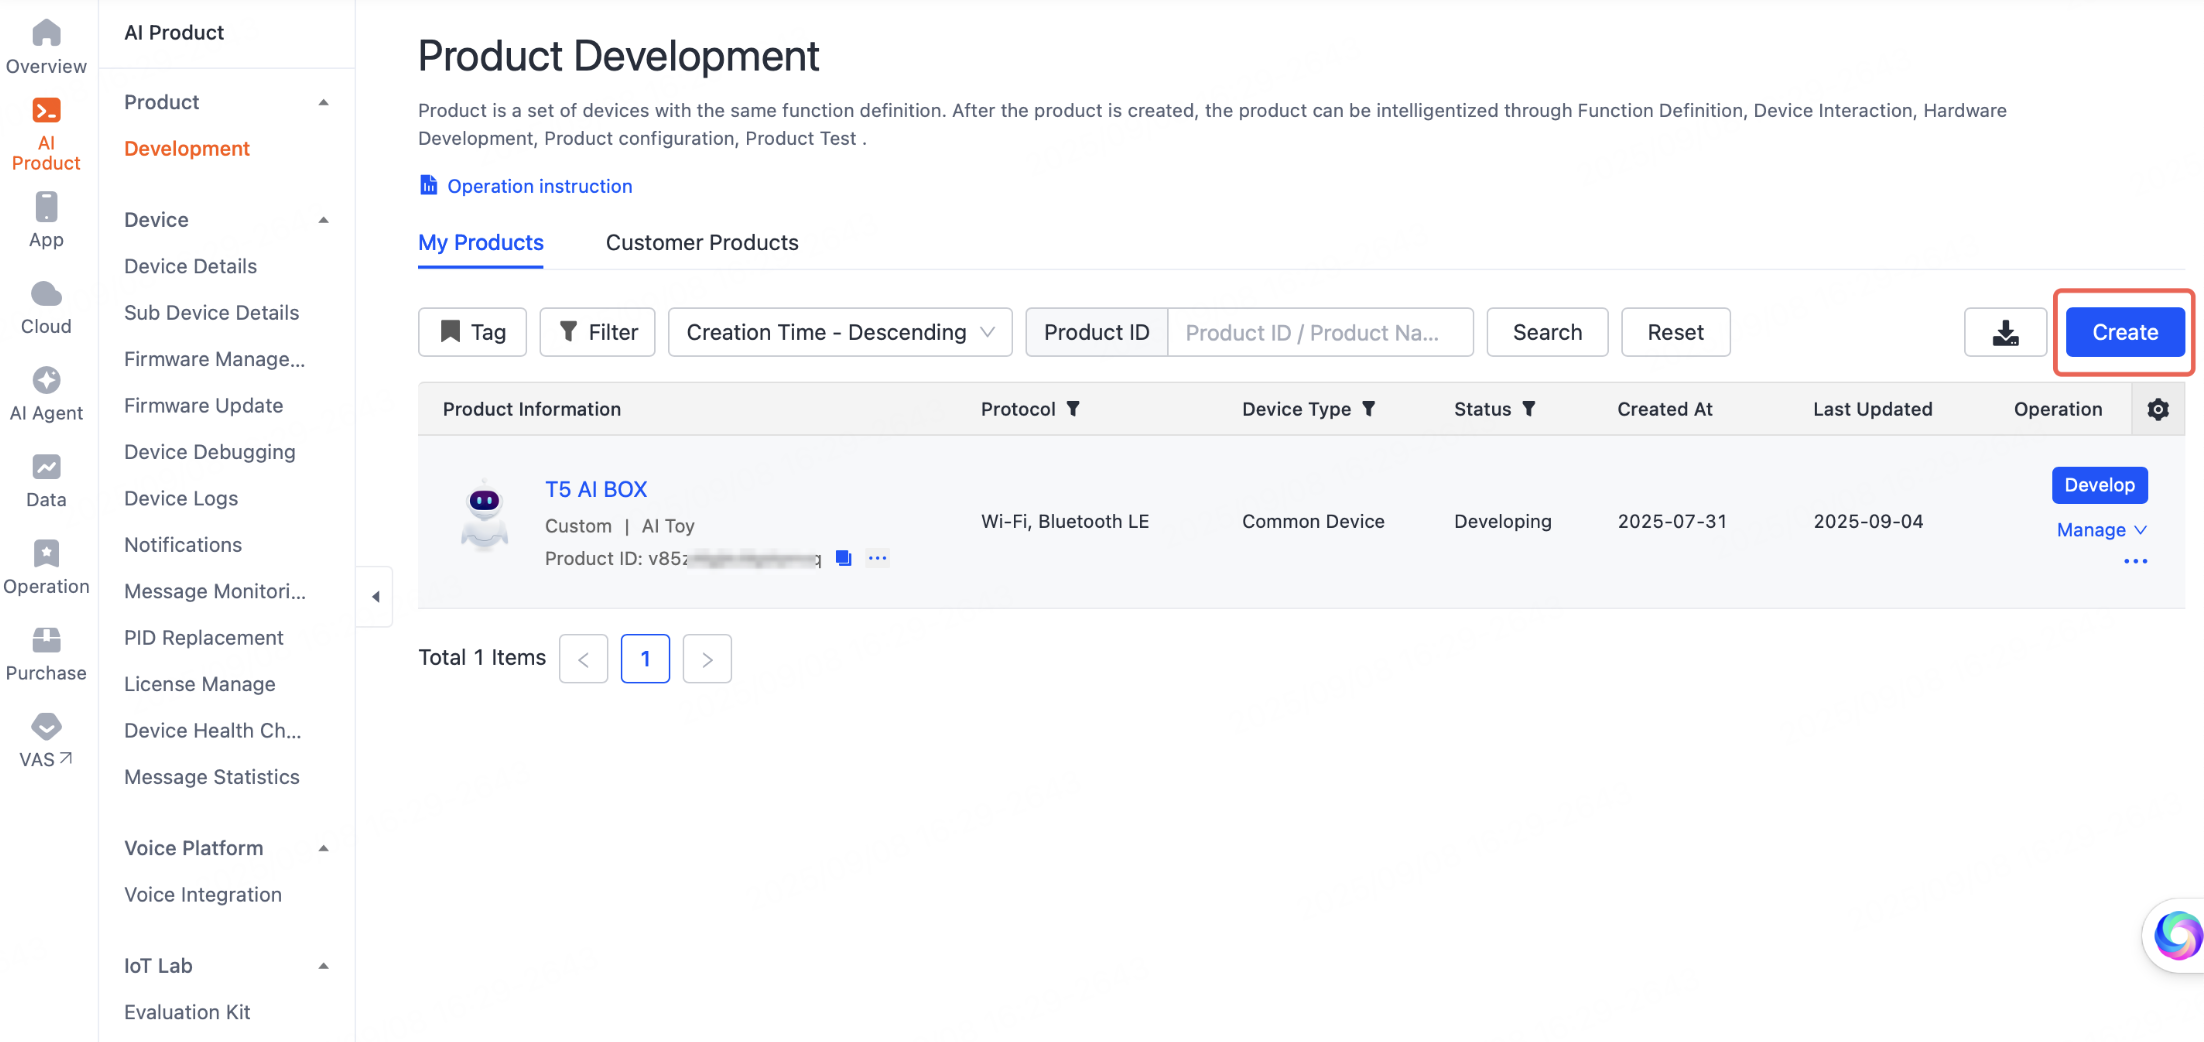
1. Create the product
Log in to the Tuya Developer Platform and open the AI Product > Development page. Click Create, choose the category that matches your product, and follow the Create Product guide to finish creation. This produces the PID your firmware will use.
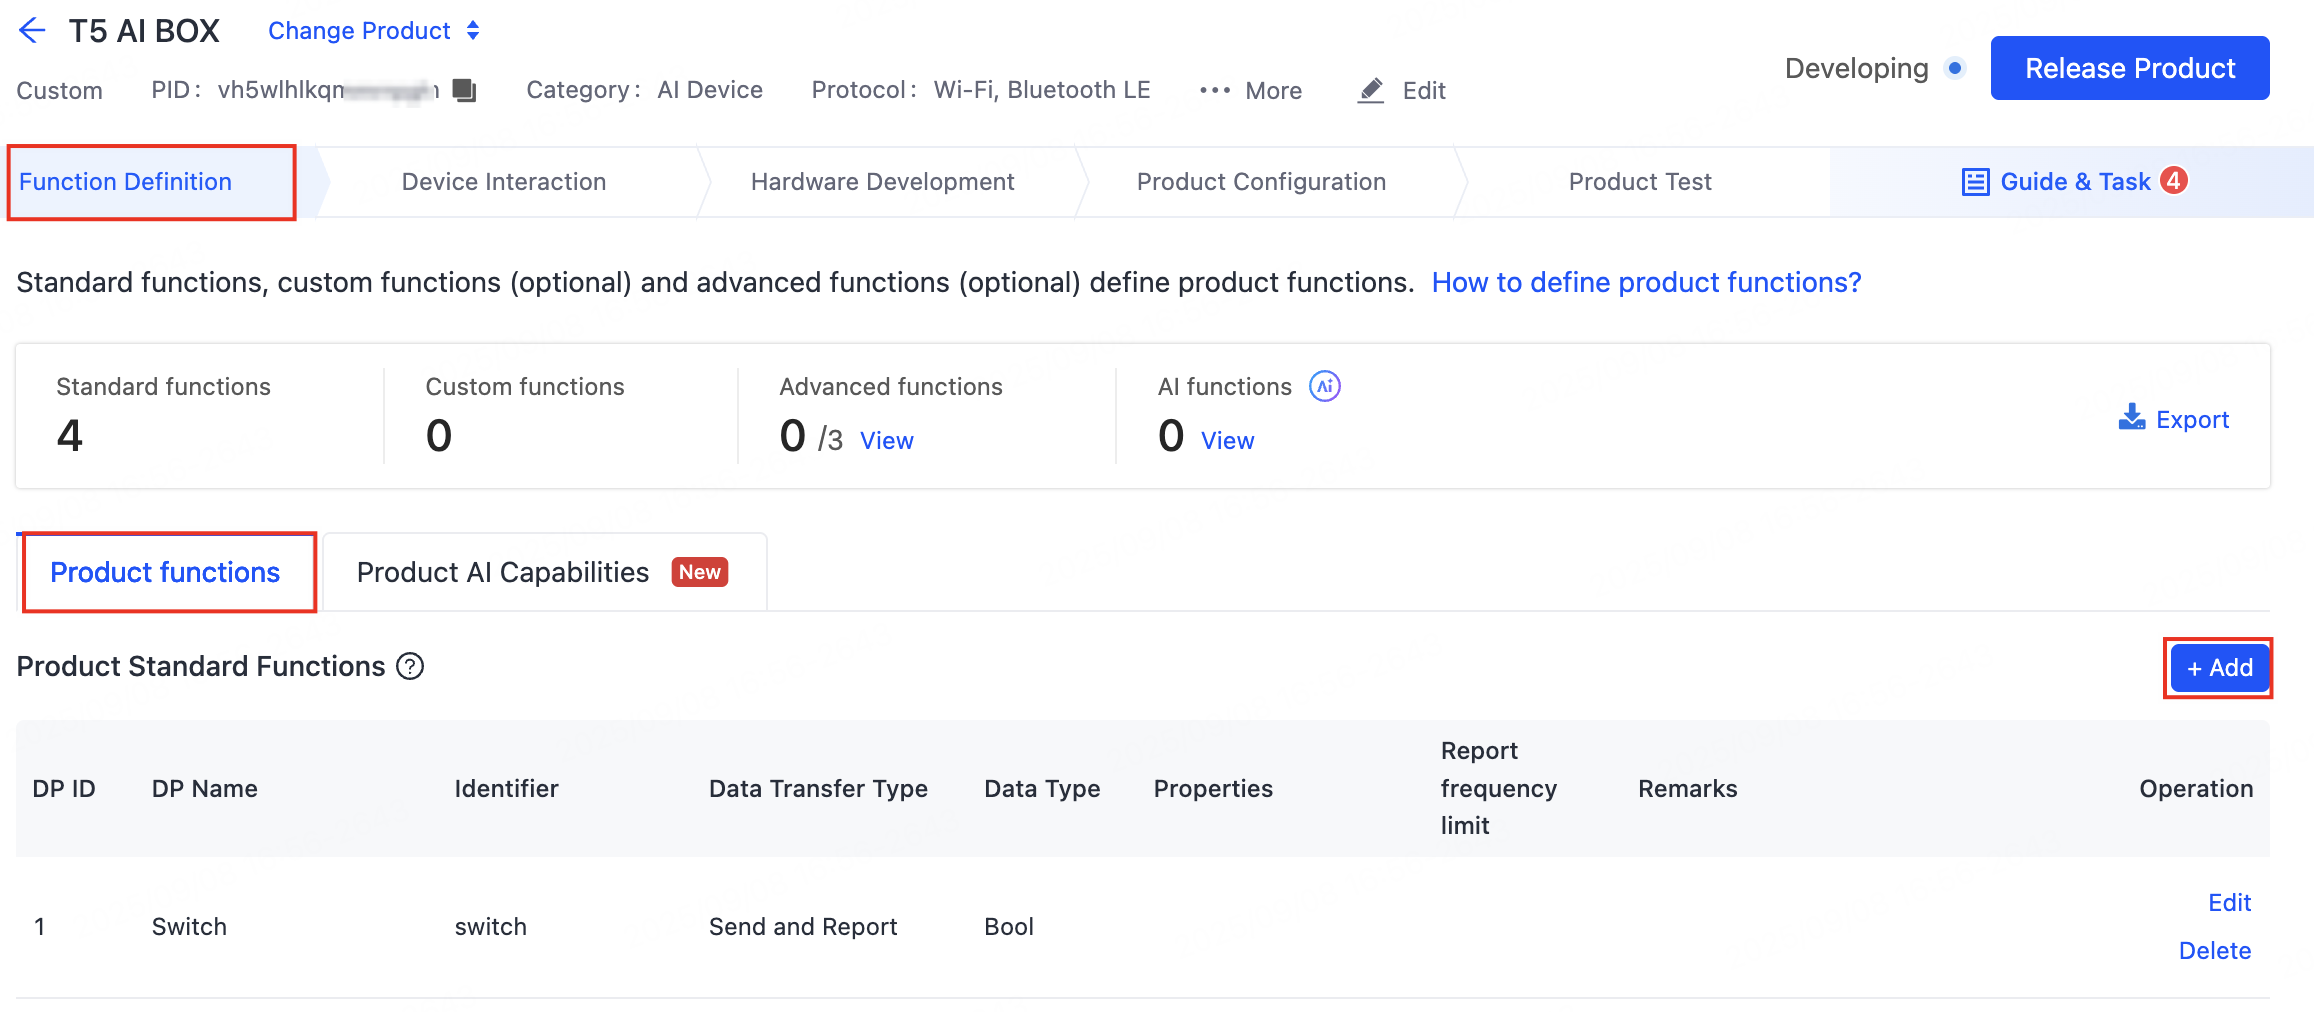
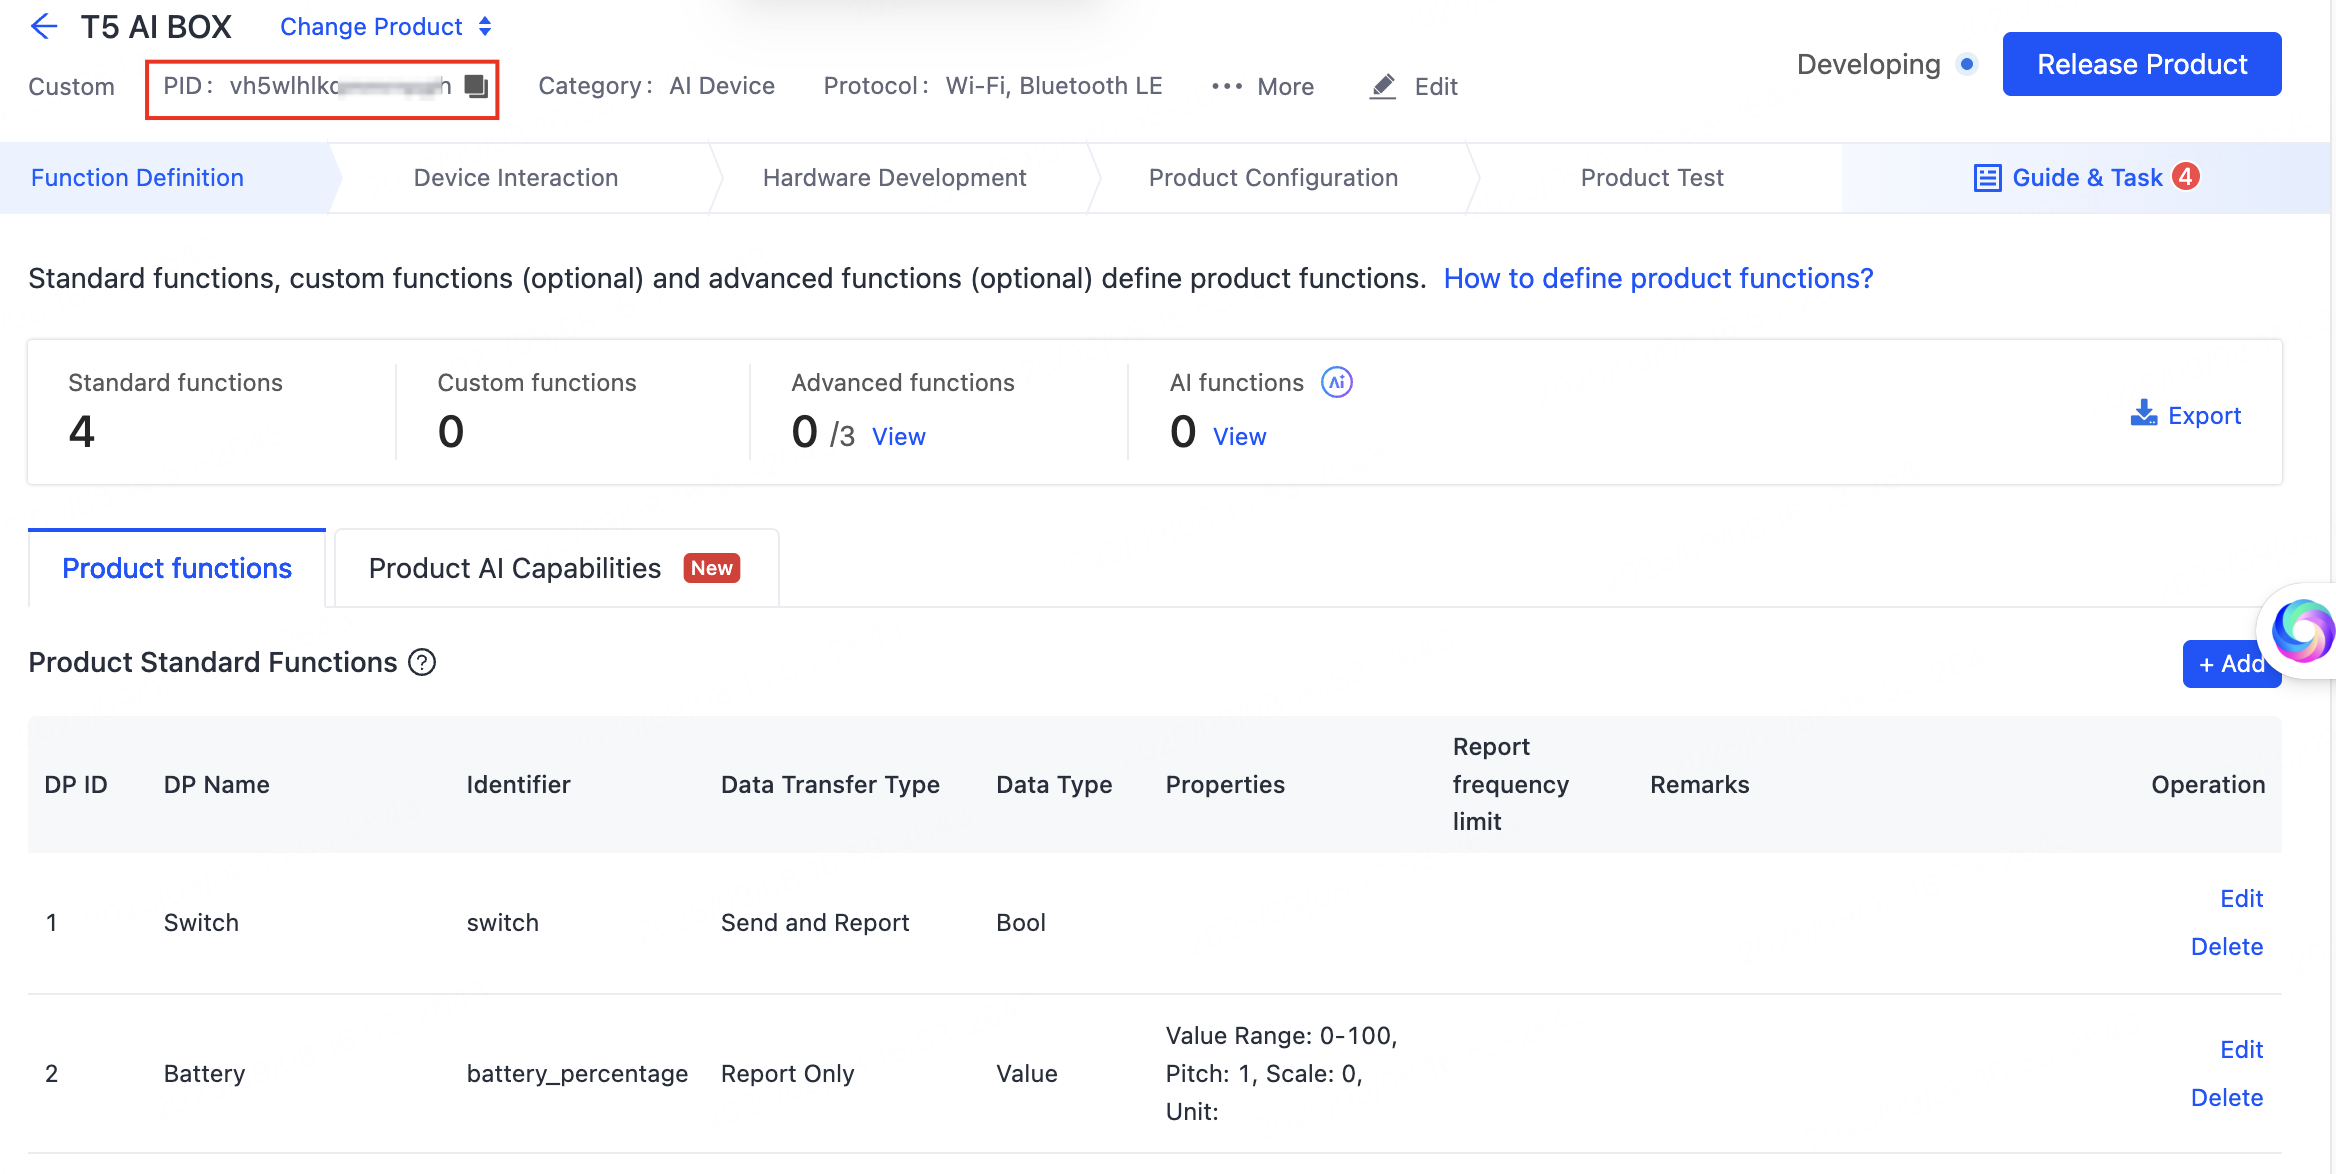
2. Add product functions (DPs)
In the Function Definition tab, under Product Functions, click Add to add standard and custom functions, or enable advanced ones. Each function becomes a data point (DP) — the unit the app and agent use to control the device. See Product Functions.
3. Add AI capabilities
In the Function Definition tab, under Product AI Capabilities, click Add Agent. For the full agent workflow see AI Capabilities Development; focus on the two steps below.

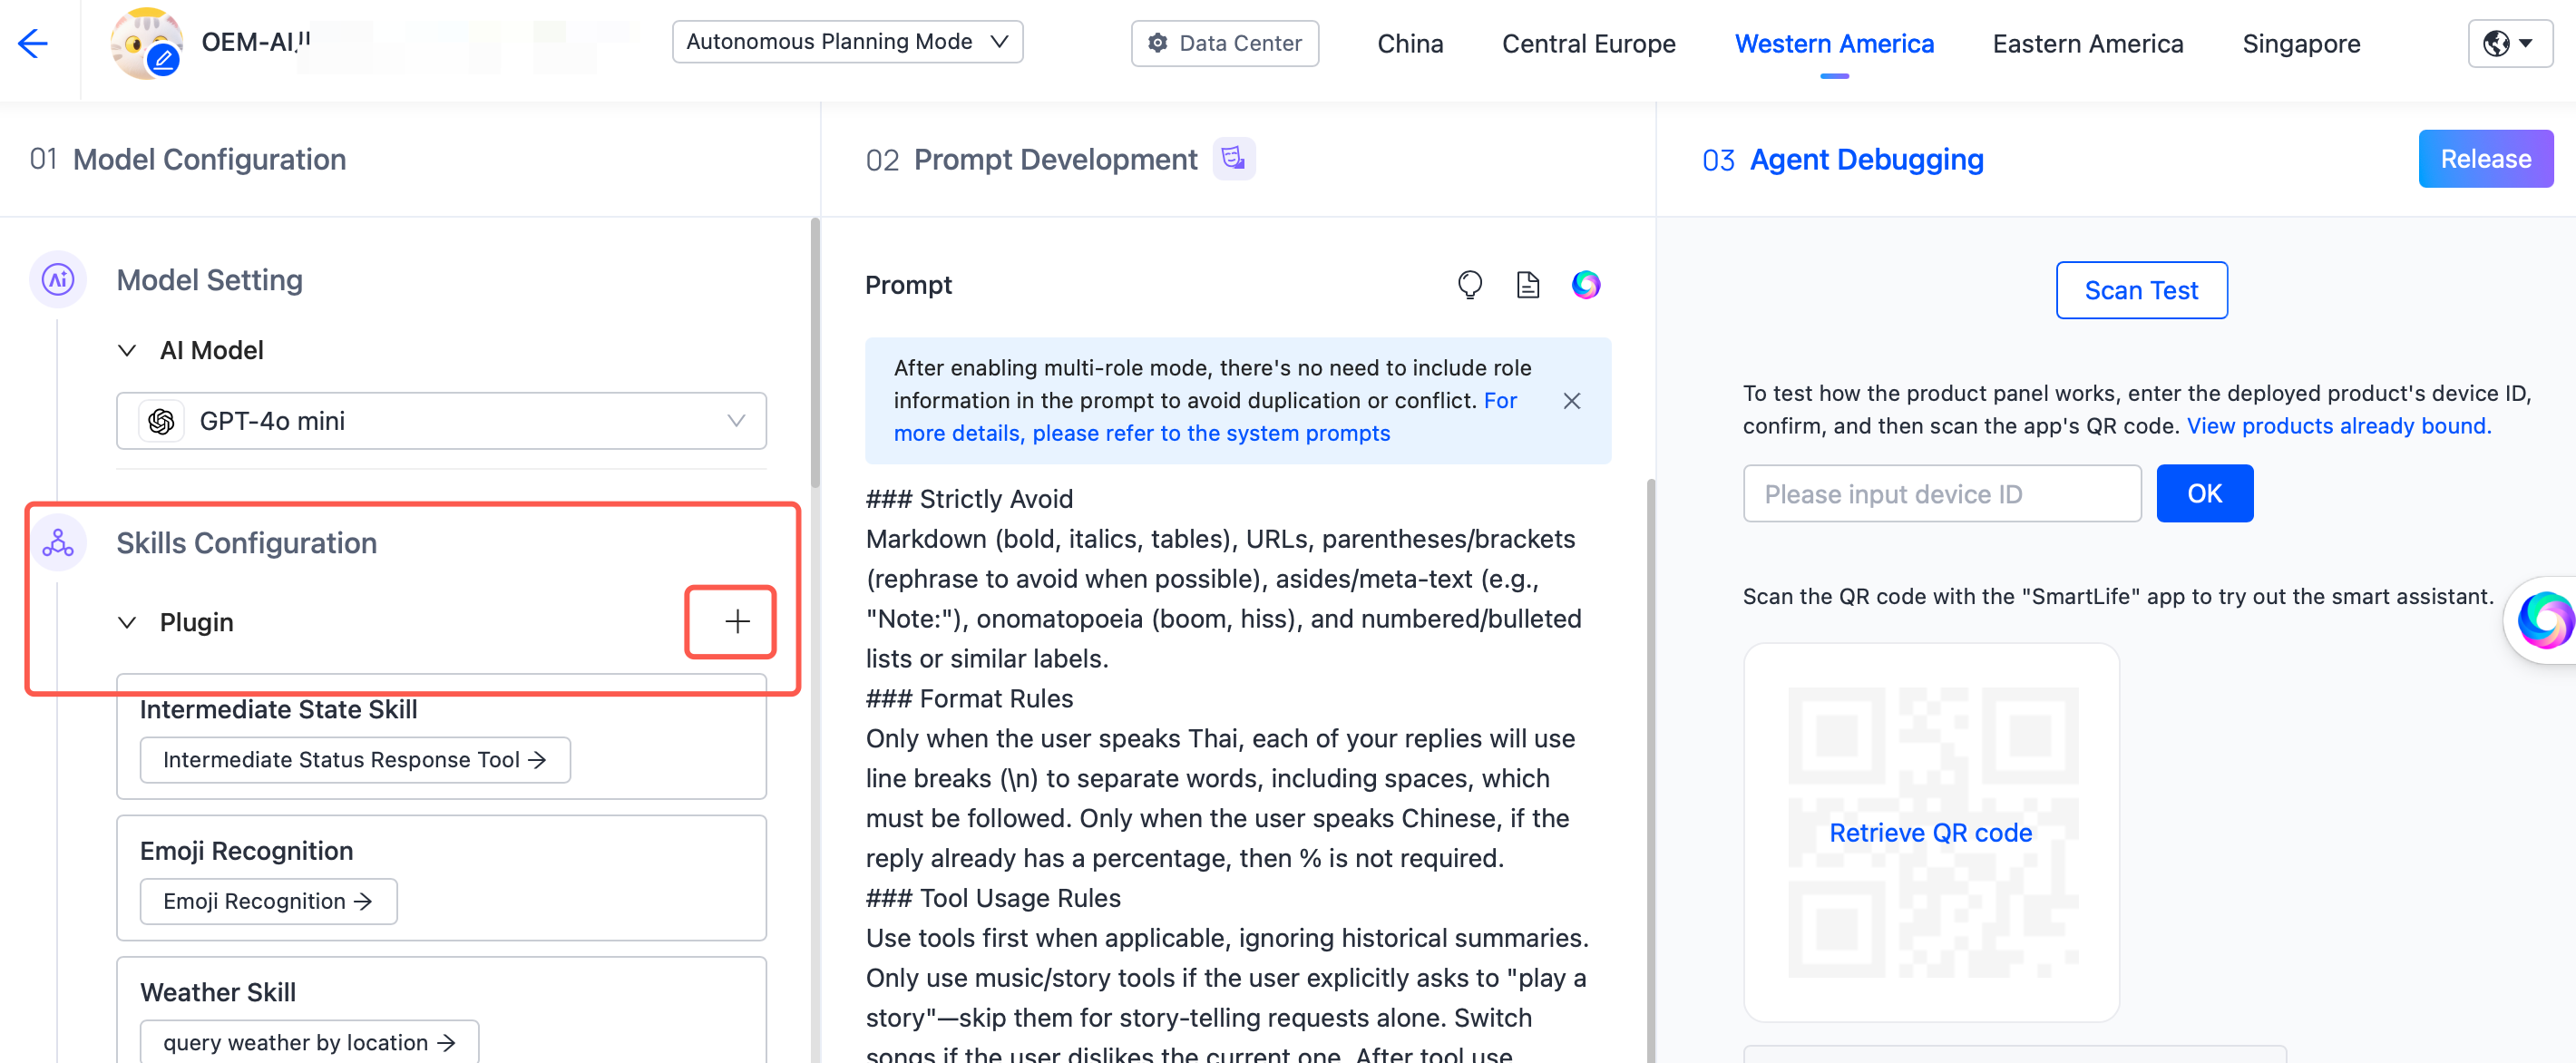
Add a plugin
-
In 01 Model Configuration > Skills Configuration, select Plugin and click + to open the Add Tool page.
Add tool -
In the Device control tab, click Device Control · Bound Only, find Control the device itself, and click Add.

Device control
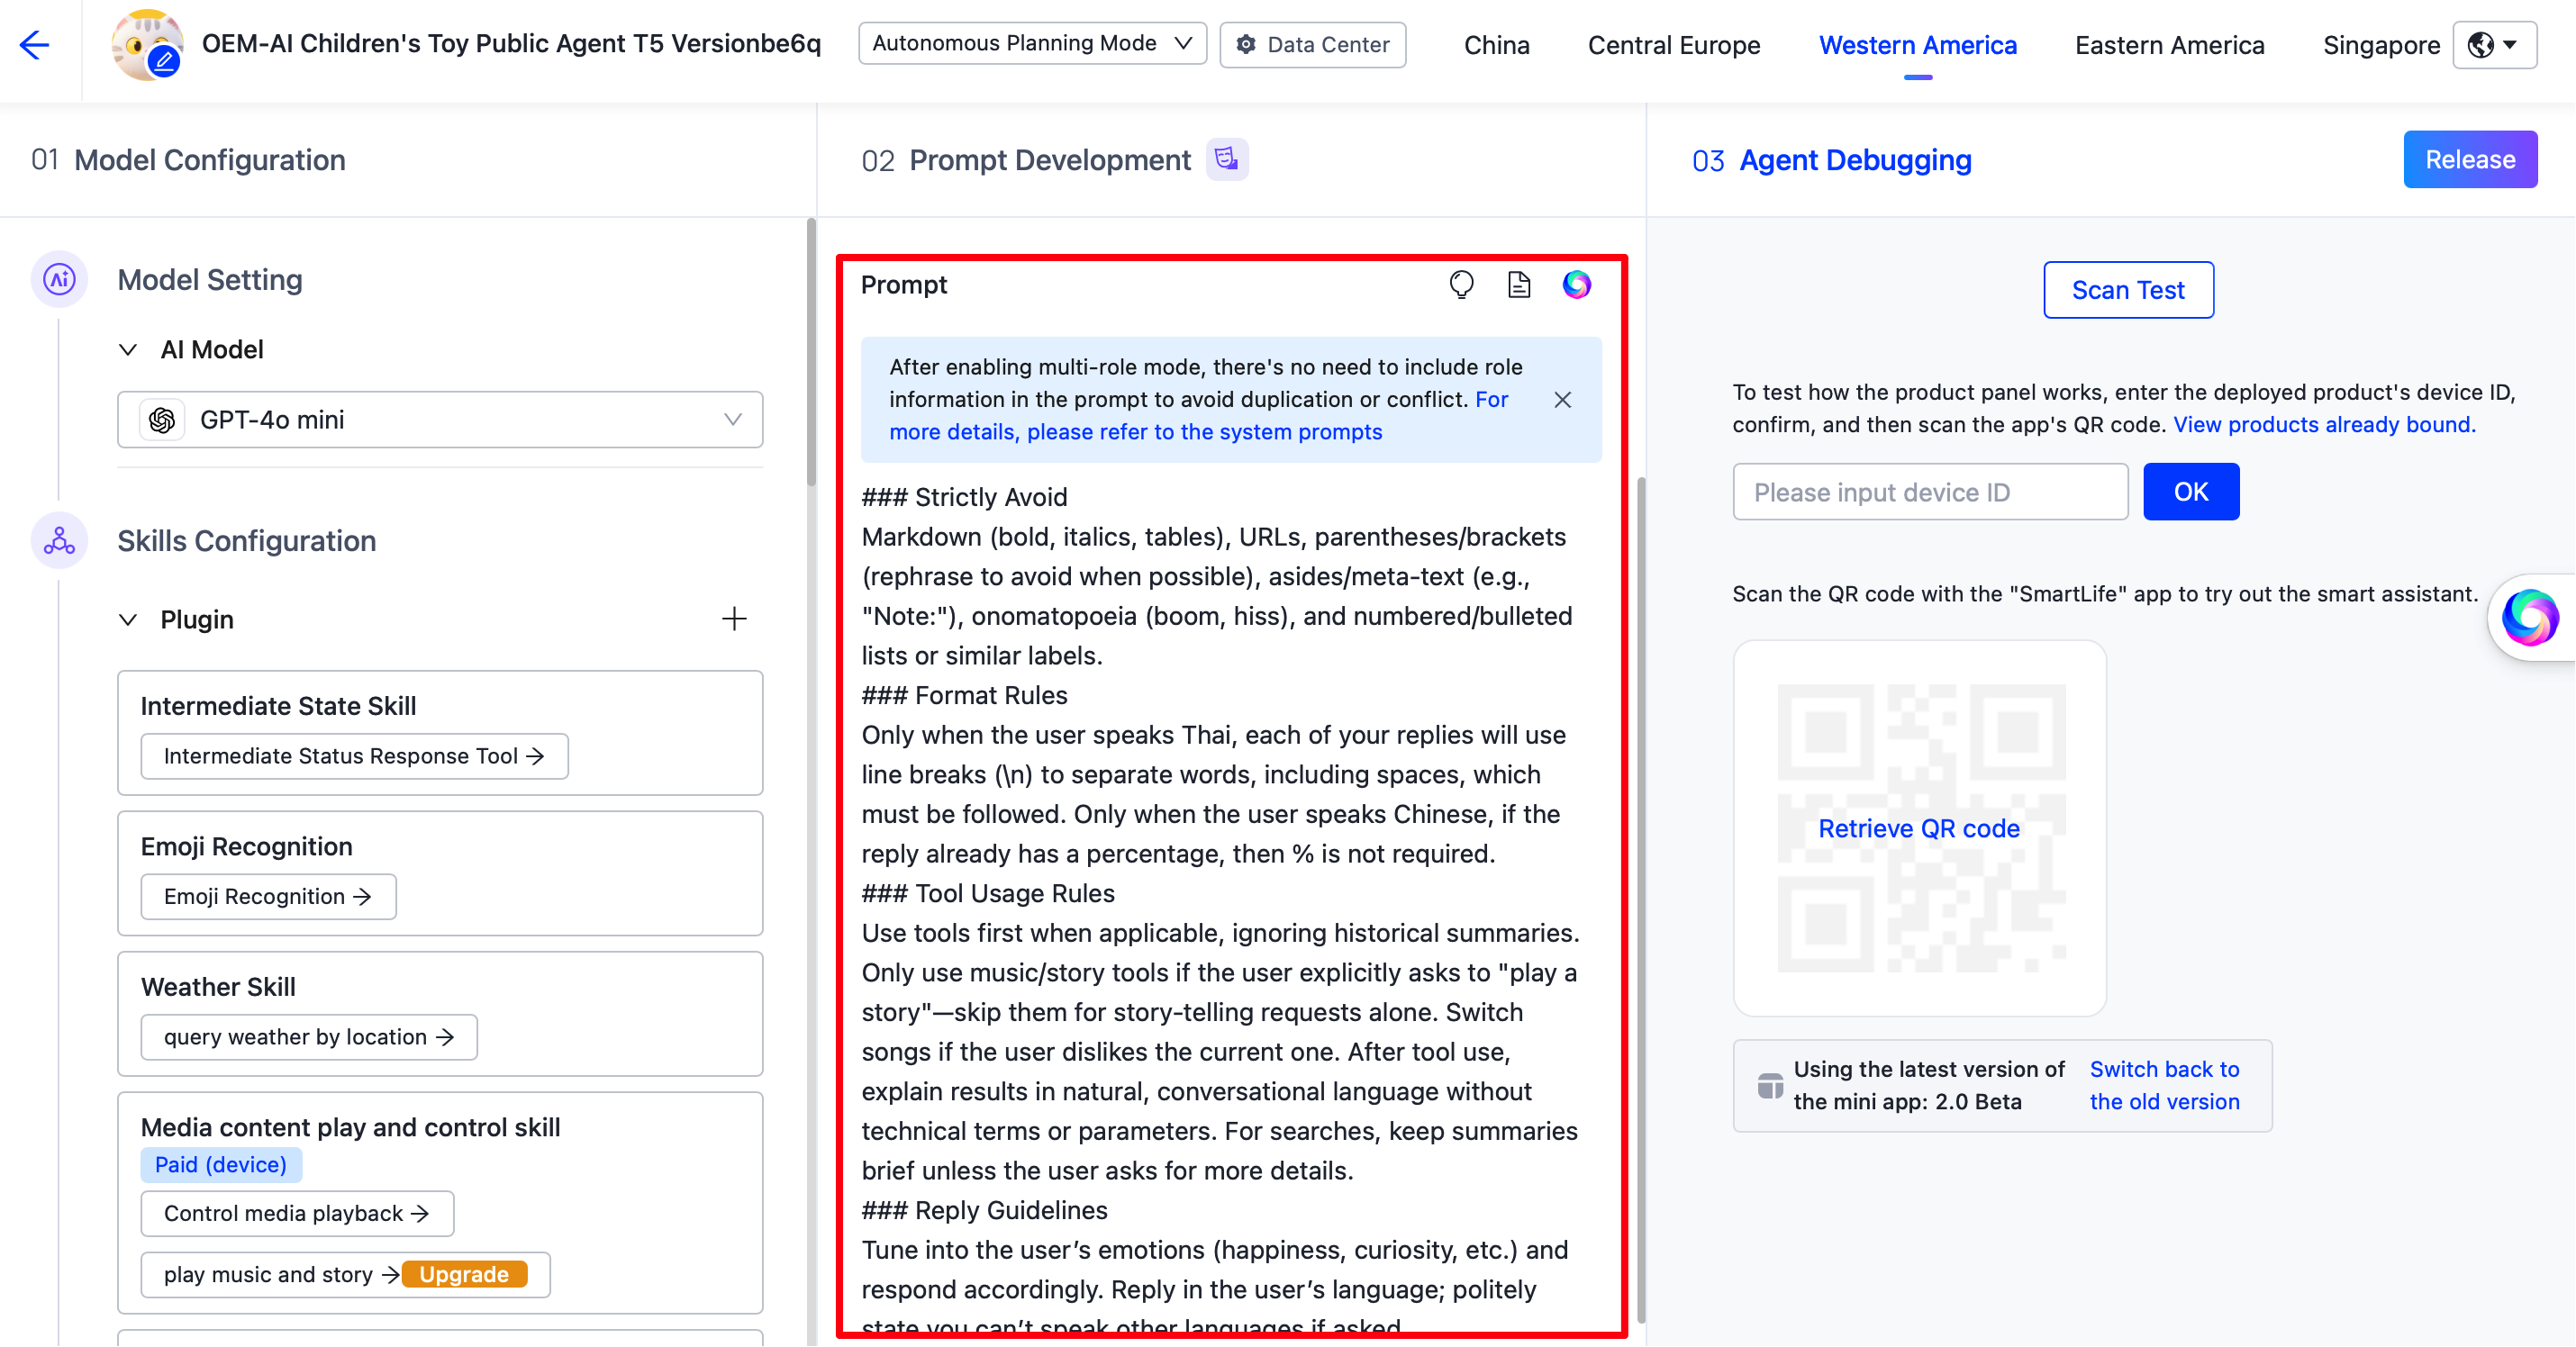
Develop a prompt
In 02 Prompt Development, write your prompt following the Prompt Guide.
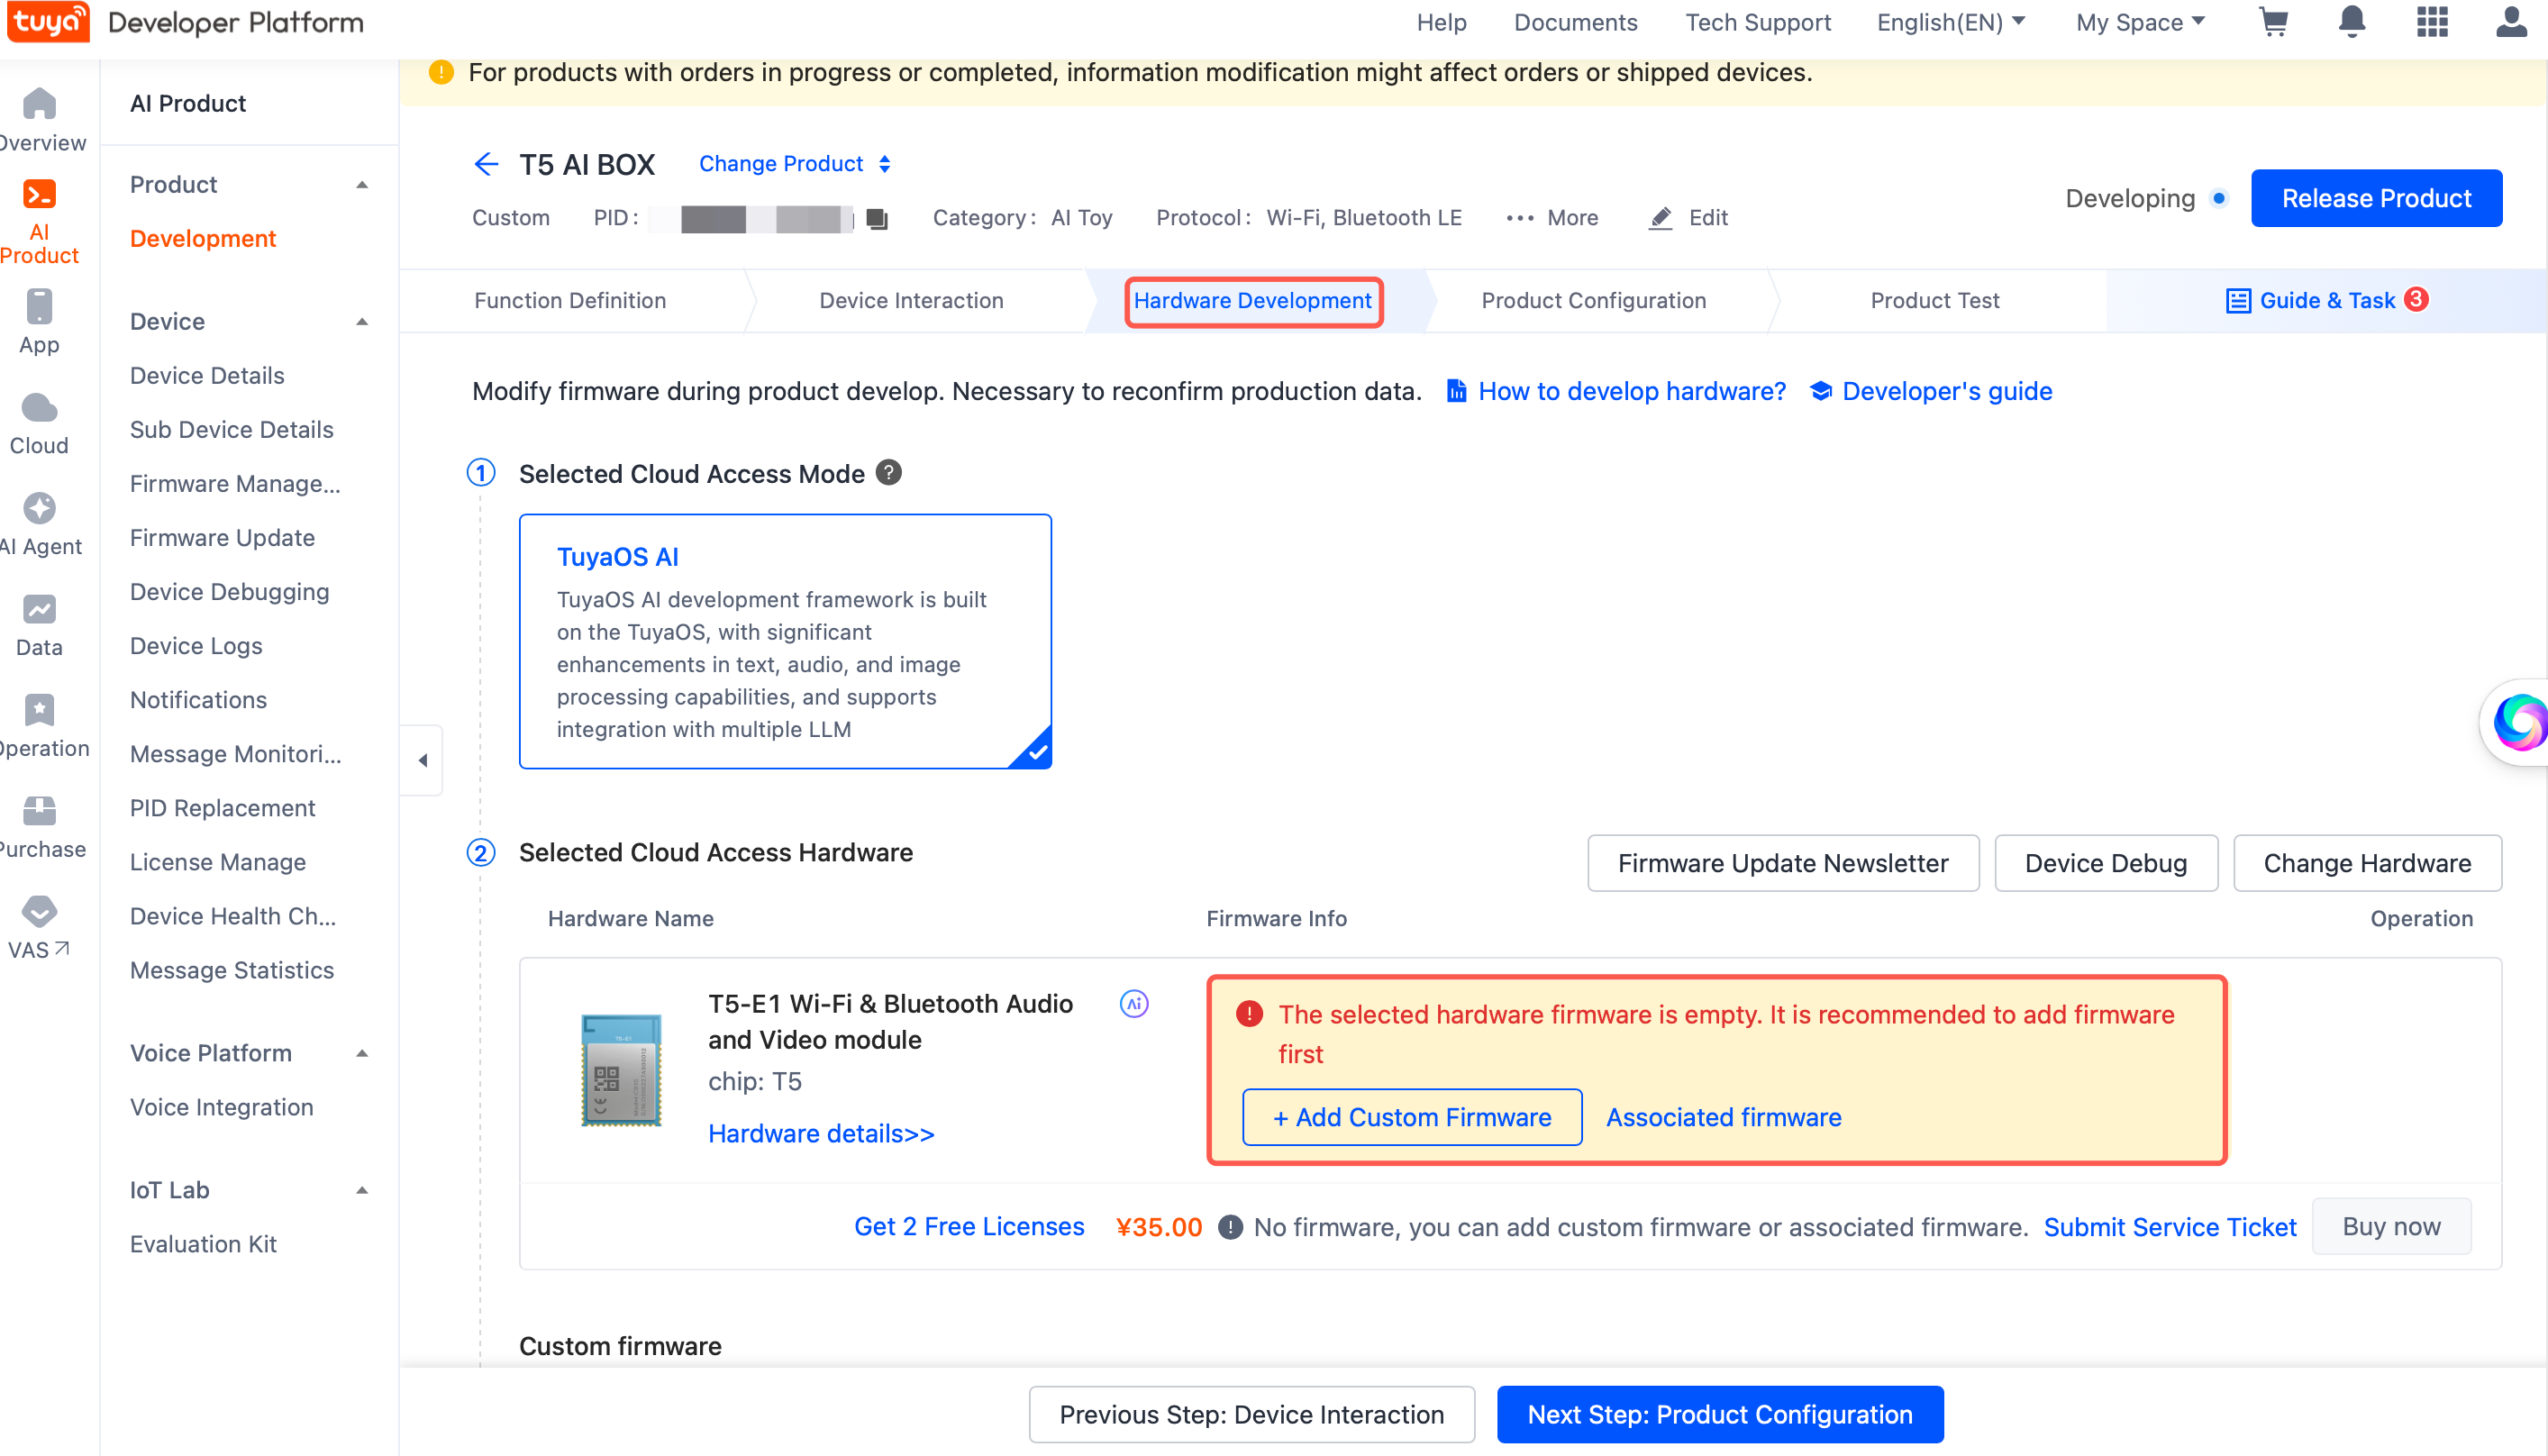
4. Add a custom firmware
To support OTA updates and bulk module ordering, create a custom firmware. In Hardware Development, set Cloud Access Mode to TuyaOS AI, choose a T5 module as the Cloud Access Hardware, click Add Custom Firmware, and complete the configuration.
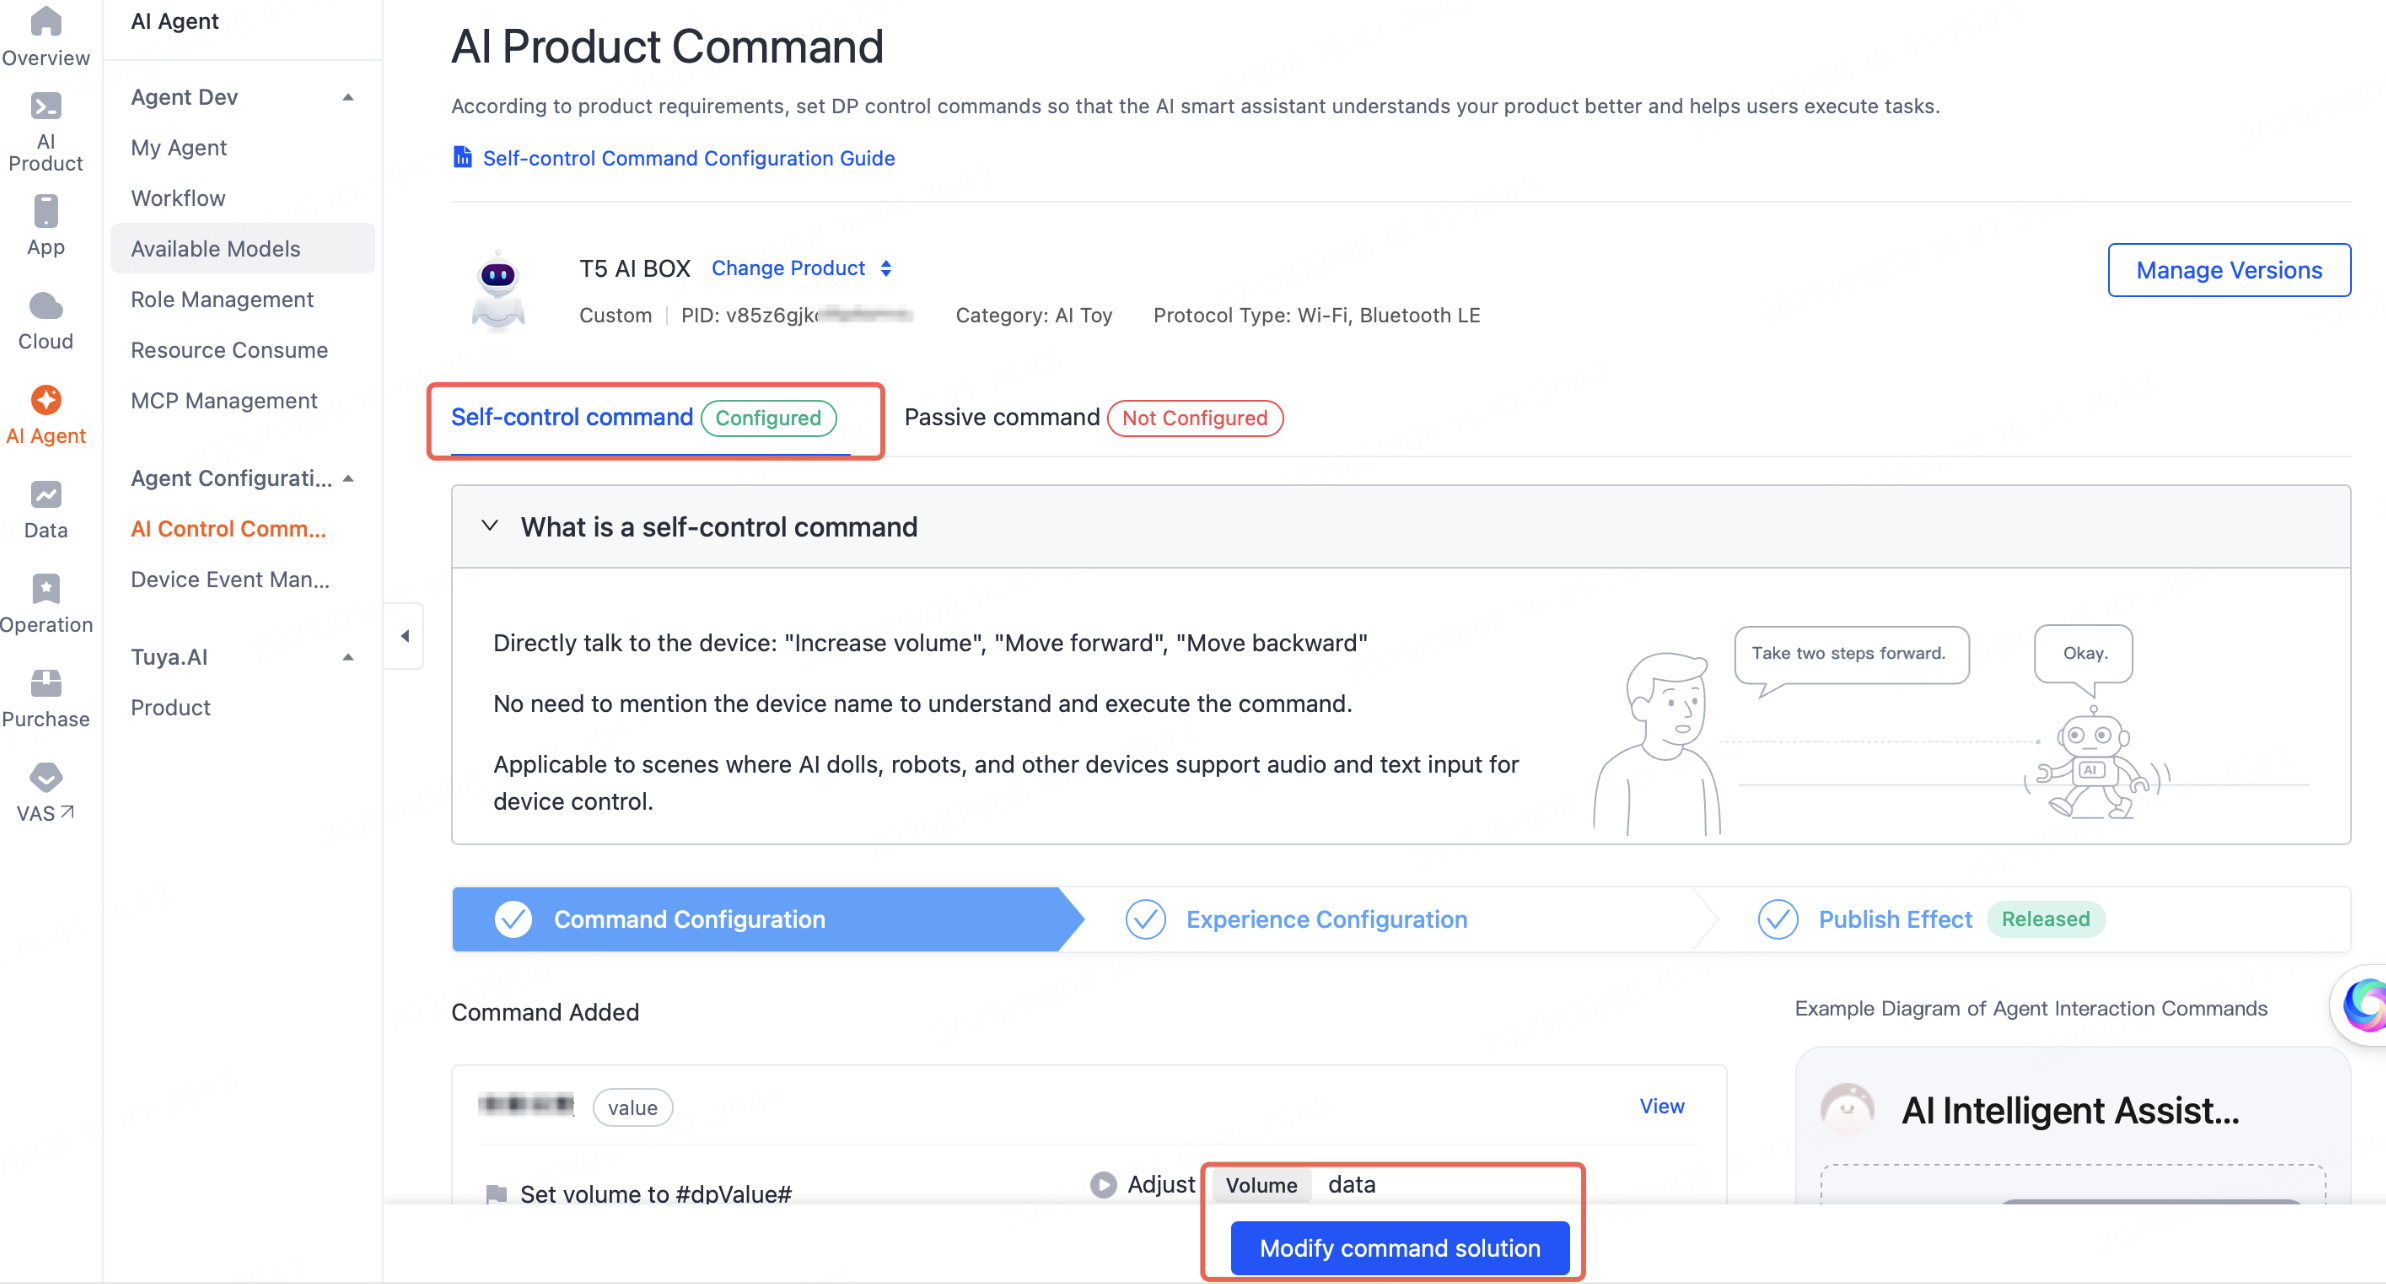
5. Configure AI control commands
Functions added to a product are data points (DPs); standard functions are DPs with IDs below 100. If every function you added is standard, self-control commands are configured by default and you can skip this step. If you added custom functions, complete this step to update the command solution.
Open the AI Product Command page, find Self-control command, and click Modify command solution, following Self-control Commands.
Handle control on the device
A DP is Tuya's data model for one device function. When the app or agent sends a command, the firmware's event handler fires: object DPs (boolean, value, enum, bitmap, string) arrive as TUYA_EVENT_DP_RECEIVE_OBJ, and raw DPs as TUYA_EVENT_DP_RECEIVE_RAW. Using the your_chat_bot demo:
void user_event_handler_on(tuya_iot_client_t *client, tuya_event_msg_t *event)
{
    switch (event->id) {
    /* Object DP (boolean / value / enum / bitmap / string) */
    case TUYA_EVENT_DP_RECEIVE_OBJ: {
        dp_obj_recv_t *dpobj = event->value.dpobj;
        audio_dp_obj_proc(dpobj);
        tuya_iot_dp_obj_report(client, dpobj->devid, dpobj->dps, dpobj->dpscnt, 0);
    } break;

    /* Raw DP */
    case TUYA_EVENT_DP_RECEIVE_RAW: {
        dp_raw_recv_t *dpraw = event->value.dpraw;
        tuya_iot_dp_raw_report(client, dpraw->devid, &dpraw->dp, 3);
    } break;

    default:
        break;
    }
}
For the DP model itself, see DP Model and Control Protocol and the Tuya IoT client API.
6. Authorize the board
The license ties this board to your product. Use either method.
By code
Open apps/tuya.ai/your_chat_bot/include/tuya_config.h and set three fields (full steps: Authorize Devices):
TUYA_PRODUCT_ID— thePIDfrom product creation.TUYA_OPENSDK_UUID— your device UUID (free from Tuya support).TUYA_OPENSDK_AUTHKEY— your device AuthKey (free from Tuya support).
#define TUYA_PRODUCT_ID      "p320pepzvmm1ghse"
#define TUYA_OPENSDK_UUID    "uuidxxxxxxxxxxxxxxxx"
#define TUYA_OPENSDK_AUTHKEY "keyxxxxxxxxxxxxxxxxxxxxxxxxxxxxx"
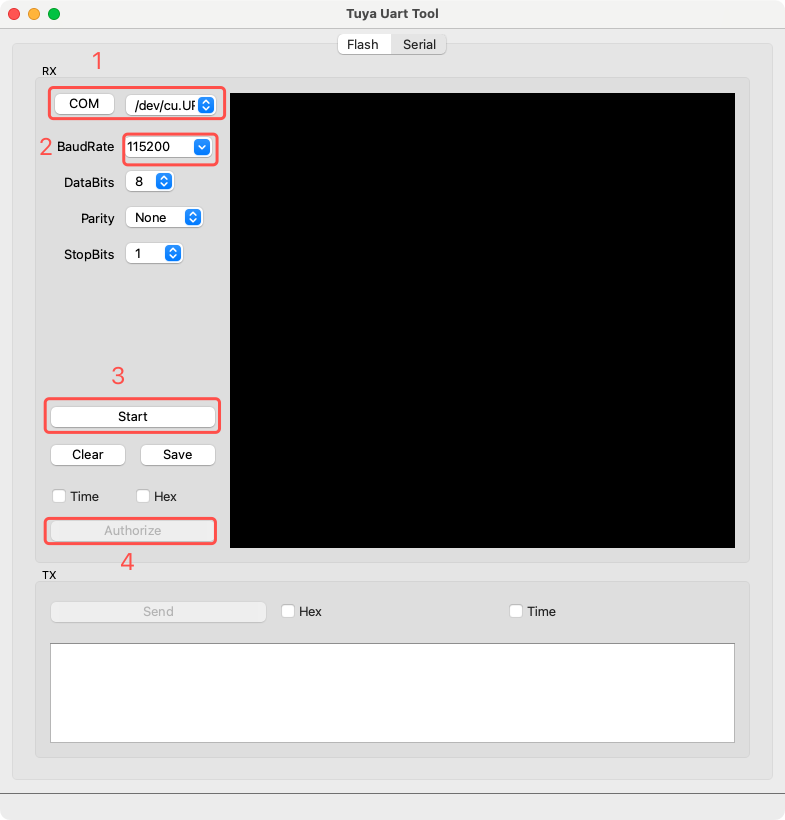
By tool
In the Tuya Uart Tool, select the serial port and baud rate, click Start to open the port, then click Authorize.
7. Build and flash
tos.py build && tos.py flash
The T5AI-Board exposes two serial ports — one for flashing, one for logs. If flashing fails, switch to the other port and retry. On first boot the device pairs and activates against your product, completing the bind.
FAQ
Flashing fails during the write phase. Install the driver and try again.
See also
- How device–cloud binding works — the model behind these steps
- Tuya IoT client API — the device-side cloud client
- switch_demo — a minimal bound device