your_chat_bot — cloud AI Agent
This is the classic TuyaOpen AI + IoT project. The focus here is the cloud IoT / AI Agent development flow inside the IDE.
Two development modes
| Mode | Suited for | Steps |
|---|---|---|
| Basic (recommended for beginners) | New to TuyaOpen or AI | Use the official default PID directly (feature and agent configuration already done). |
| Advanced | Building your own product | 1. Create a PID · 2. Create an Agent · 3. Bind the Agent to the PID. |
This practice uses Basic mode — fast for beginners and a real taste of three-ends-in-one.
Step 1: Create a project from an example
-
Click Demos in the IDE sidebar, choose AI voice chatbot, and click Create project.
-
Select Tuya T5AI and the Tuya T5AI-Board, plus the 3.5-inch LCD touch screen (optional).
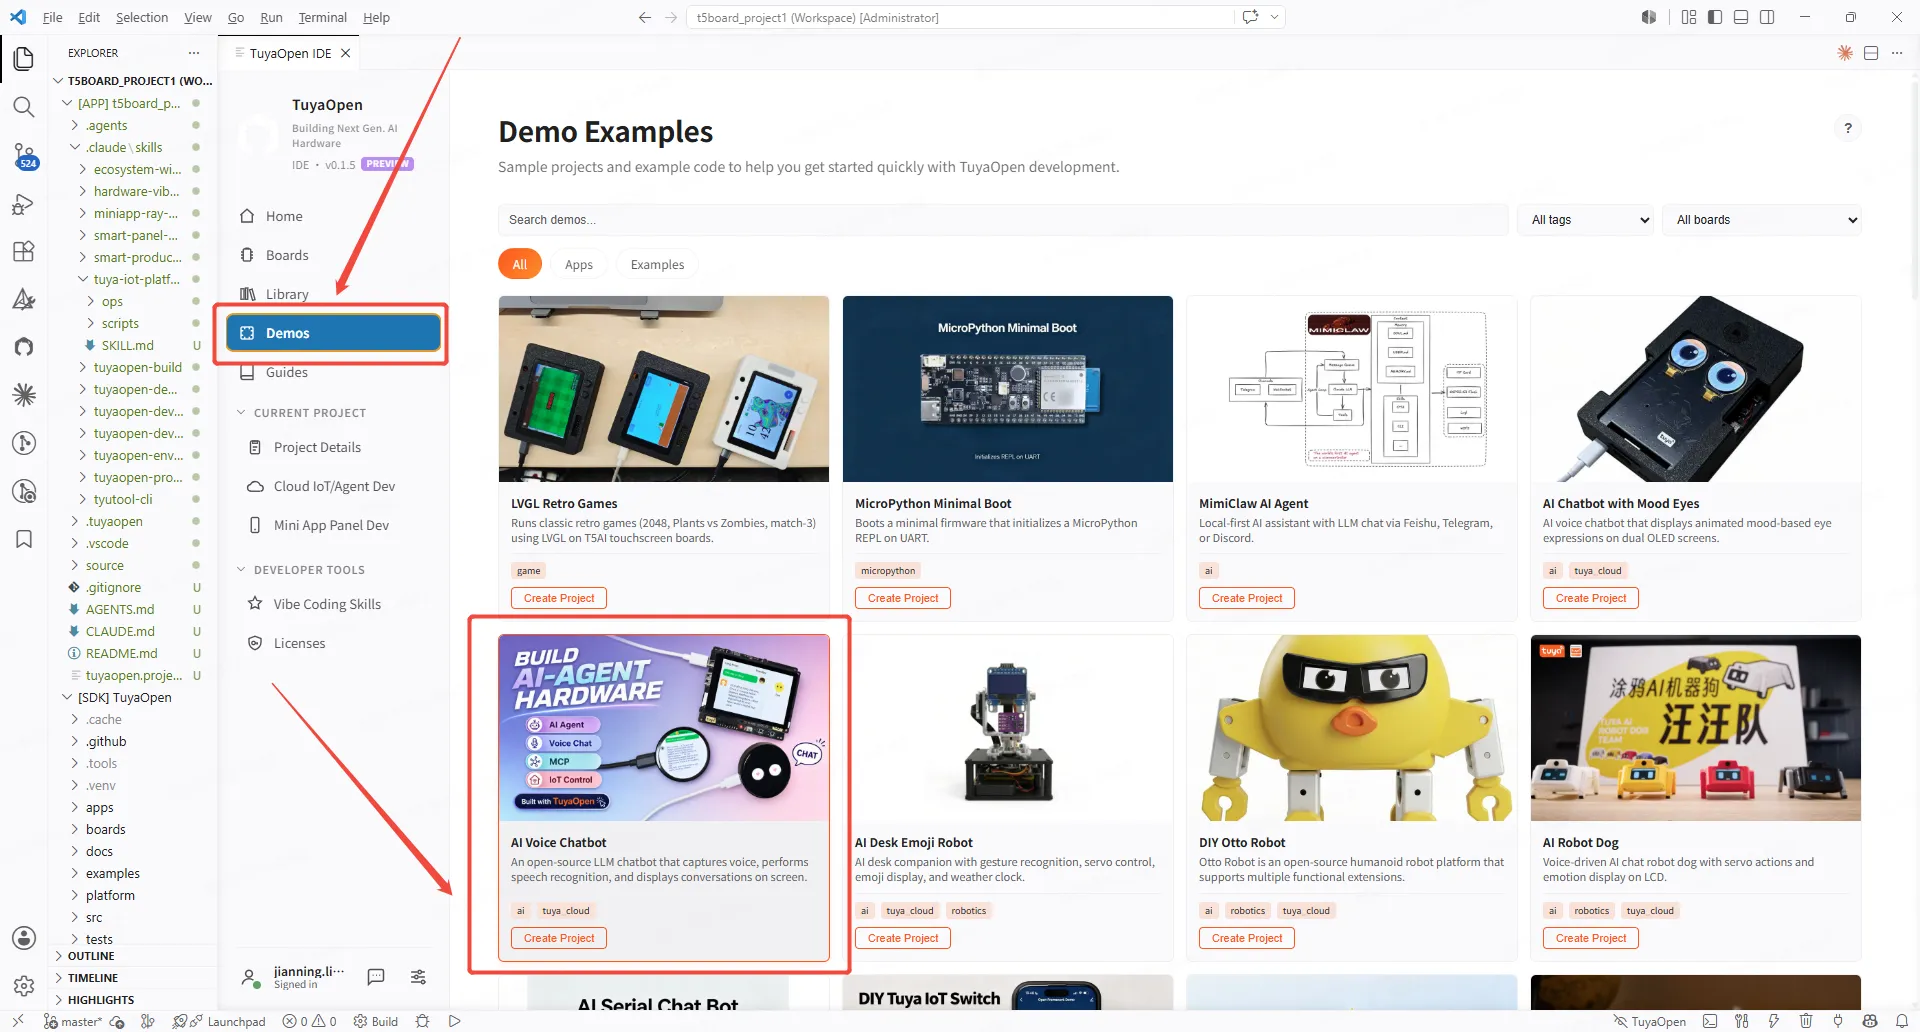
Examples gallery — AI voice chatbot -
Follow the prompt to grab the OEM example PID. This opens the Tuya Developer Platform in your browser. For what a PID is, see PID.
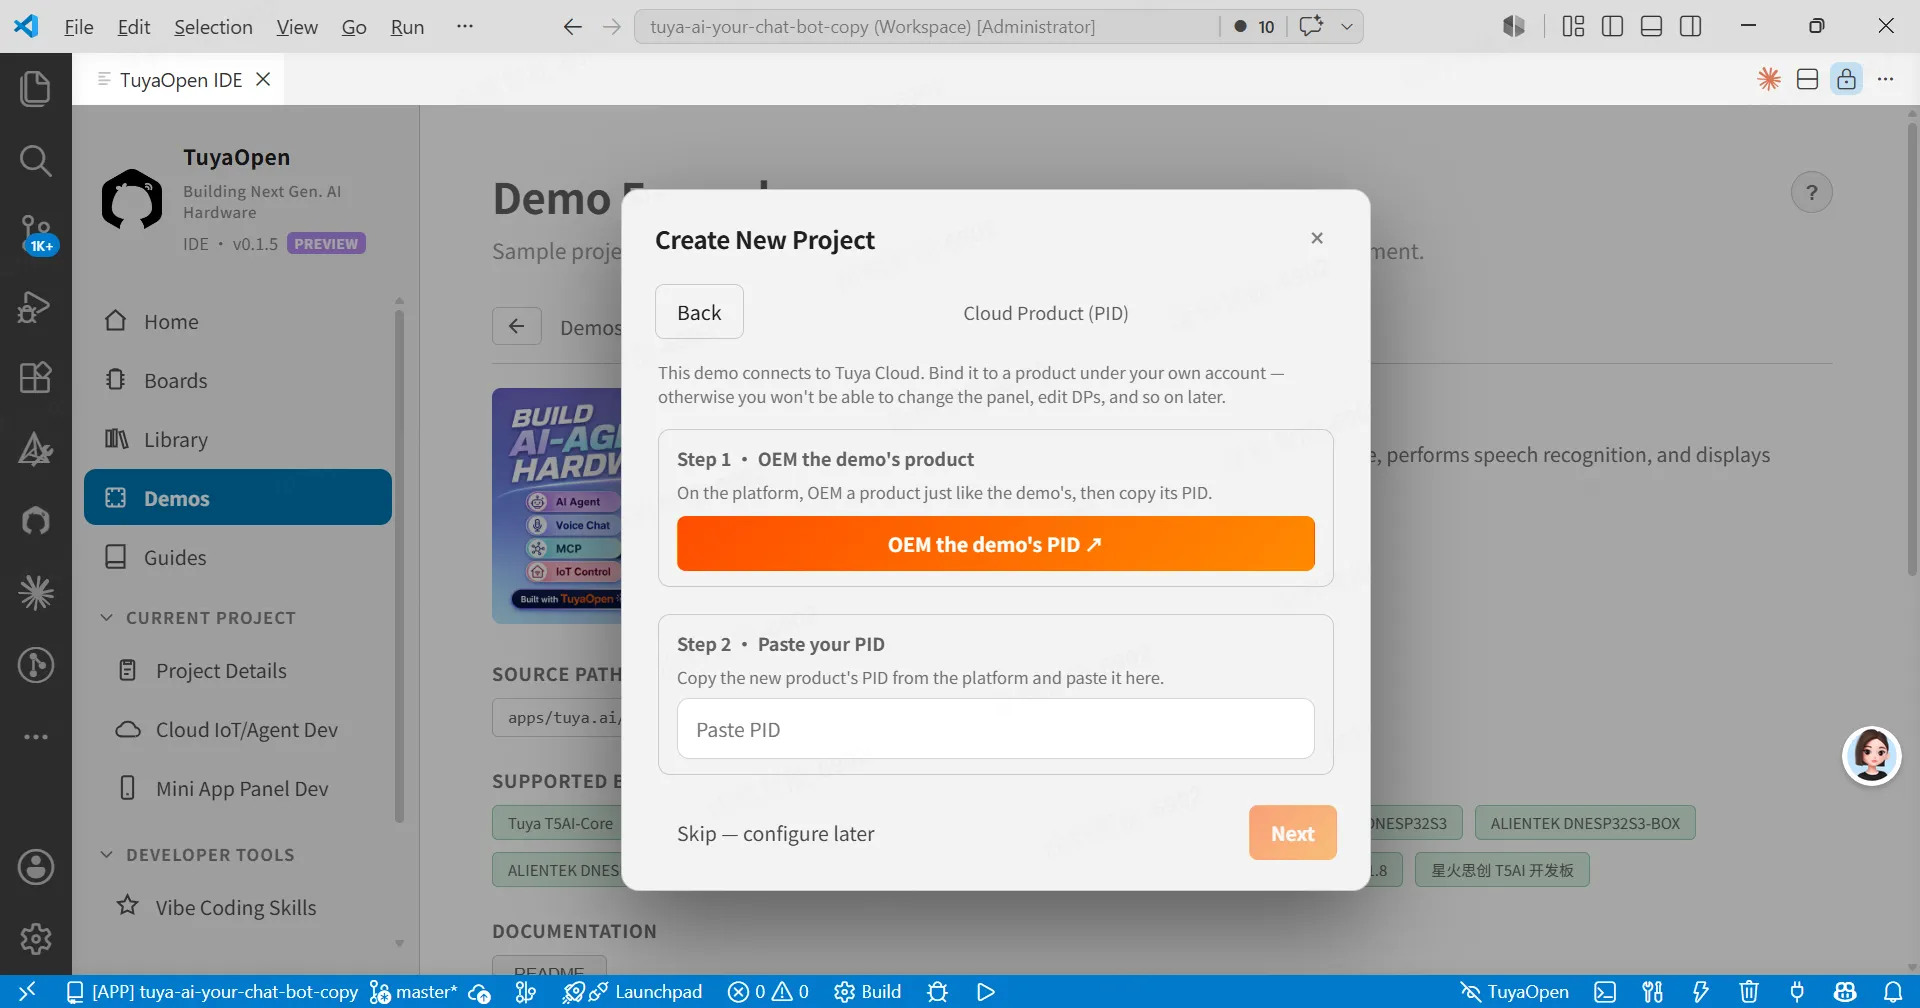
OEM example PID — jump to the developer platform -
Click Copy product, fill in a product name and model number, and confirm.
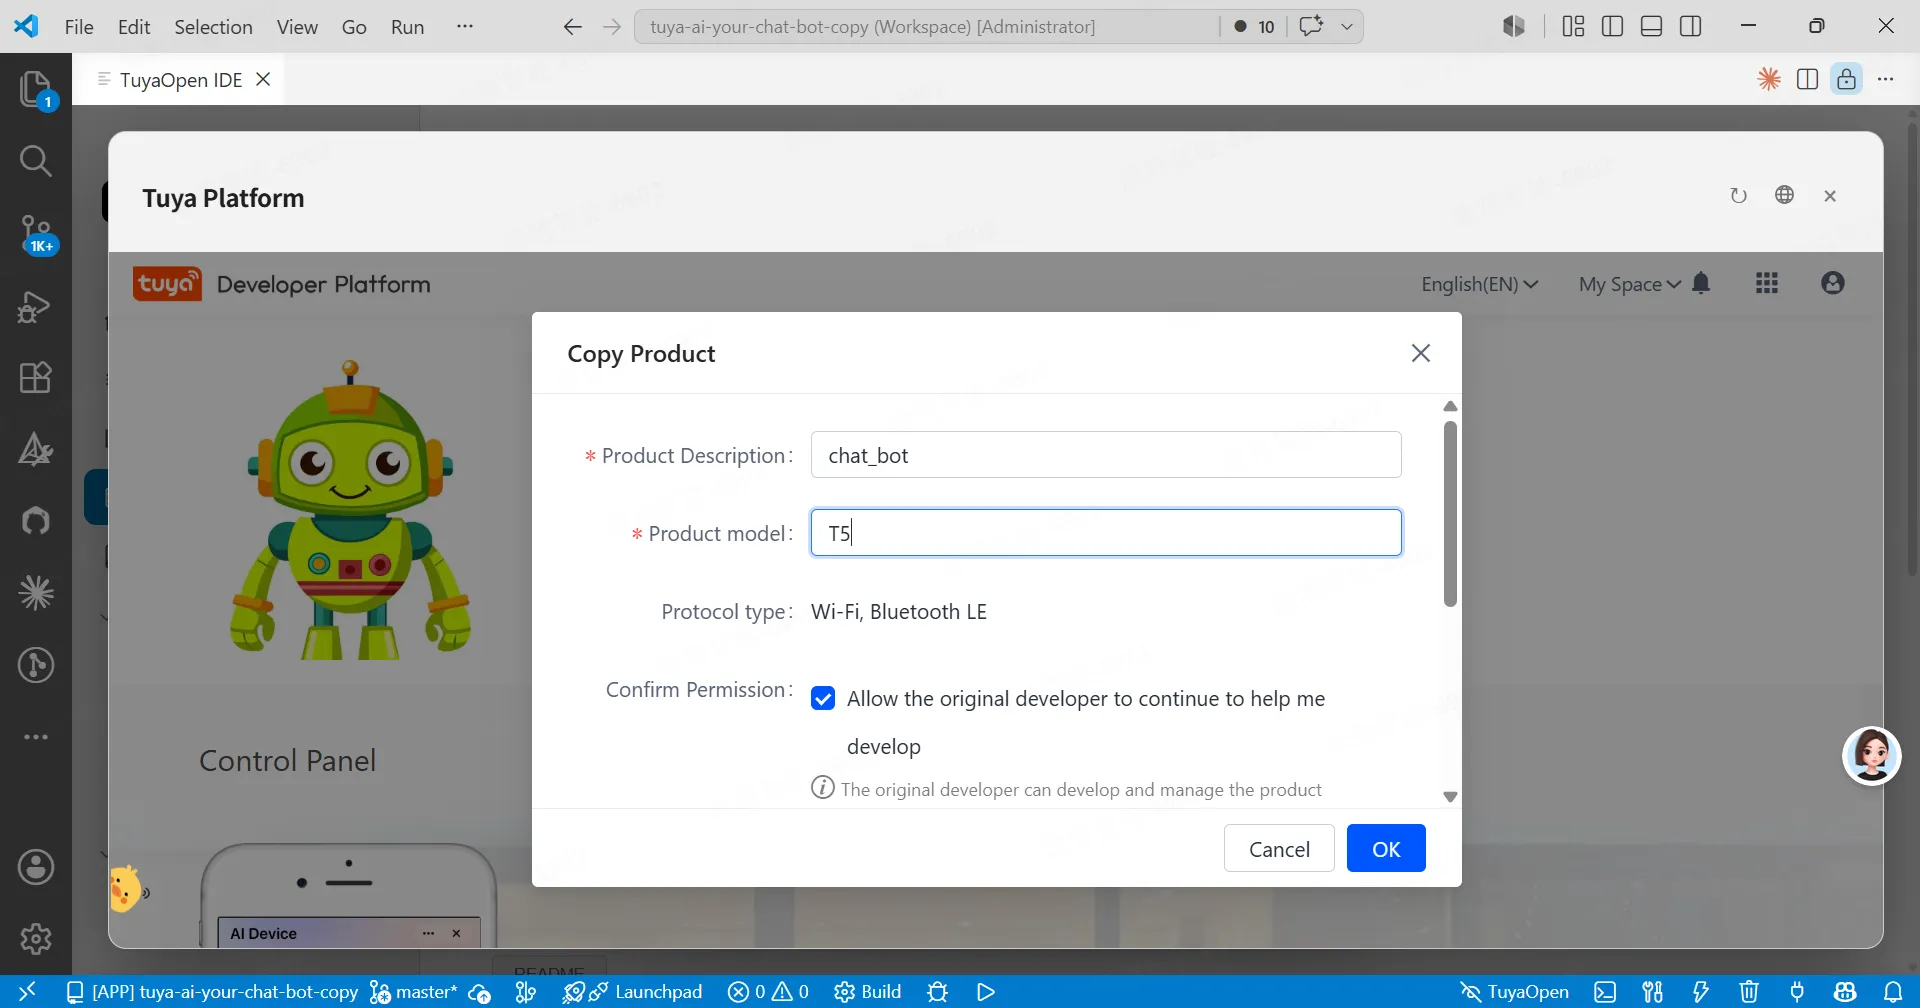
Copy product dialog -
Copy the PID on the left.
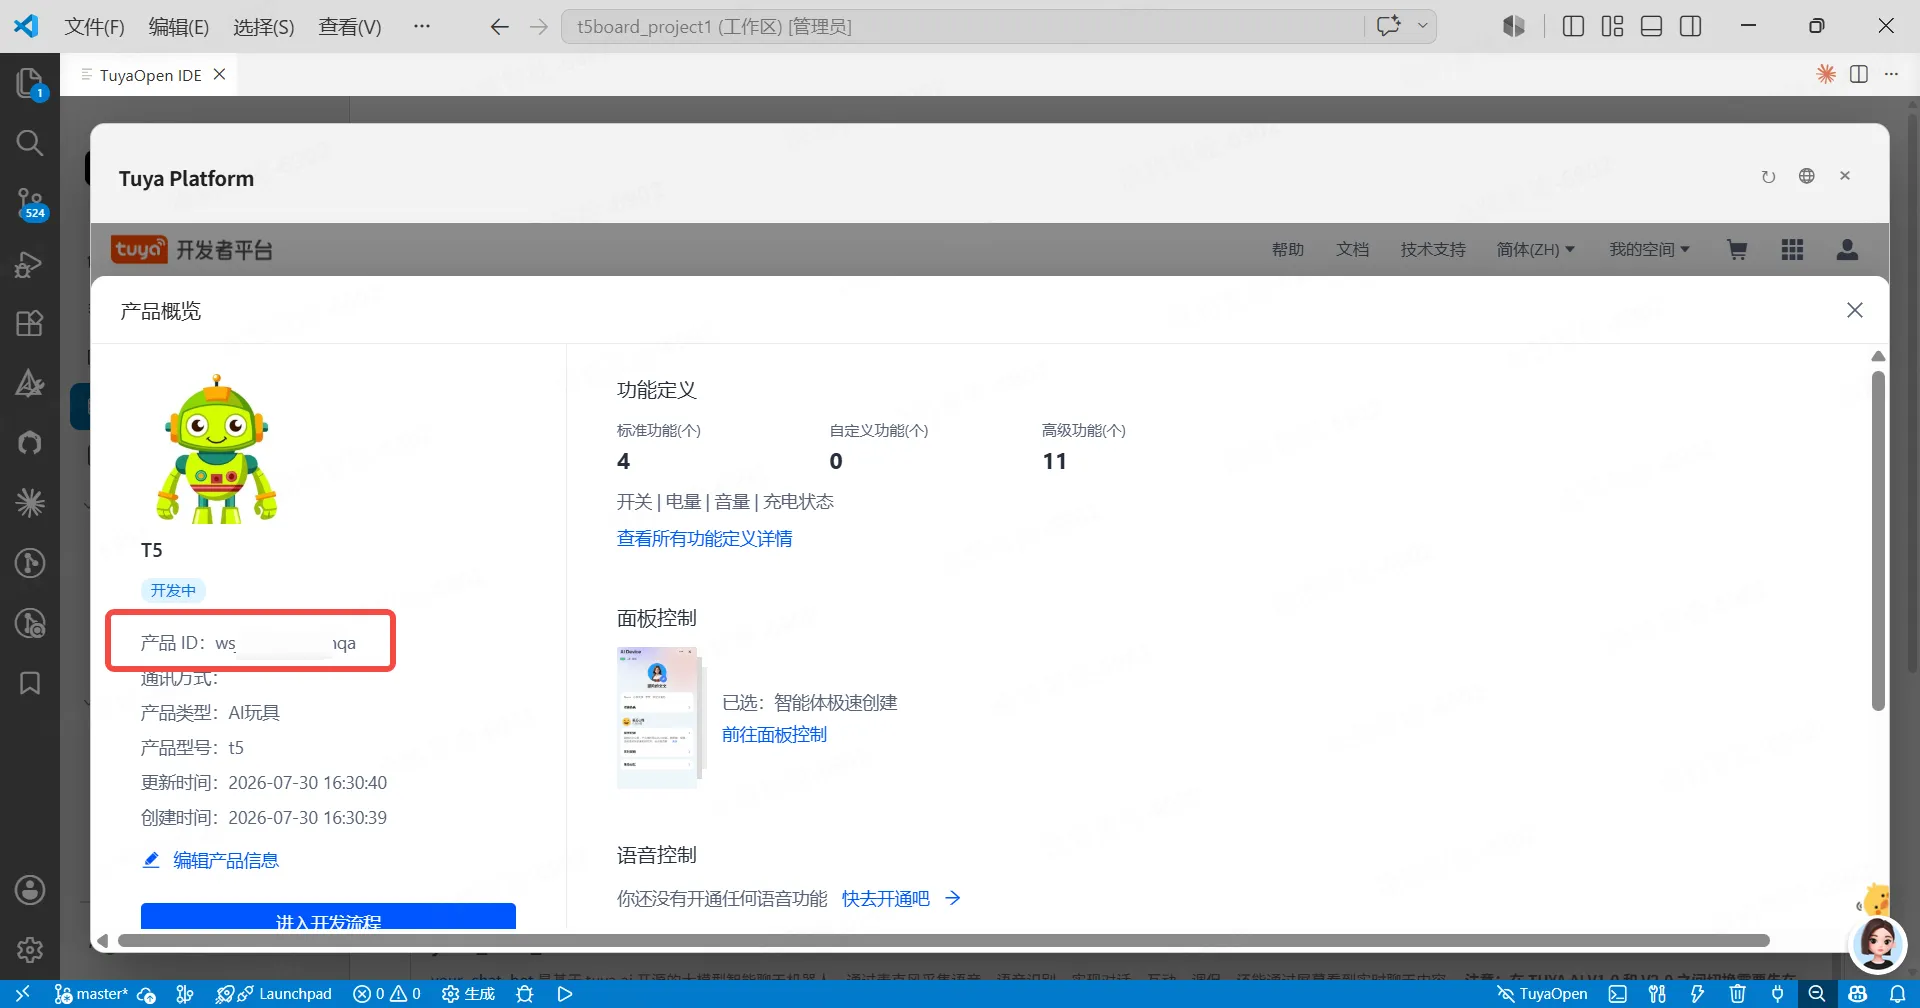
Copy the PID on the left -
Back in TuyaOpen IDE, paste the PID and click Next to create the project.
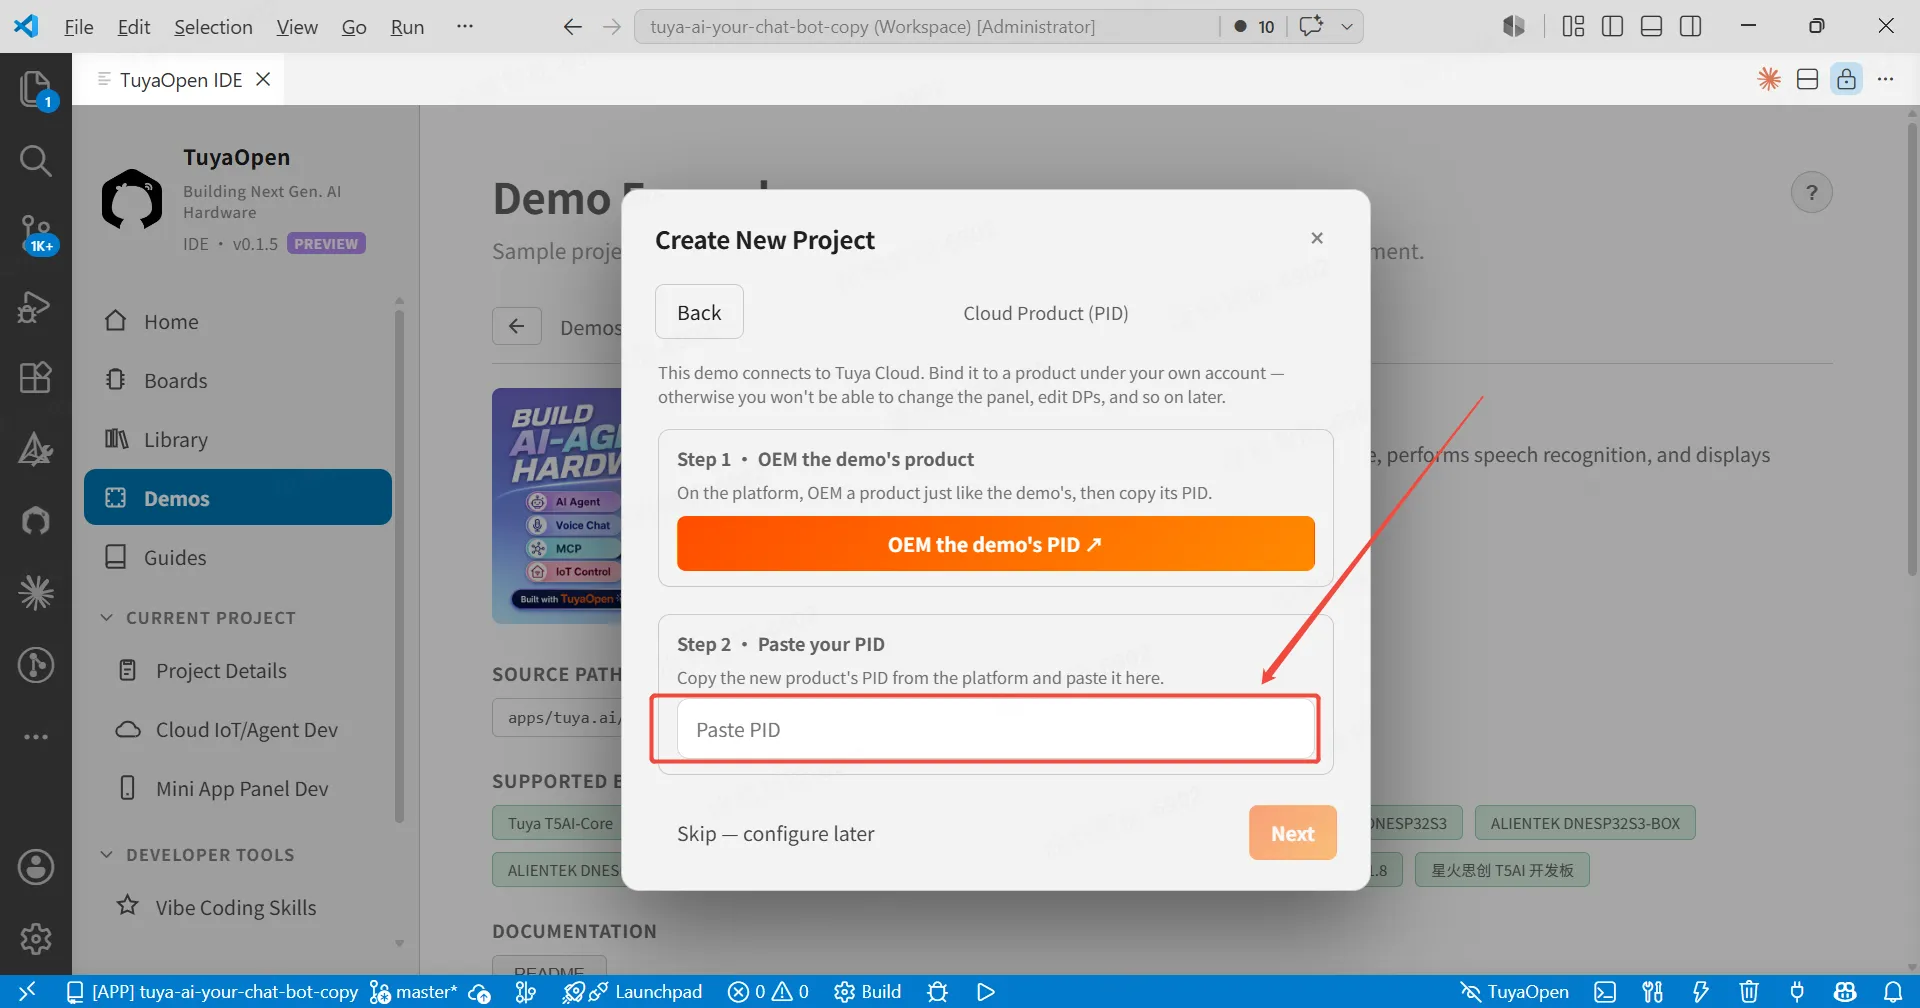
Paste the PID and create the project in the IDE
Why copy? Copying quickly produces a product with the same features as the default PID. For AI + IoT products it also copies the Agent already bound to that product.
Step 2: Build and flash
-
In Cloud IoT/Agent Dev you can see that the cloud product is now bound.
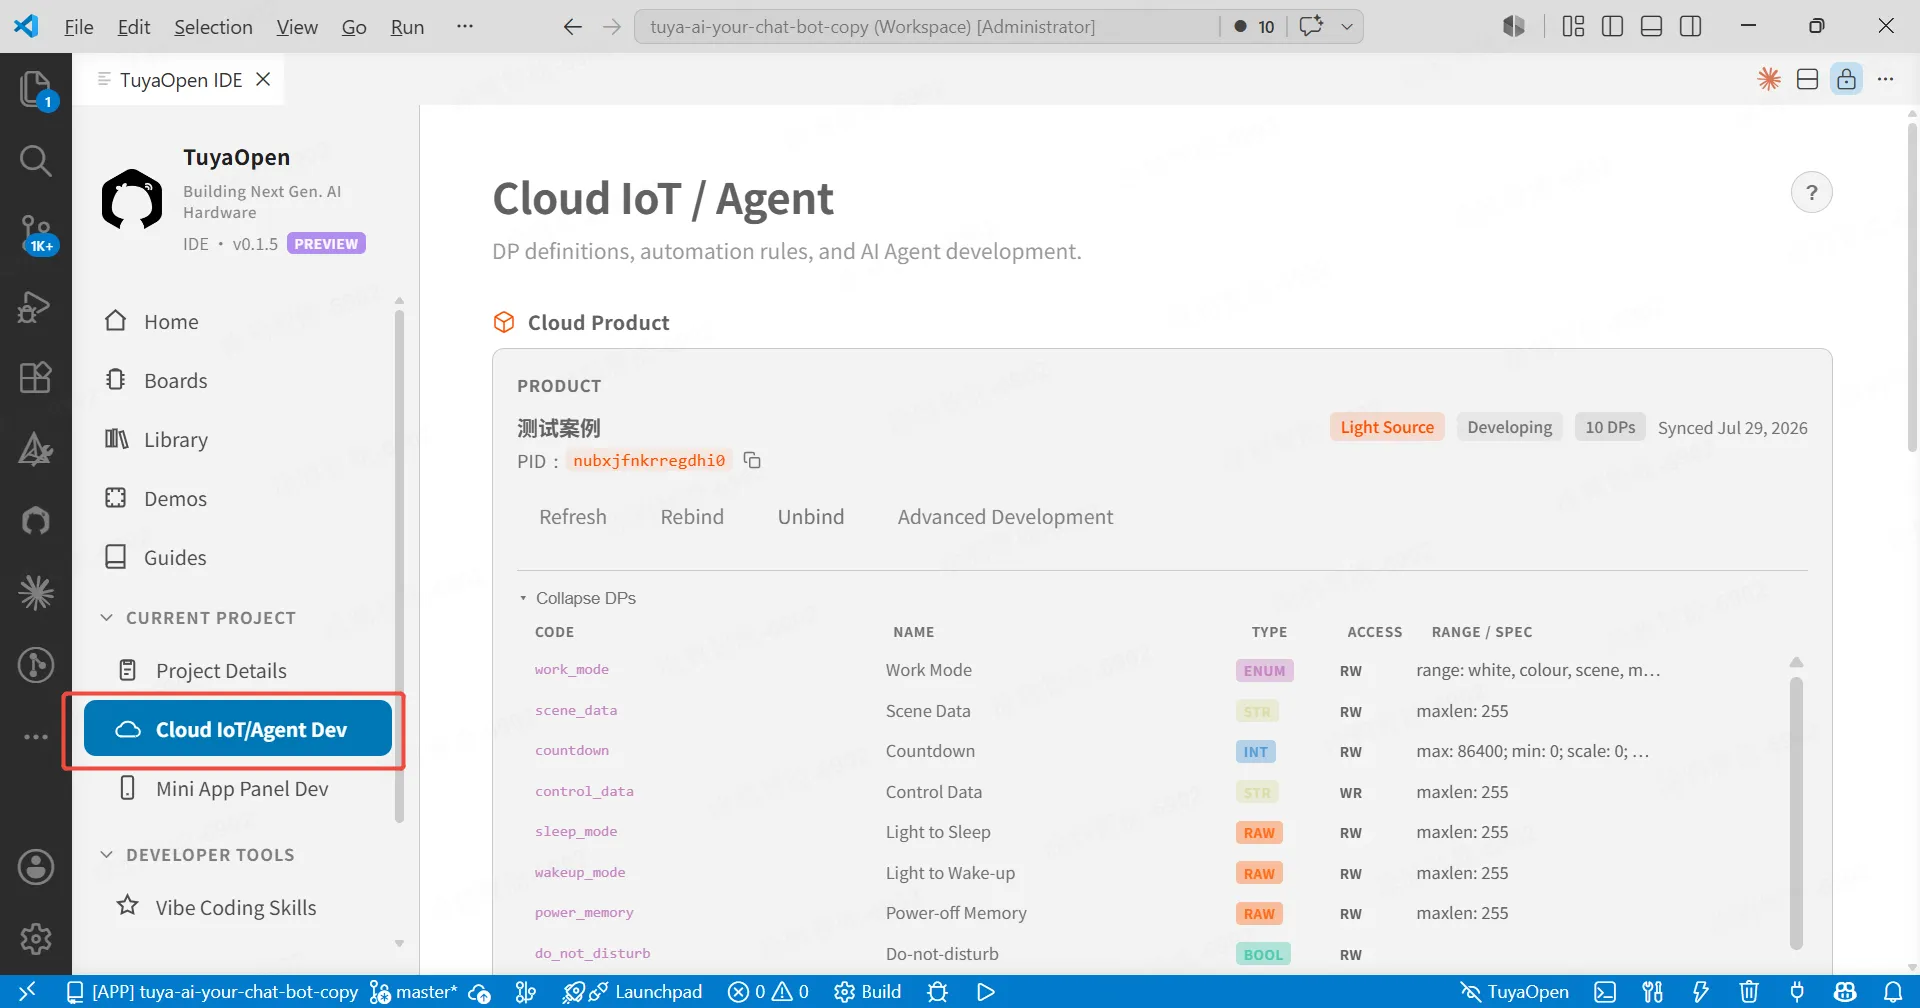
Cloud IoT / Agent page — product bound -
Open Project Details and build and flash. At the bottom of the page you can see the Vibe Coding hardware view and all pin states.
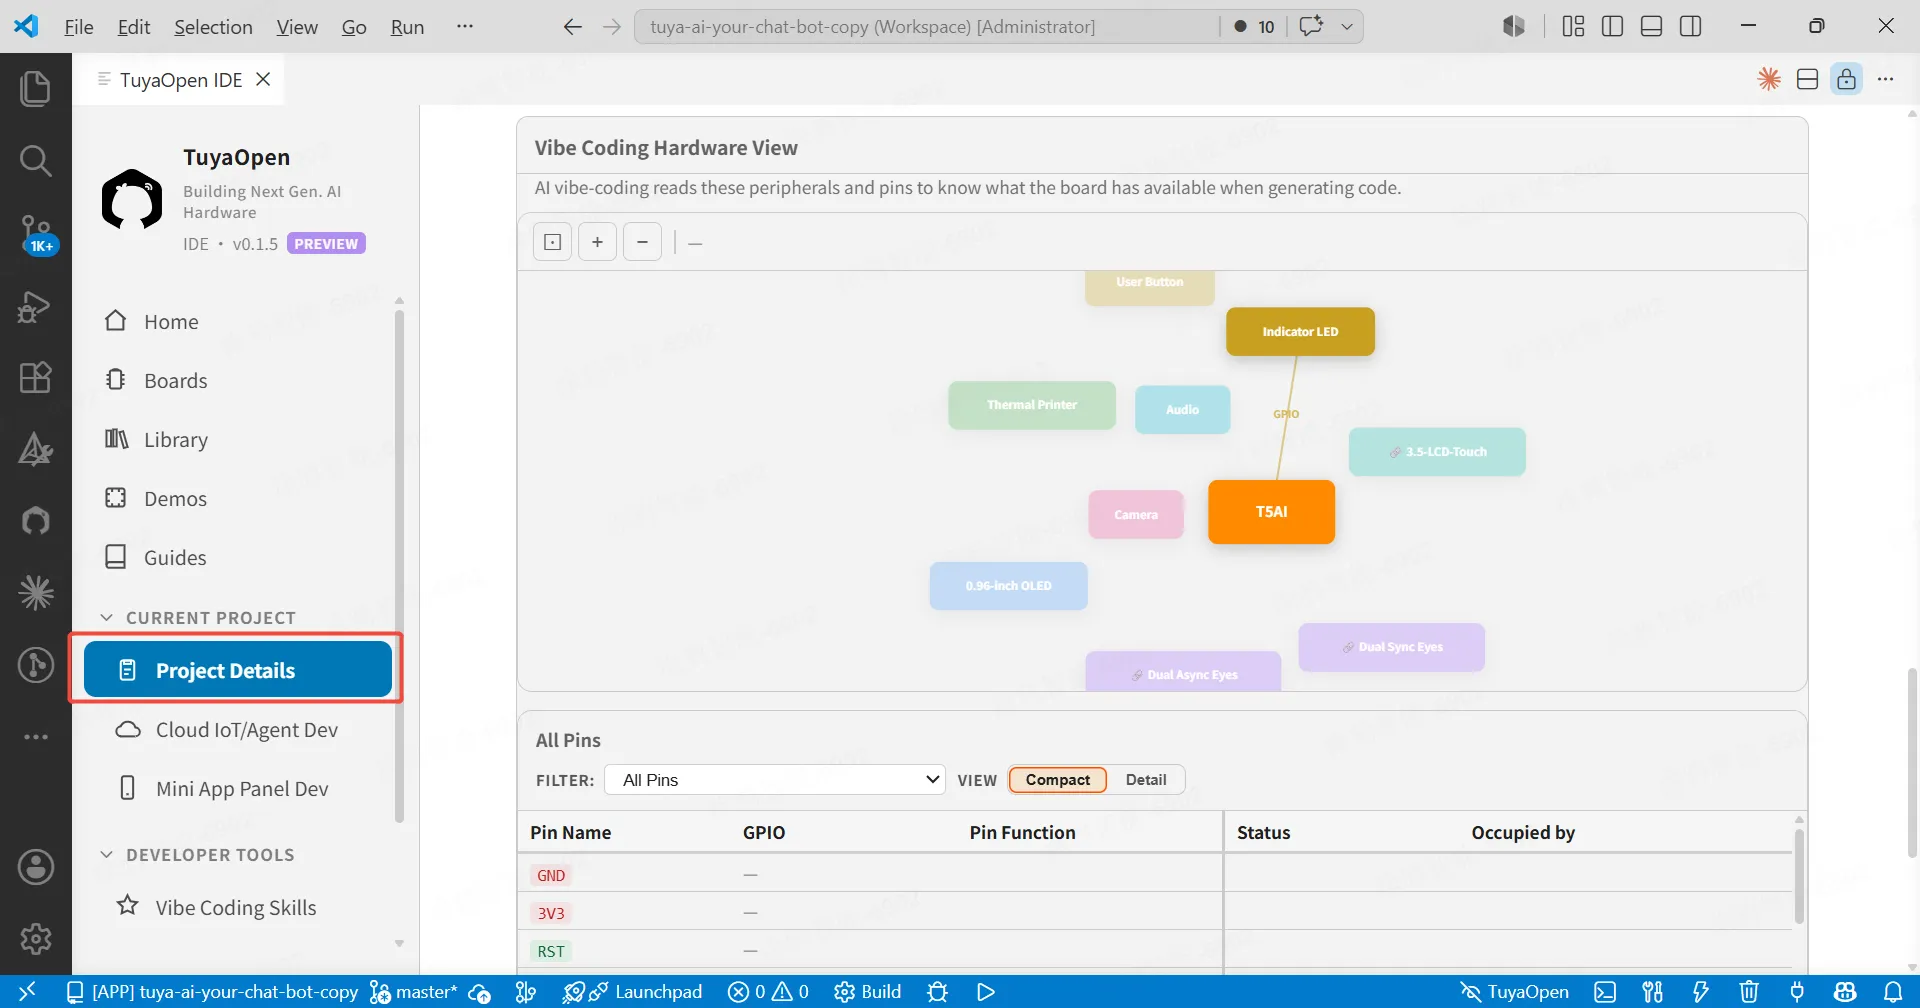
Project Details — Vibe Coding hardware view -
After flashing succeeds, the touch screen lights up.
Step 3: Authorize the device
The license key (UUID + AuthKey) is the credential a device uses to reach the cloud, obtained from the Tuya IoT Platform.
-
For the concept of license keys and how to get them, see TuyaOpen license keys and the authorization guide. For this practice, claim two free license keys first. Back on the Tuya Developer Platform, open AI Products → Product Development to see the OEM example product from step 1.
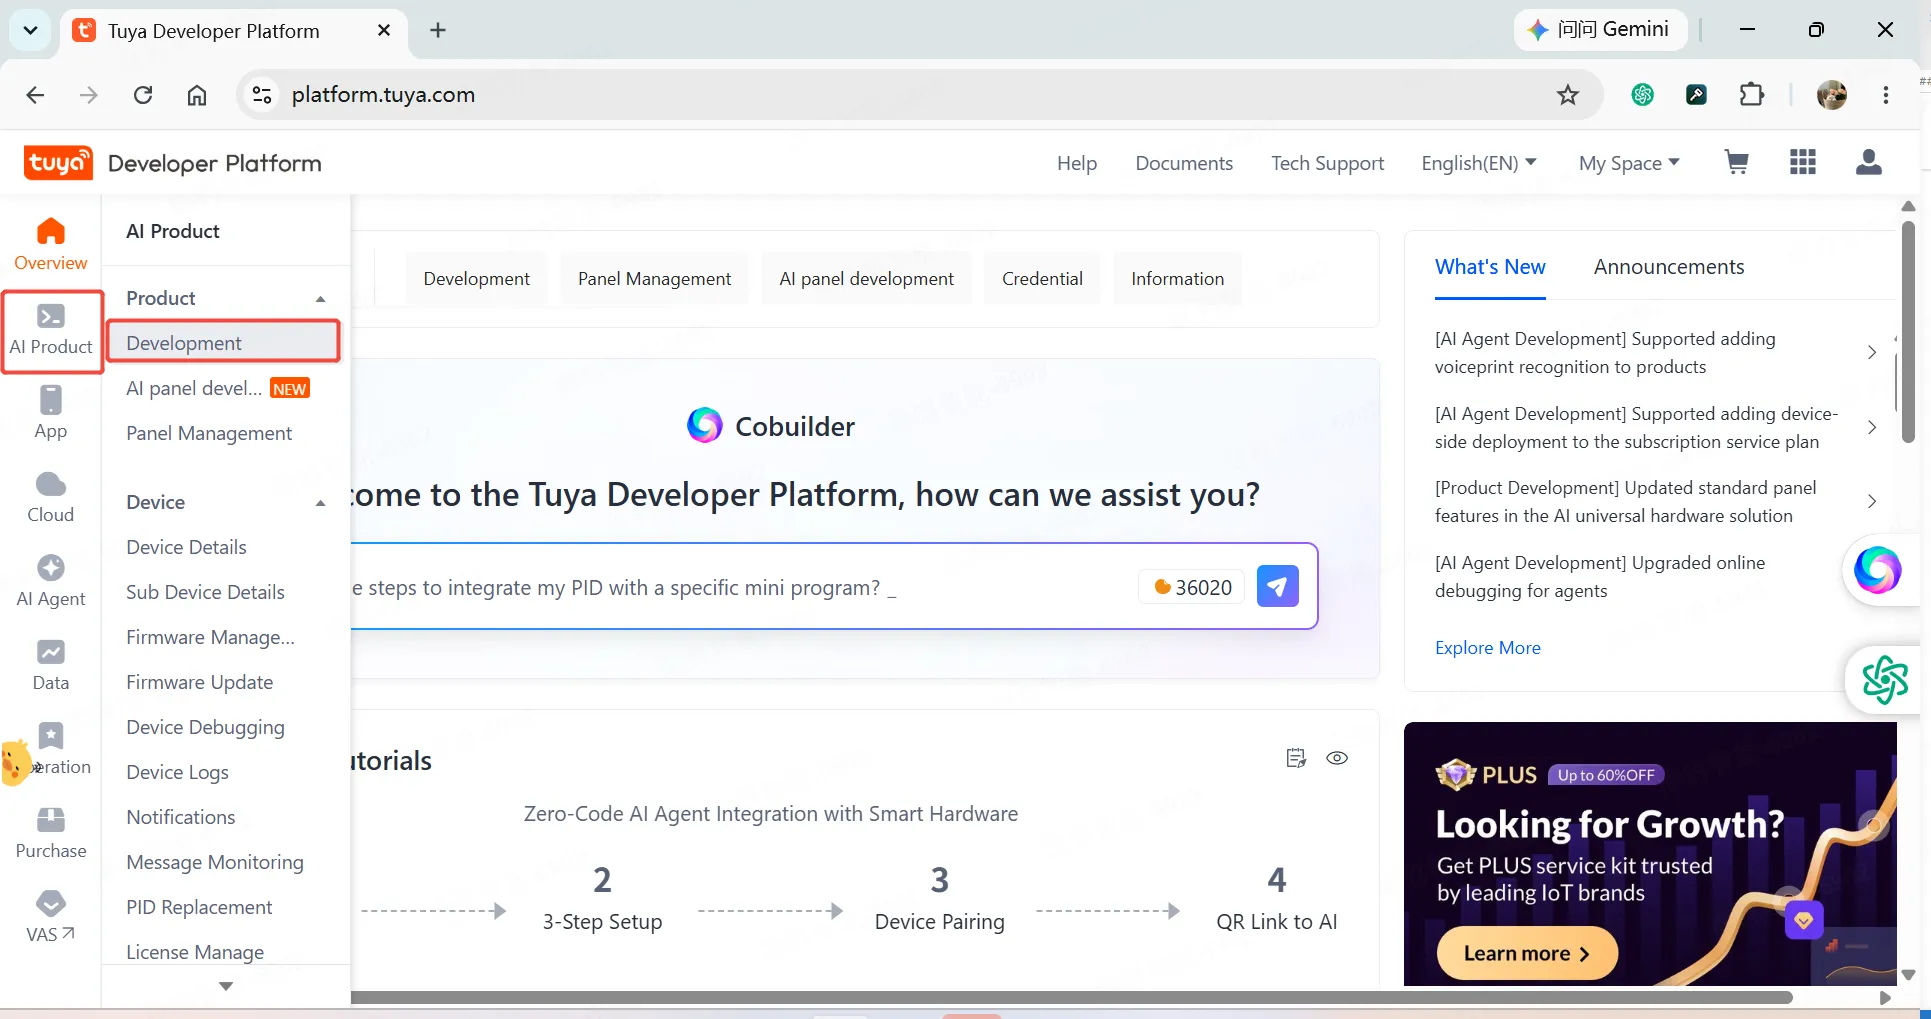
OEM example product in the developer platform -
Click Continue development on the right.

Continue development on the platform -
Under the Hardware Development tab, in the selected cloud-access hardware section, click Get 2 Free Licenses.
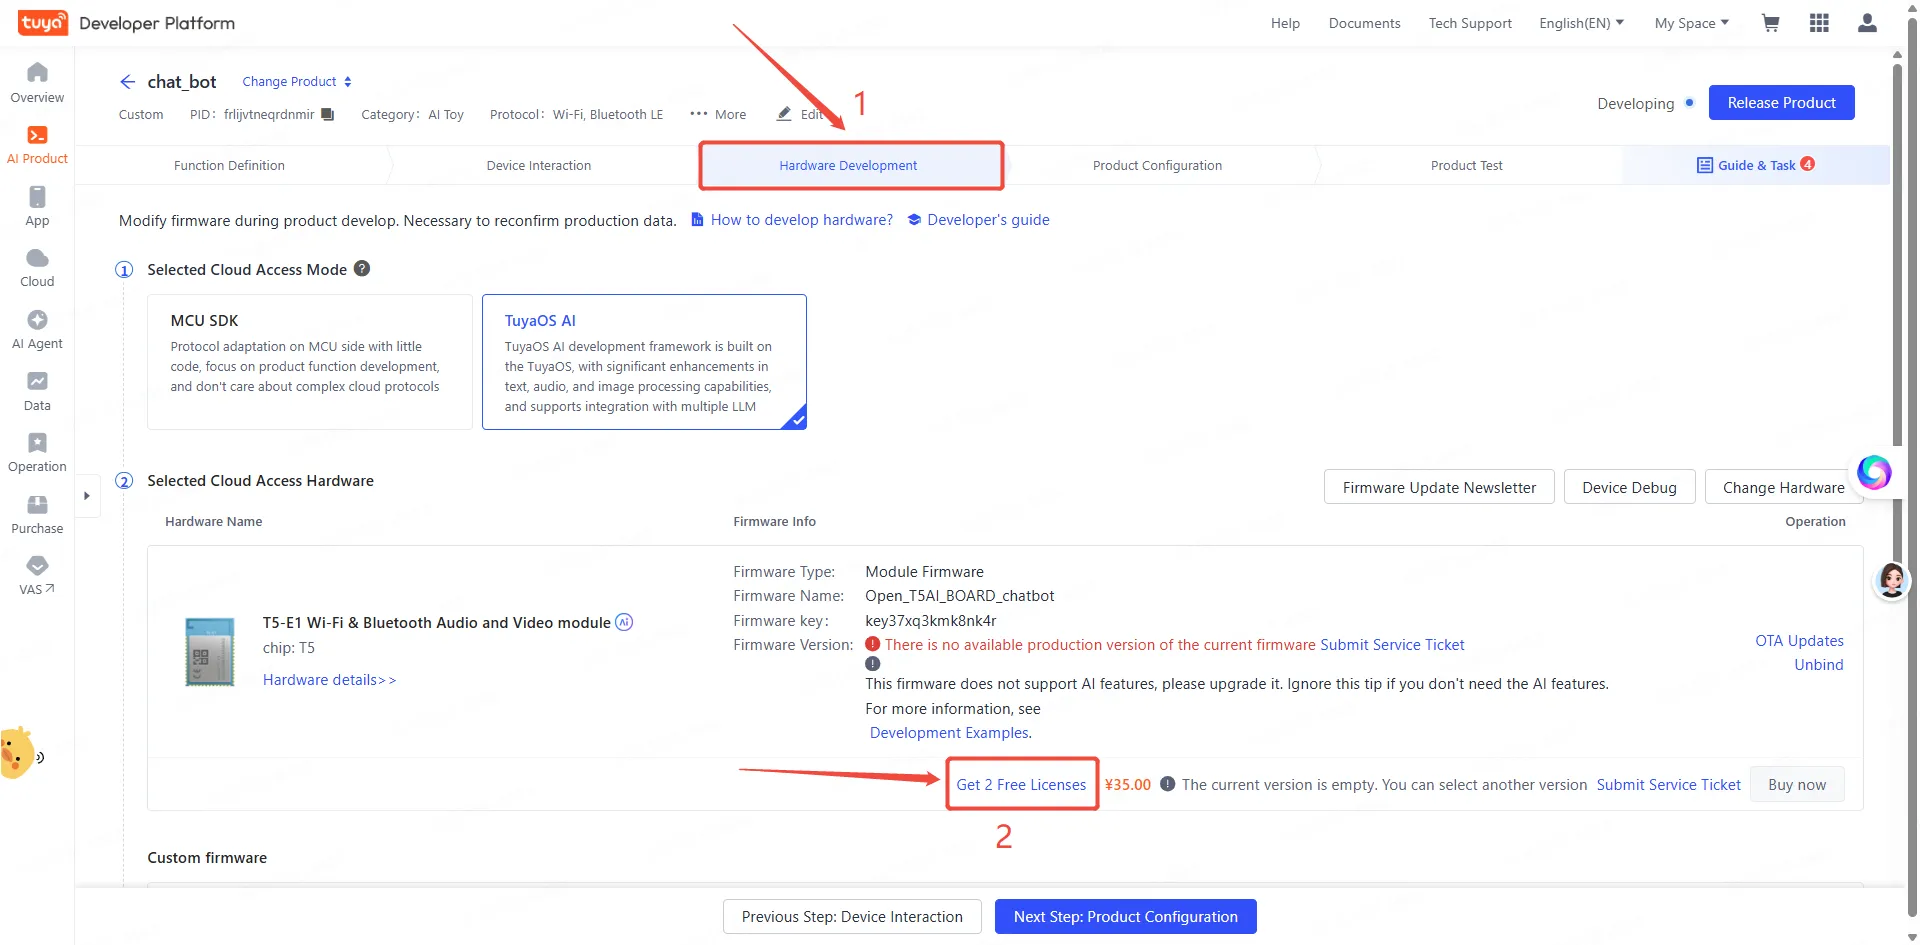
Get 2 Free Licenses button 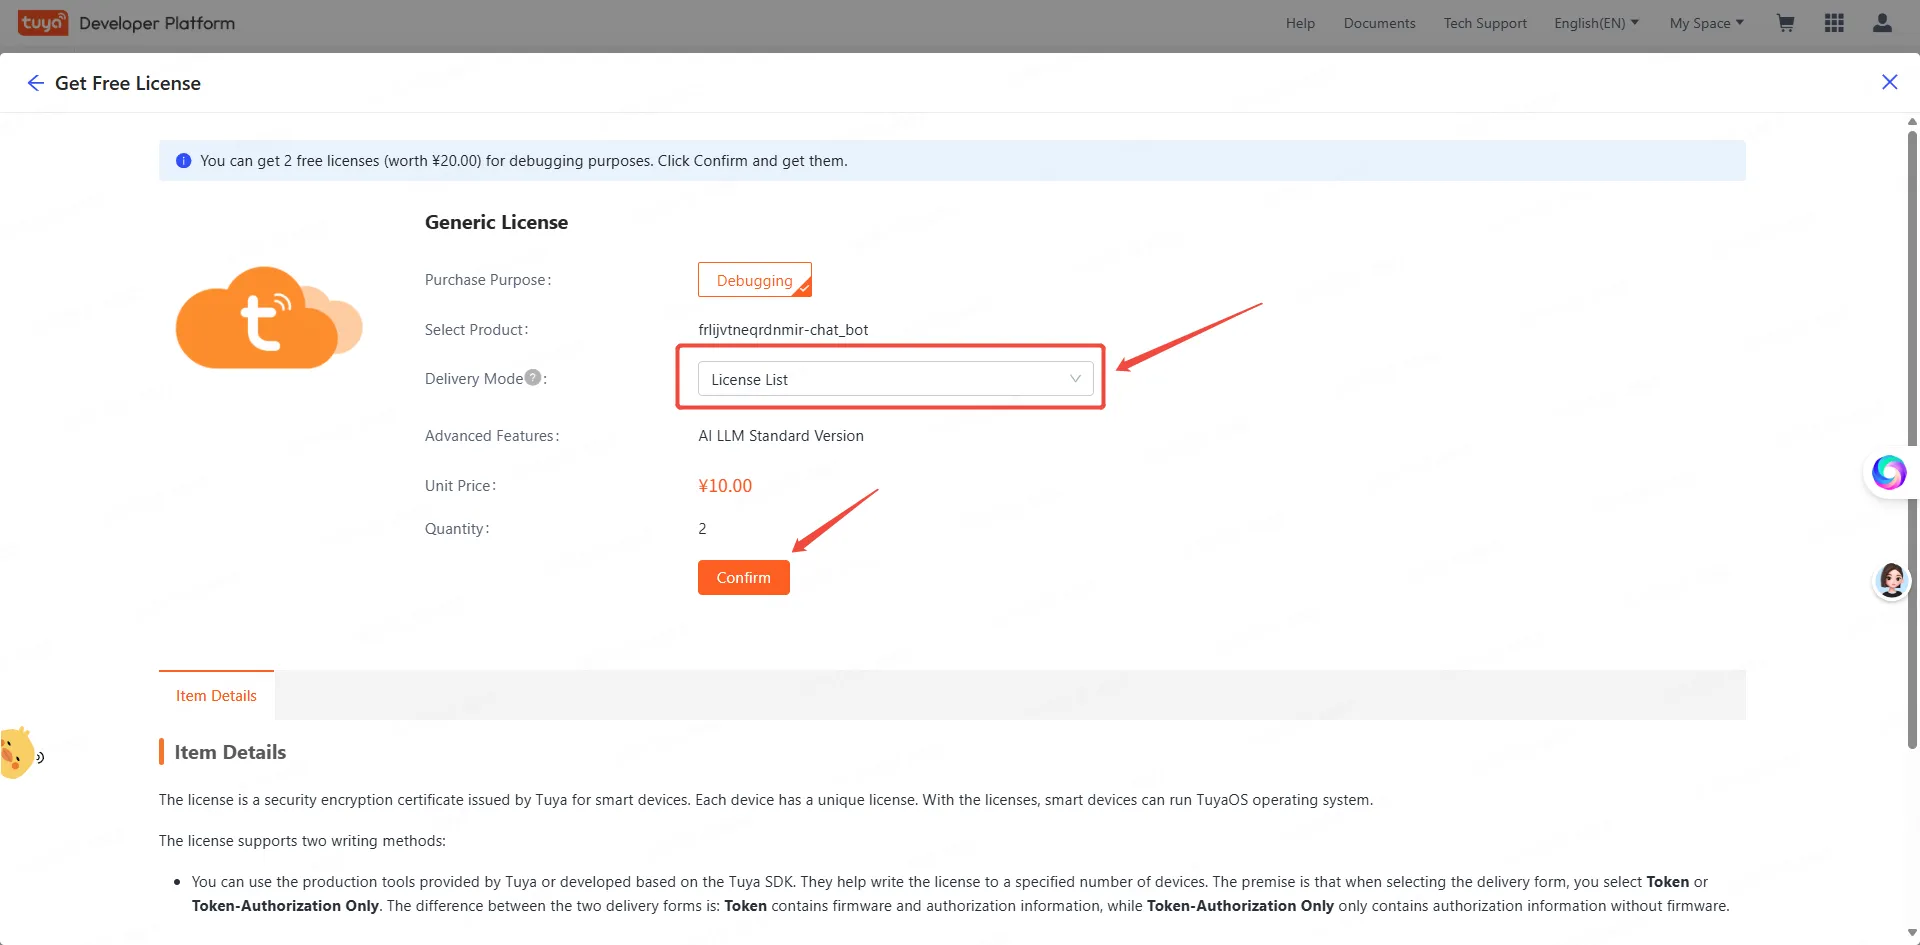
License keys claimed 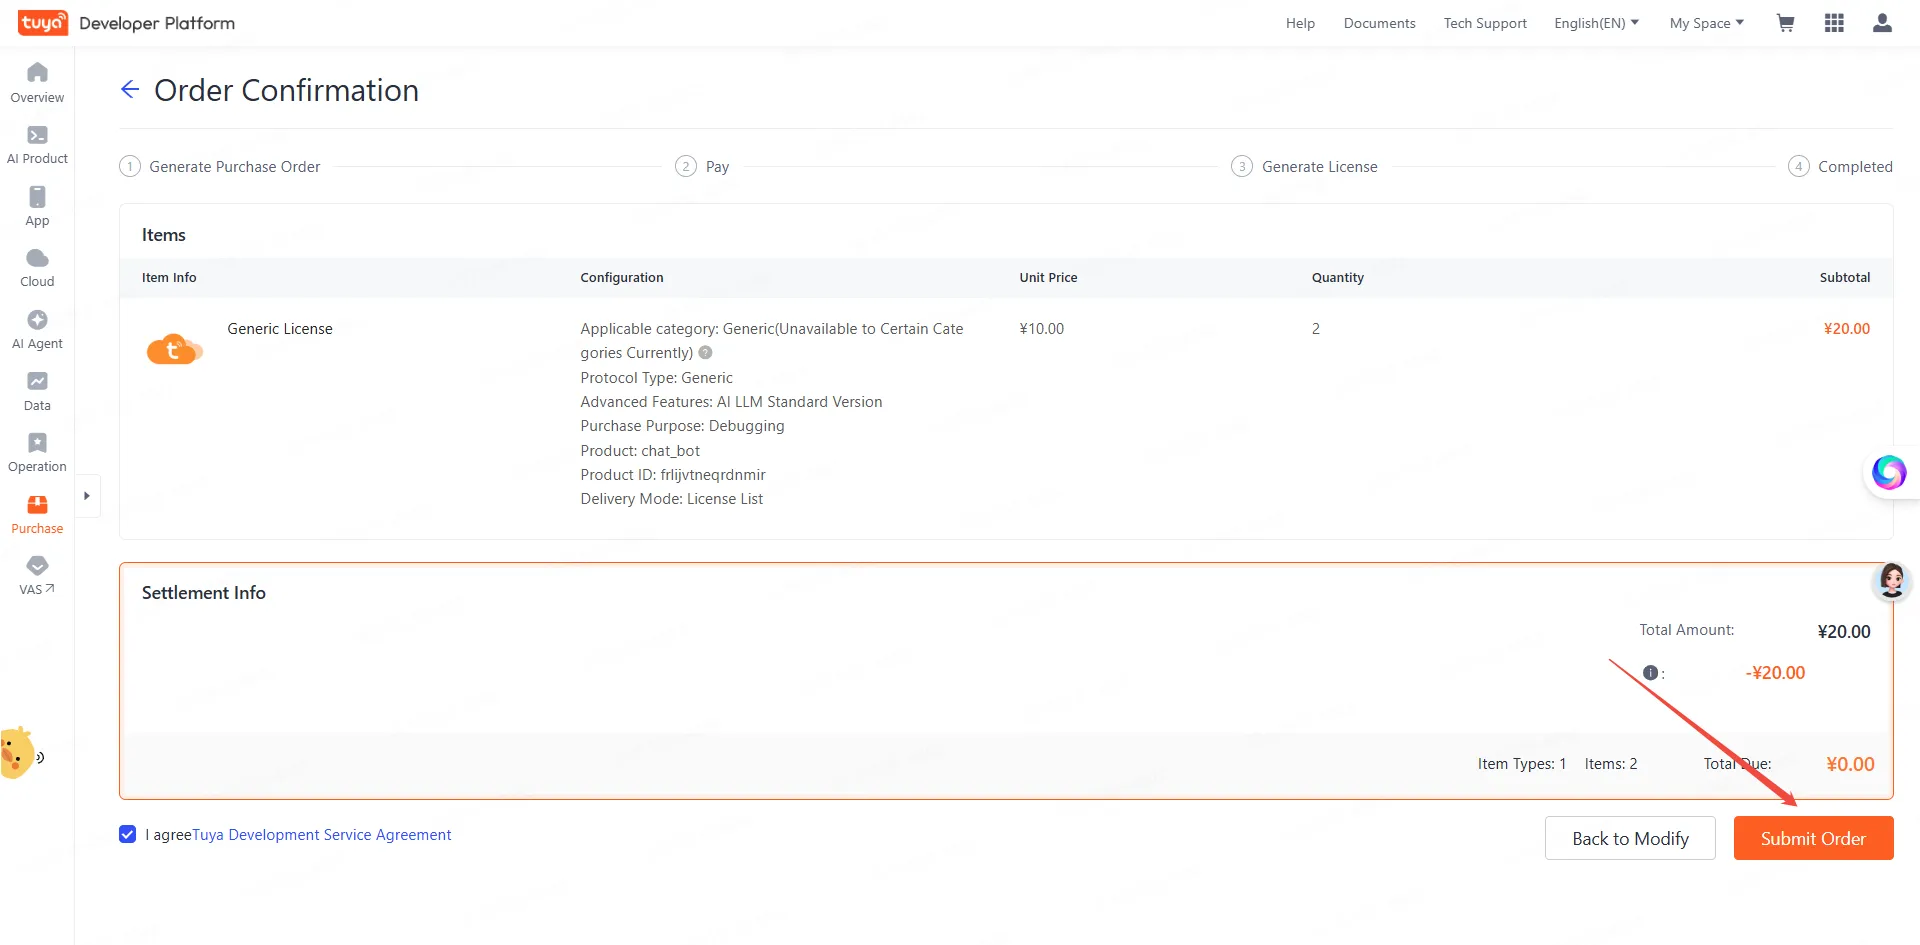
License key list detail -
Download the license key list.
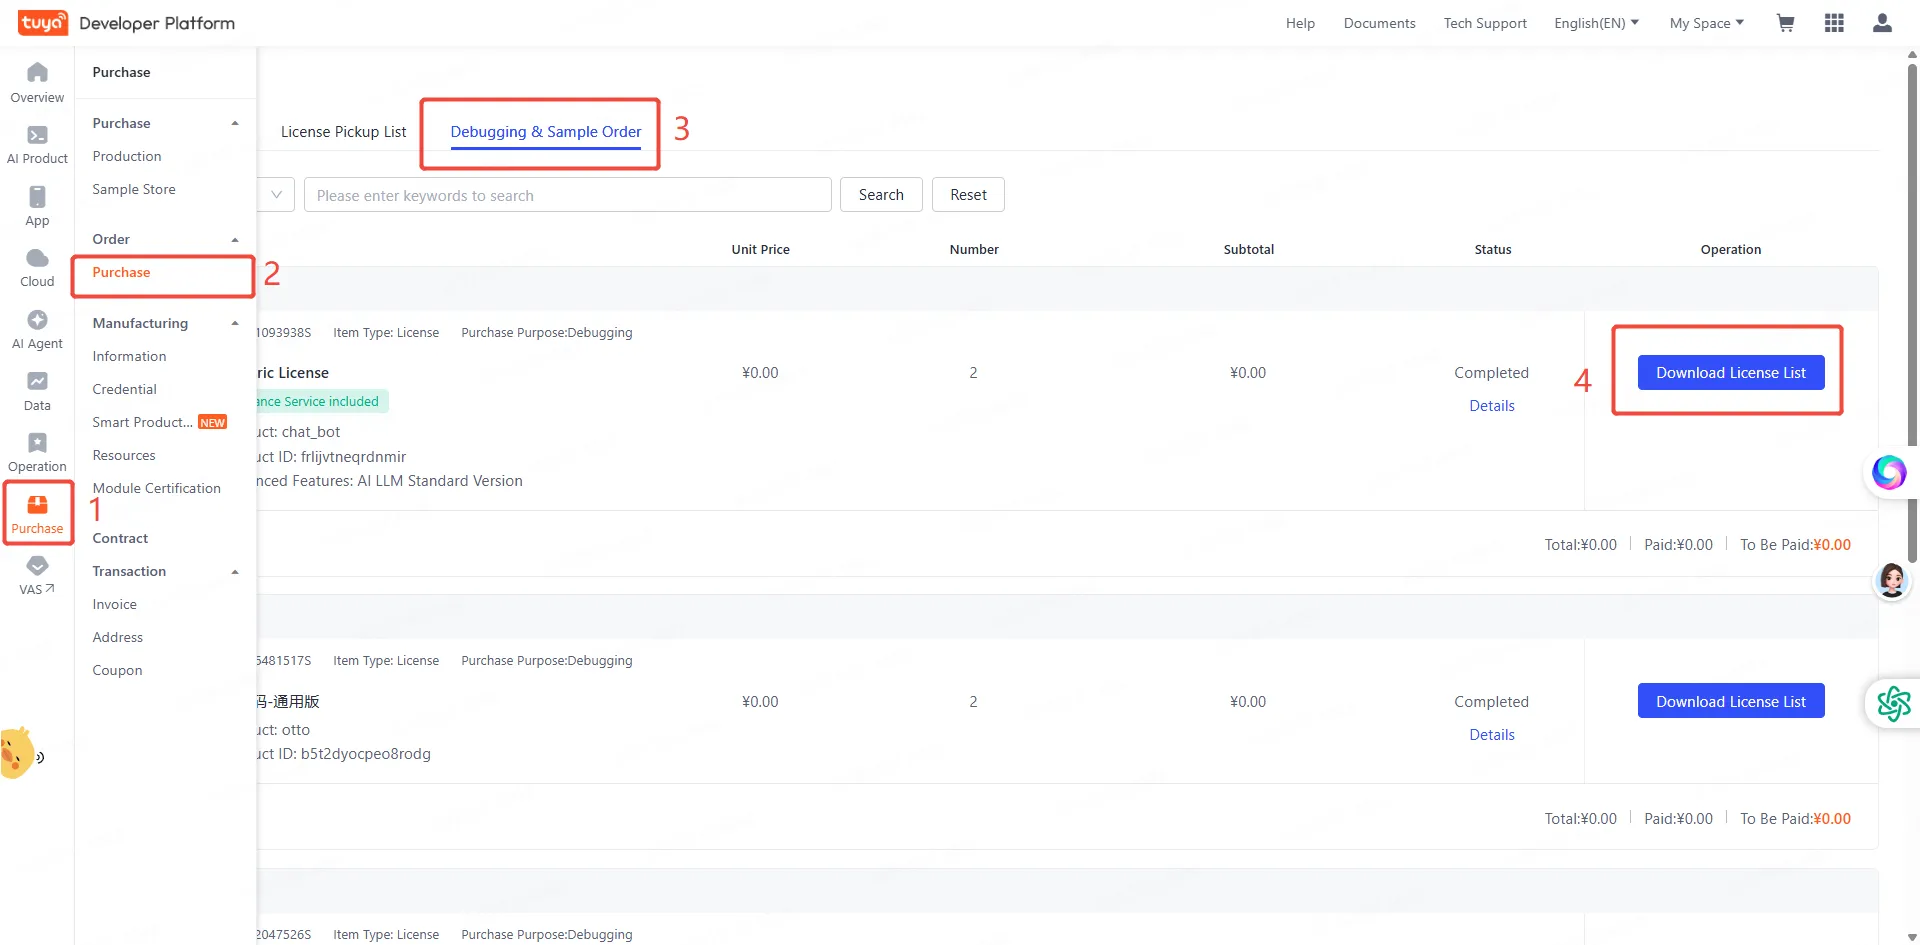
Download the license key list -
Enter the license keys in the IDE's Licenses panel (Key Management).
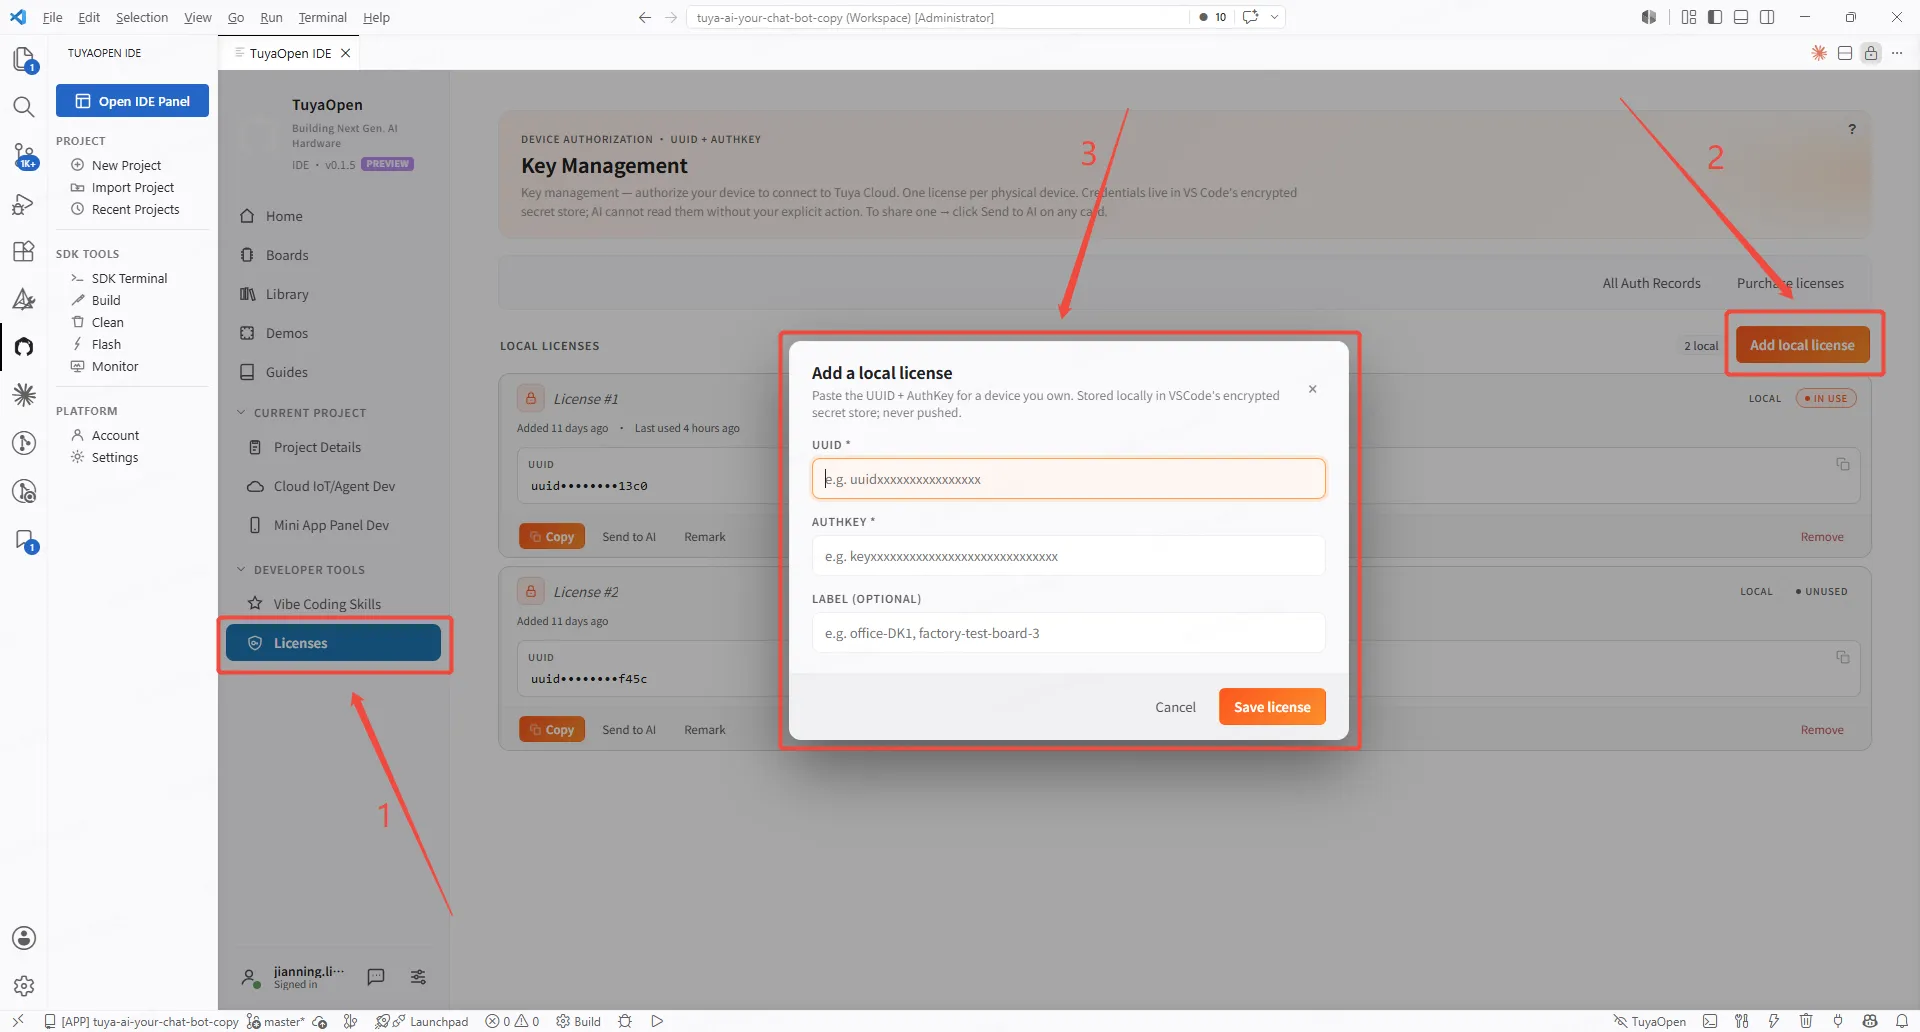
IDE license key manager -
Use AI to write the license key to the device.
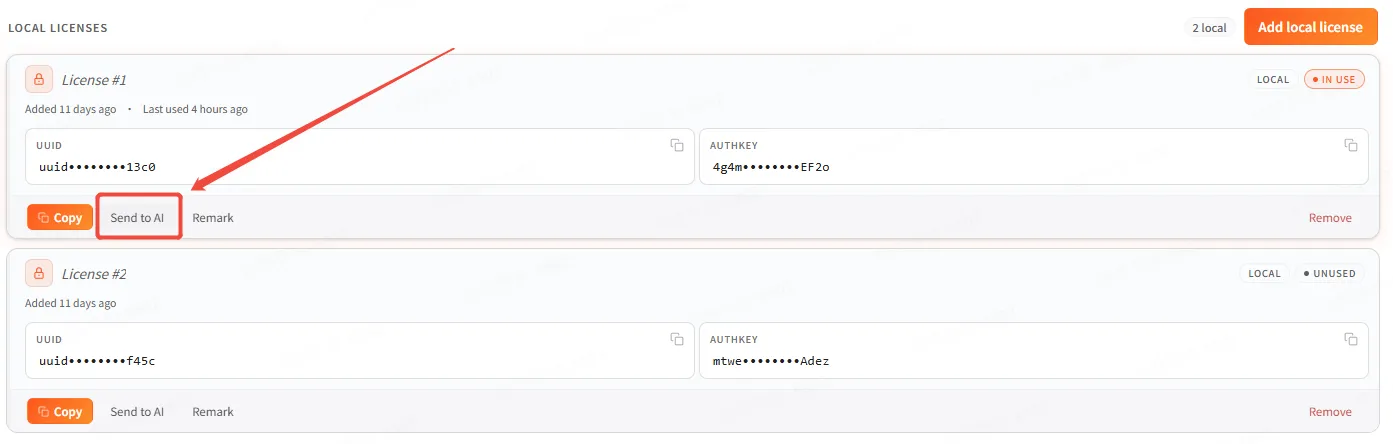
AI writes the license key to the device
Step 4: Pair the device
-
Follow the official device network configuration steps to pair the device.
-
Once paired, you can switch the AI Agent you talk to from the mini-app panel.
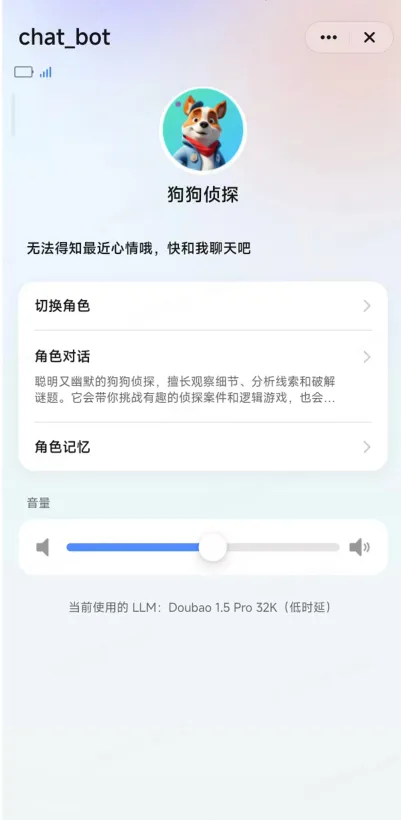
Switch AI Agent from the mini-app panel -
Double-tap the board KEY button to switch conversation mode. The current project supports the wake words "你好涂鸦" / "Hey Tuya".
Going further — building your own Agent (Advanced mode): see the Agent Development Guide.
Next step
You have a cloud-connected device. Continue with Practice 3: mini-app panel — build the phone control panel for it.