Tuya Product Development
Every device that connects to the Tuya Cloud must have a PID (Product ID) — a globally unique identifier assigned by the Tuya IoT Platform. The PID binds your device to a specific set of capabilities: data point (DP) definitions, App control panels, OTA channels, and more. This page creates your own product, gets its PID, and writes that PID into your firmware.
Why Create Your Own Product
TuyaOpen ships with a default PID in its demo configuration so you can get your hardware online quickly. However, this PID belongs to Tuya's official account — it is not under your control, which means:
| Feature | Default PID | Your Own PID |
|---|---|---|
| Device connects to cloud | ✅ | ✅ |
| Add / modify DP functions | ❌ | ✅ |
| Customize App control panel | ❌ | ✅ |
| Configure firmware OTA | ❌ | ✅ |
| Manage device credentials | ❌ | ✅ |
| Mass production & certification | ❌ | ✅ |
Recommendation: Once you have verified basic hardware connectivity, create your own product on the Tuya IoT Platform and write the PID into your firmware. All subsequent development and testing should use your own product.
Create a Product
Prerequisites
- A registered account on the Tuya IoT Platform
Steps
Step 1 — Open the Create Product page
After logging in, click Create Product on the console home page.

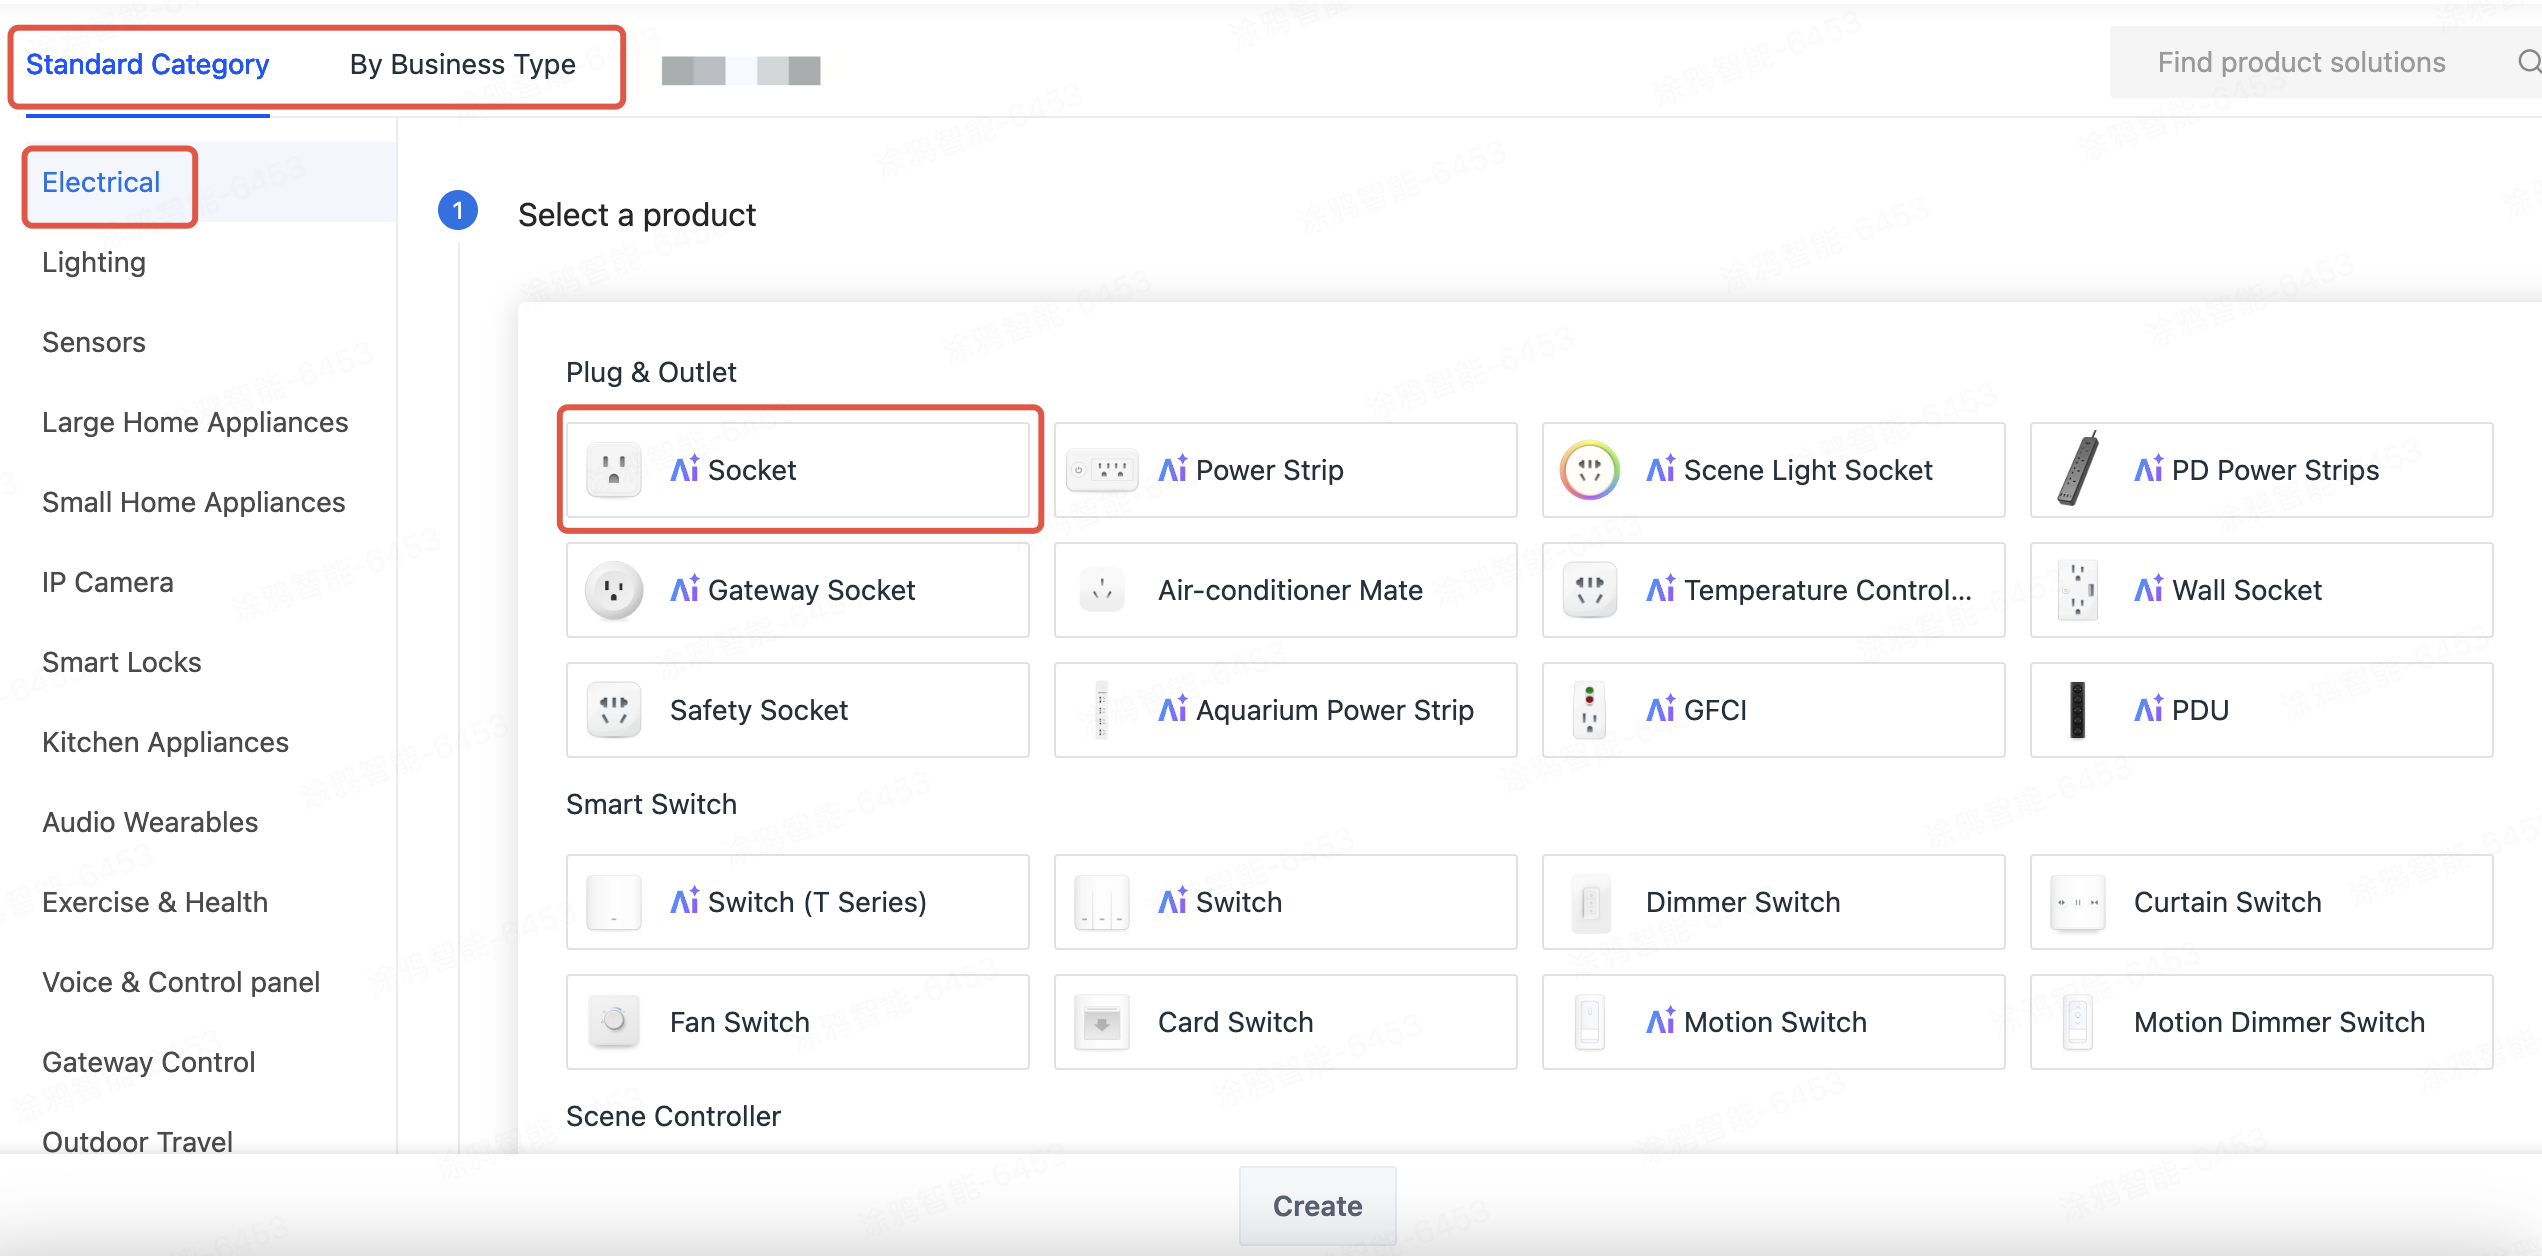
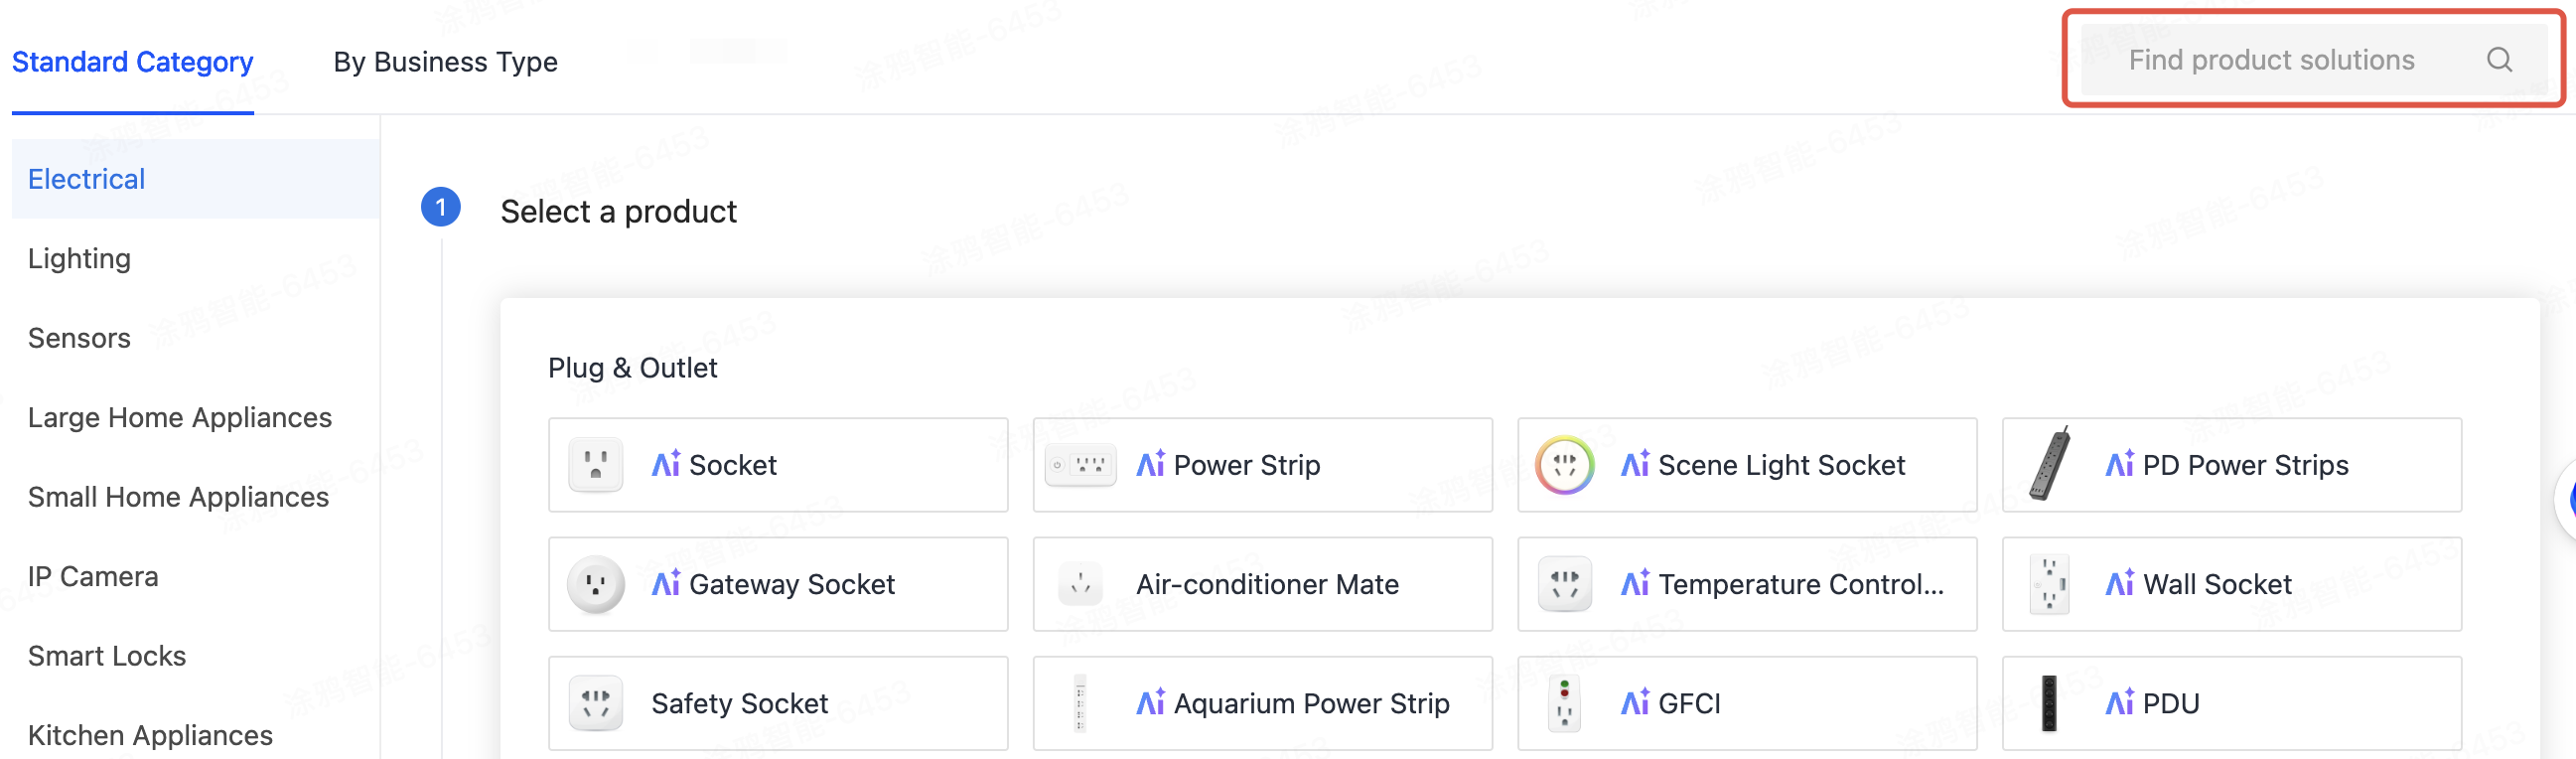
Step 2 — Select a product category
Browse the standard category tree or use the search box to find the category that matches your product.
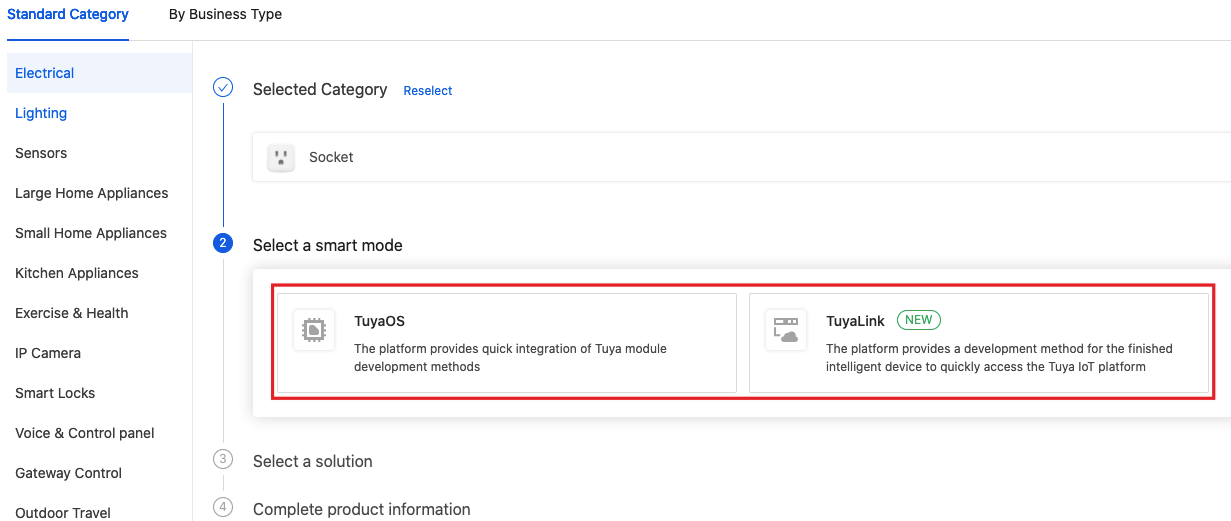
Step 3 — Select the smart solution type
Choose Product Development.
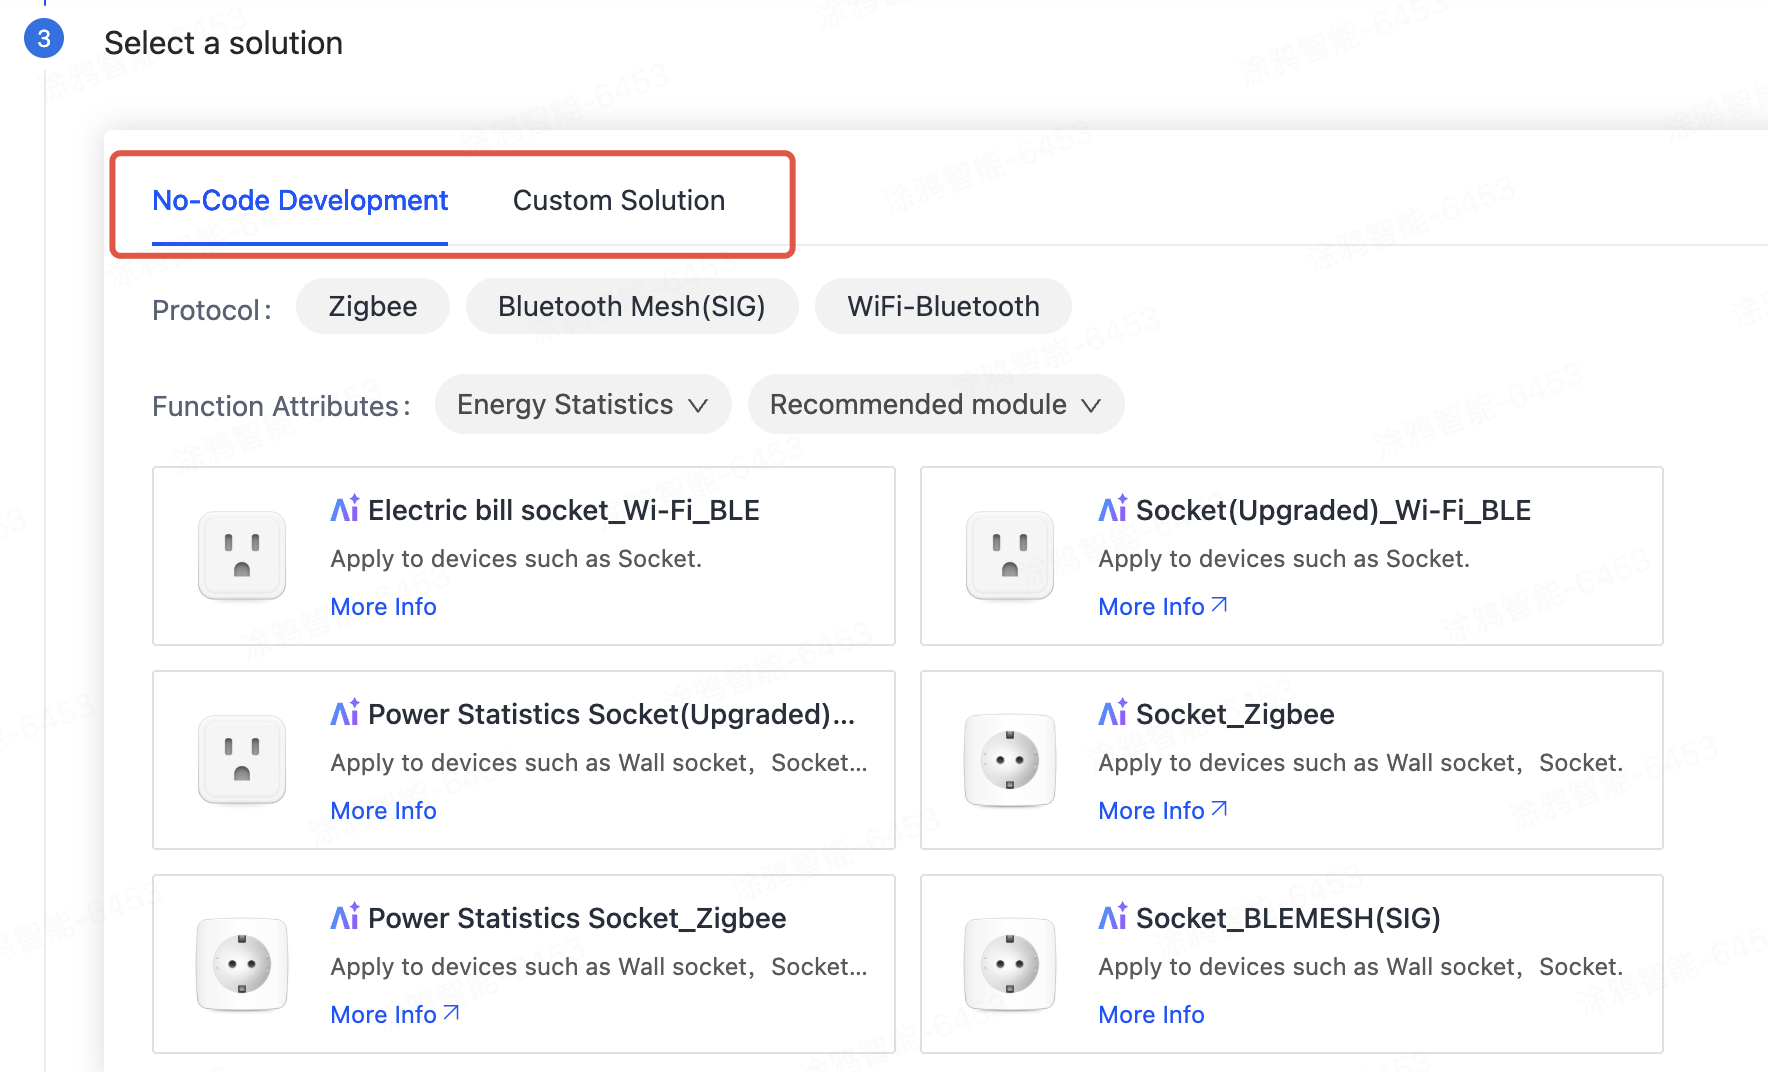
Step 4 — Select the product solution
Choose Custom Solution. This is the appropriate choice for TuyaOpen, where you write your own application logic and need maximum flexibility.
Step 5 — Fill in product information
| Field | Notes |
|---|---|
| Product Name | Suggested format: Brand + Product + Module, e.g. MyBrand Smart Plug T5AI |
| Communication Protocol | Match your hardware — Wi-Fi, Ethernet, etc. |
| Power Type | Select Powered for mains-powered devices |
| Other fields | Optional; can be filled in later |
Click Create Product. The platform generates a unique PID for your product.
Step 6 — Copy your PID
Open the product detail page. The Product ID (PID) is shown in the Hardware Development or Basic Information section.
A PID is an alphanumeric string, for example kh0hig0fdtlzndvg.
Write the PID into Firmware
Option 1 — Via menuconfig (recommended)
Run the following command in your application project root directory:
tos.py config menu
Find the TUYA_PRODUCT_ID option, enter your PID, and save.
Option 2 — Edit the config file directly
Edit your_chat_bot/app_default.config (or the config file for your app):
CONFIG_TUYA_PRODUCT_ID="your_pid_here"
Rebuild and re-flash after saving.
Any change to a .config file requires a clean build before it takes effect on the device: run tos.py clean -f first, then rebuild.
Next Steps
After creating your product, the full development workflow is:
- Function Definition — Define the product's data points (DPs) on the Tuya IoT Platform to describe device capabilities (Function Definition)
- Device Panel — Configure or customize the App control panel (Device Panel)
- Hardware & Embedded Development — Design the hardware circuit and develop firmware with TuyaOpen
- Verify Firmware Upgrade — Verify the device OTA upgrade functionality (Verify Firmware Upgrade)
- Product Configuration — Set up cloud parameters, schedules, automations, and other product features (Product Configuration)
- Product Testing — Use Tuya platform tools to verify device connectivity, functionality, and stability (Product Testing)