Pair your device with the SmartLife app
Put your flashed, authorized device into pairing mode and register it to the Tuya IoT Cloud from the SmartLife app — the last step to a device you can control from your phone.
What you get at the end
Your device is registered to the Tuya IoT Cloud and controllable from the SmartLife app — the finish line of the first-device path.
- Pairing connects and registers the device to the cloud, so you can control it remotely.
- The device must already be flashed with firmware AND authorized (UUID + AuthKey written).
- Some Tuya modules only support the 2.4 GHz Wi-Fi band — check your chip/module’s WiFi capabilities and your router settings.
Prerequisites
Before you pair, confirm each of these:
- The SmartLife app installed on your phone (see Get the app below).
- A device that has been flashed with firmware and authorized — see Use your license key if not.
- The device in pairing mode (see Enter pairing mode).
Get the SmartLife app
Install SmartLife on your phone, then register and log in. Scan the QR code or tap your store below.

The QR code opens the official SmartLife download page, which routes you to the right store for your phone.
Enter pairing mode
On first boot
If your application uses the Tuya IoT Cloud (like switch_demo or your_chat_bot), a freshly flashed and authorized device enters pairing mode automatically on its first boot — no trigger needed. Watch the serial log to confirm it is ready.
If it is not in pairing mode
If the device has paired before, lost its network config, or is not showing the pairing log, reset the pairing and network configuration with one of these methods:
What the log shows when it is ready
Whichever path you took, the device is in pairing mode when you see this in the serial log:
[01-01 00:00:01 ty D][tuya_iot.c:774] STATE_START
[01-01 00:00:01 ty I][tuya_iot.c:792] Activation data read fail, go activation mode...
[01-01 00:00:01 ty D][tuya_main.c:143] Tuya Event ID:1(TUYA_EVENT_BIND_START)
Method 1 — Add the device in the app (common)
With the device in pairing mode, add it from the SmartLife app:
- On the All Devices page, tap Add Device or the + in the top right.
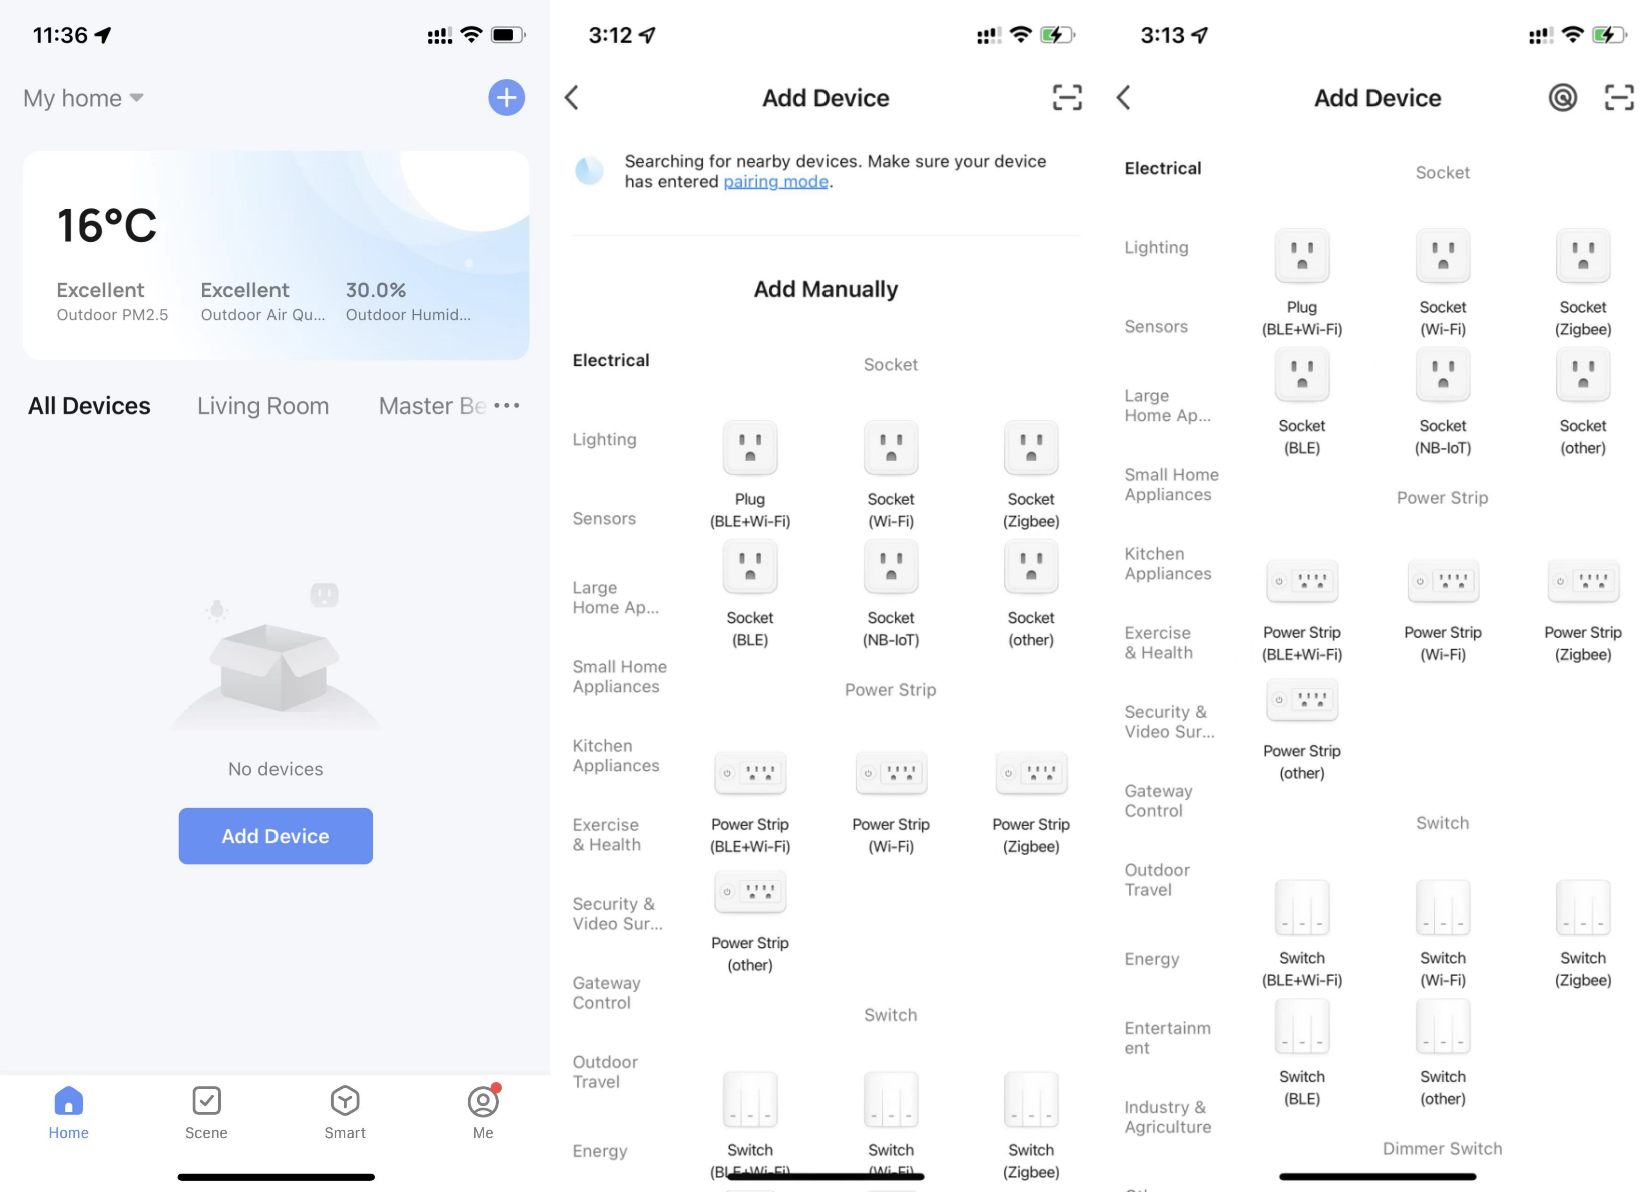
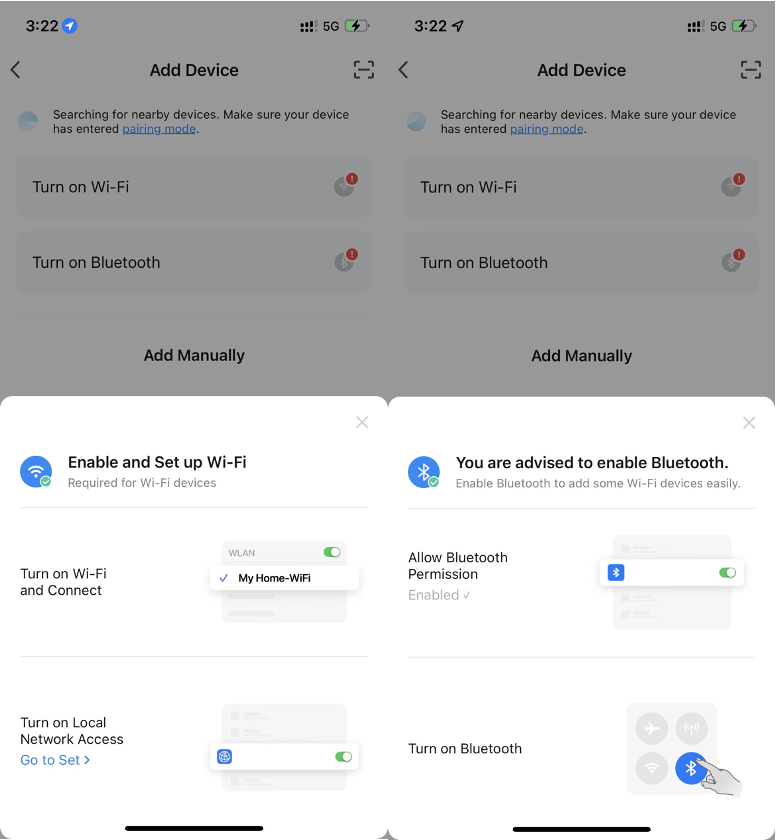
- Grant Wi-Fi and Bluetooth permissions when prompted — without them, nearby devices cannot be discovered.
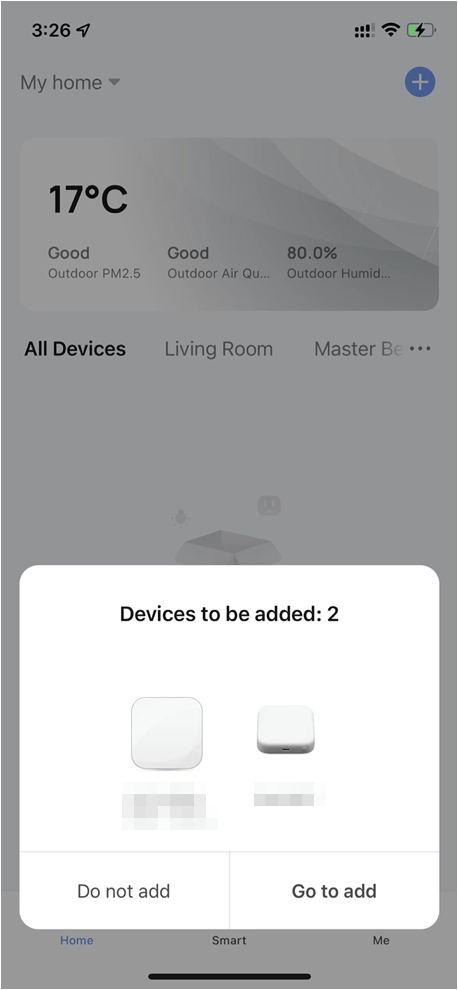
- Tap Go to add when the device appears on the Home or Add Device page, then follow the app prompts to finish pairing.
Some Tuya modules only support the 2.4 GHz Wi-Fi band. If pairing fails, check your chip/module’s WiFi capabilities and confirm your router is serving 2.4 GHz (or split the bands) during pairing.
Method 2 — Scan to pair (QR)
Some TuyaOpen devices — commonly Linux devices like Raspberry Pi — pair by scanning a QR code the device prints to its terminal.
- Make sure the device is in pairing mode and a QR code is shown in the terminal/log.
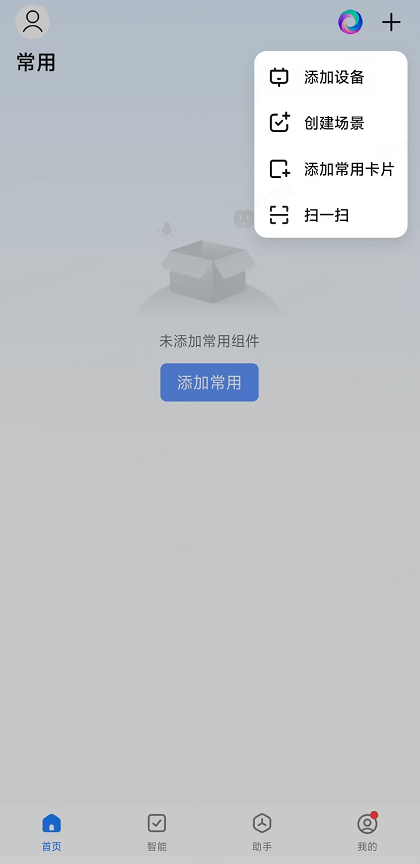
- Open the SmartLife app and tap + in the top right.
- Select Scan and point the camera at the QR code the device printed.
- Follow the on-screen instructions to finish pairing.
Troubleshooting
The authorization information was not written. Re-write a TuyaOpen (not TuyaOS) UUID + AuthKey with tyutool, then re-enter pairing mode. See Use your license key.
Confirm Wi-Fi and Bluetooth permissions are granted to SmartLife, the device is in pairing mode (look for TUYA_EVENT_BIND_START in the log), and your phone is on the same network band the device supports.
Some Tuya modules only support 2.4 GHz. Check your chip/module’s WiFi capabilities, and confirm the router is serving a supported band — split or disable 5 GHz during pairing if needed.
Flashing firmware is not the same as authorizing. The device needs a UUID + AuthKey written separately — see Get a license key and Use your license key before pairing.
Reset the pairing and network configuration first: power-cycle 3 times within 5 seconds (~1 s apart) on embedded modules, or delete the tuyadb folder on a Raspberry Pi / Linux host, then reboot.
You did it — browse more learn →Full pairing docs →Use your license key →