Mini-app panel
Build a device control panel that runs in the phone app and cooperates with the firmware over DP (Data Points) — create, bind, preview, and publish.
This practice turns to the interface — you use Tuya mini-app technology to build a device control panel that runs inside the phone app and talks to the firmware through DP (Data Points). The two sides cooperate over DP: the firmware defines and reports DPs, and the panel reads and sends DPs.
How firmware and panel cooperate over DP
Firmware and panel are two independent programs that communicate through DP:
- Firmware side: define DPs in TuyaOpen IDE (for example
switch_led) and report them. - Panel side: use the mini-app API —
publishDpsto send,onDpDataChangeto listen — to control the device.
Prerequisite: at least one device that can reach the Tuya Cloud. Build one first in Practice 2.
Step 1: Account and product
-
Open Mini App Panel Dev and follow the three steps on the right.
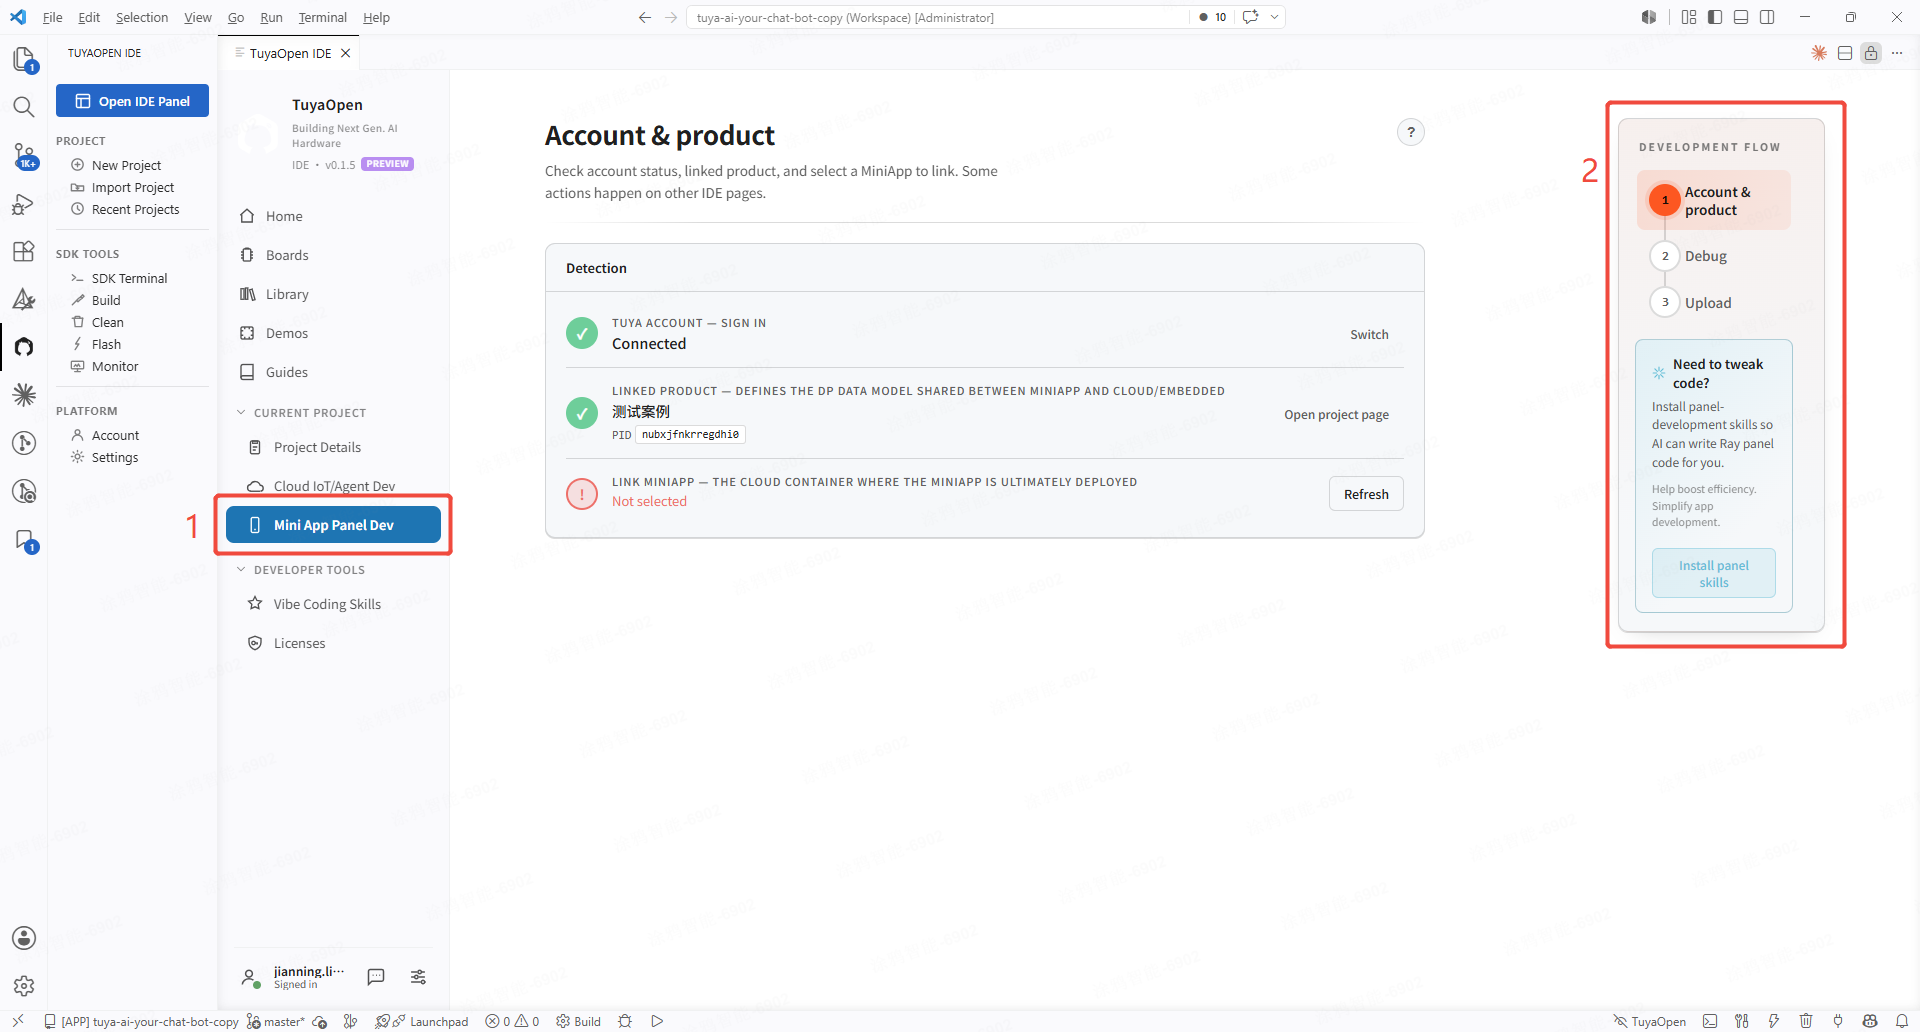
Mini-app panel development — three steps -
After Practice 2 you are already logged in and have a bound product. Now go to the developer platform to create a mini-app for binding.
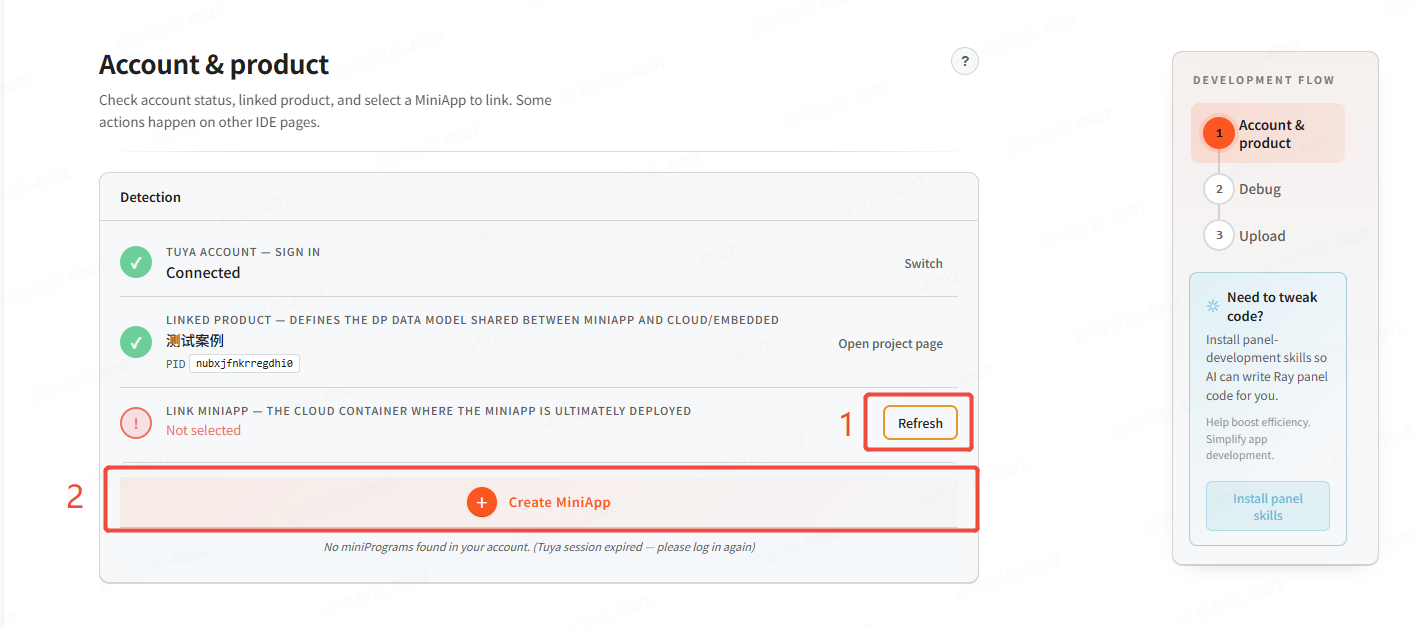
Create a mini-app on the developer platform -
Create a new mini-app panel.
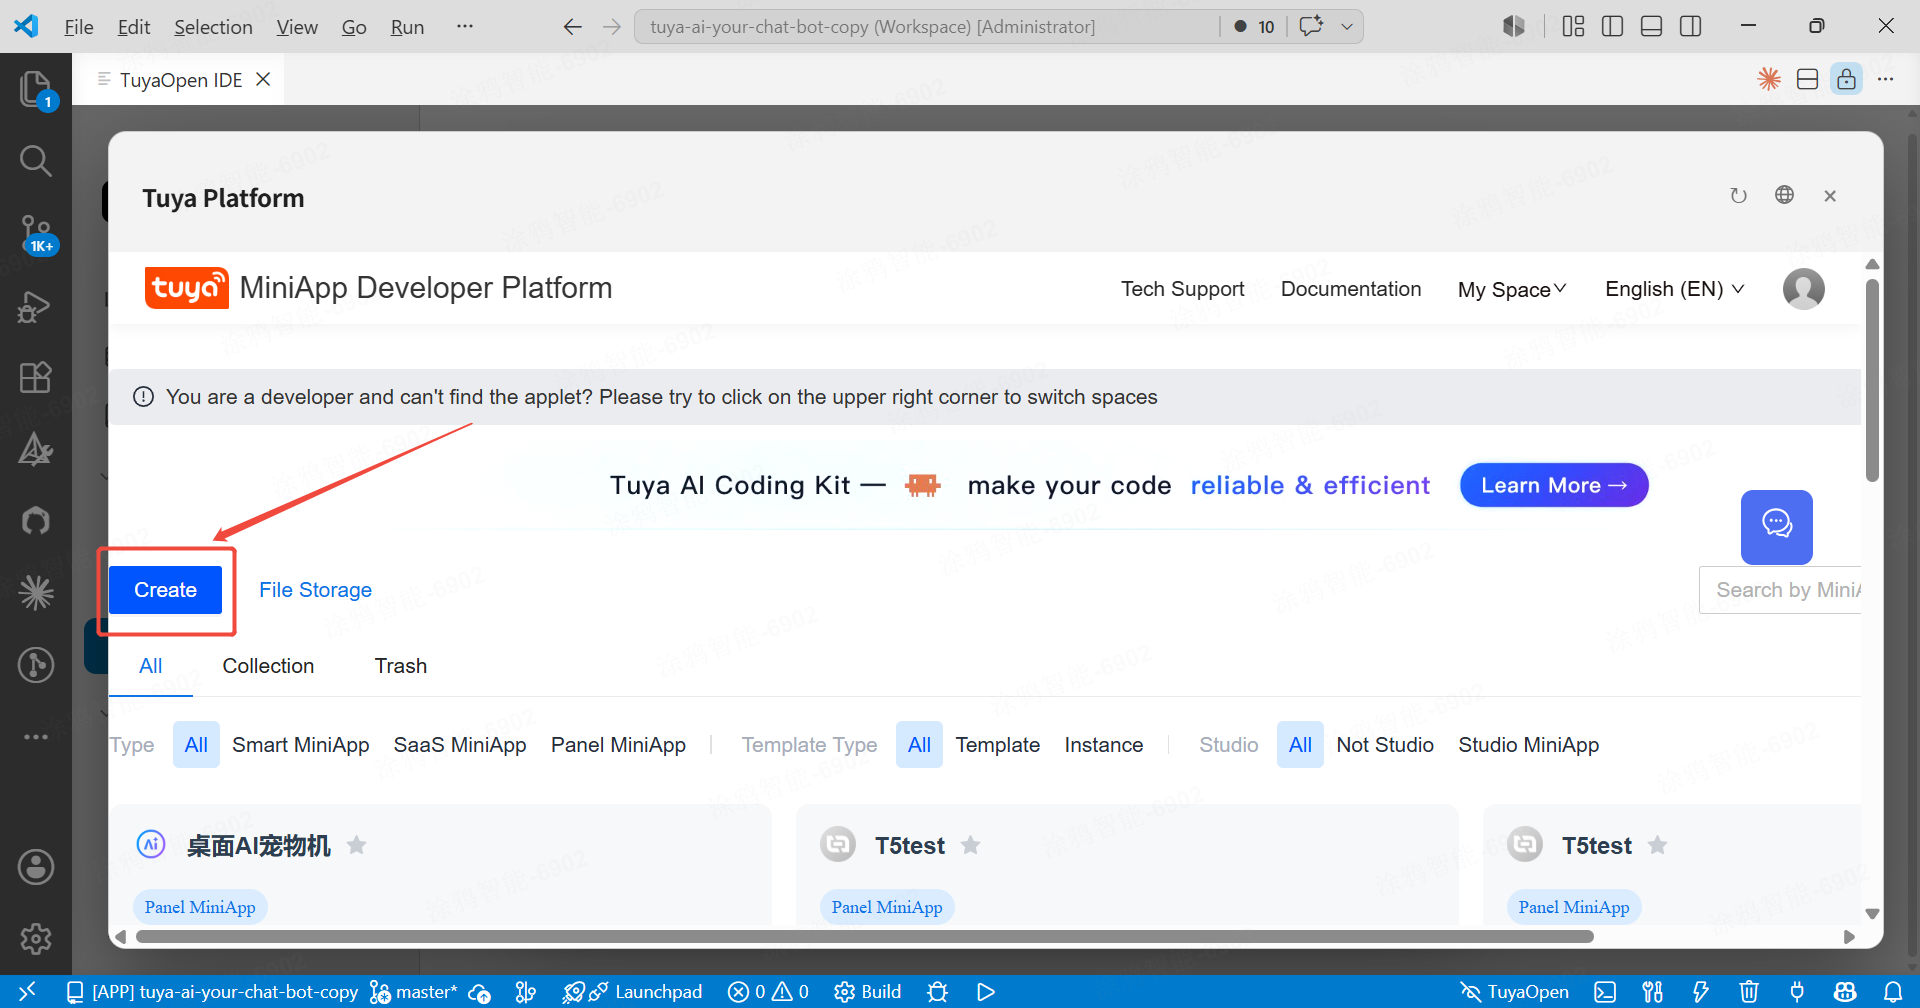
Create a mini-app panel -
Select the panel mini-app type.
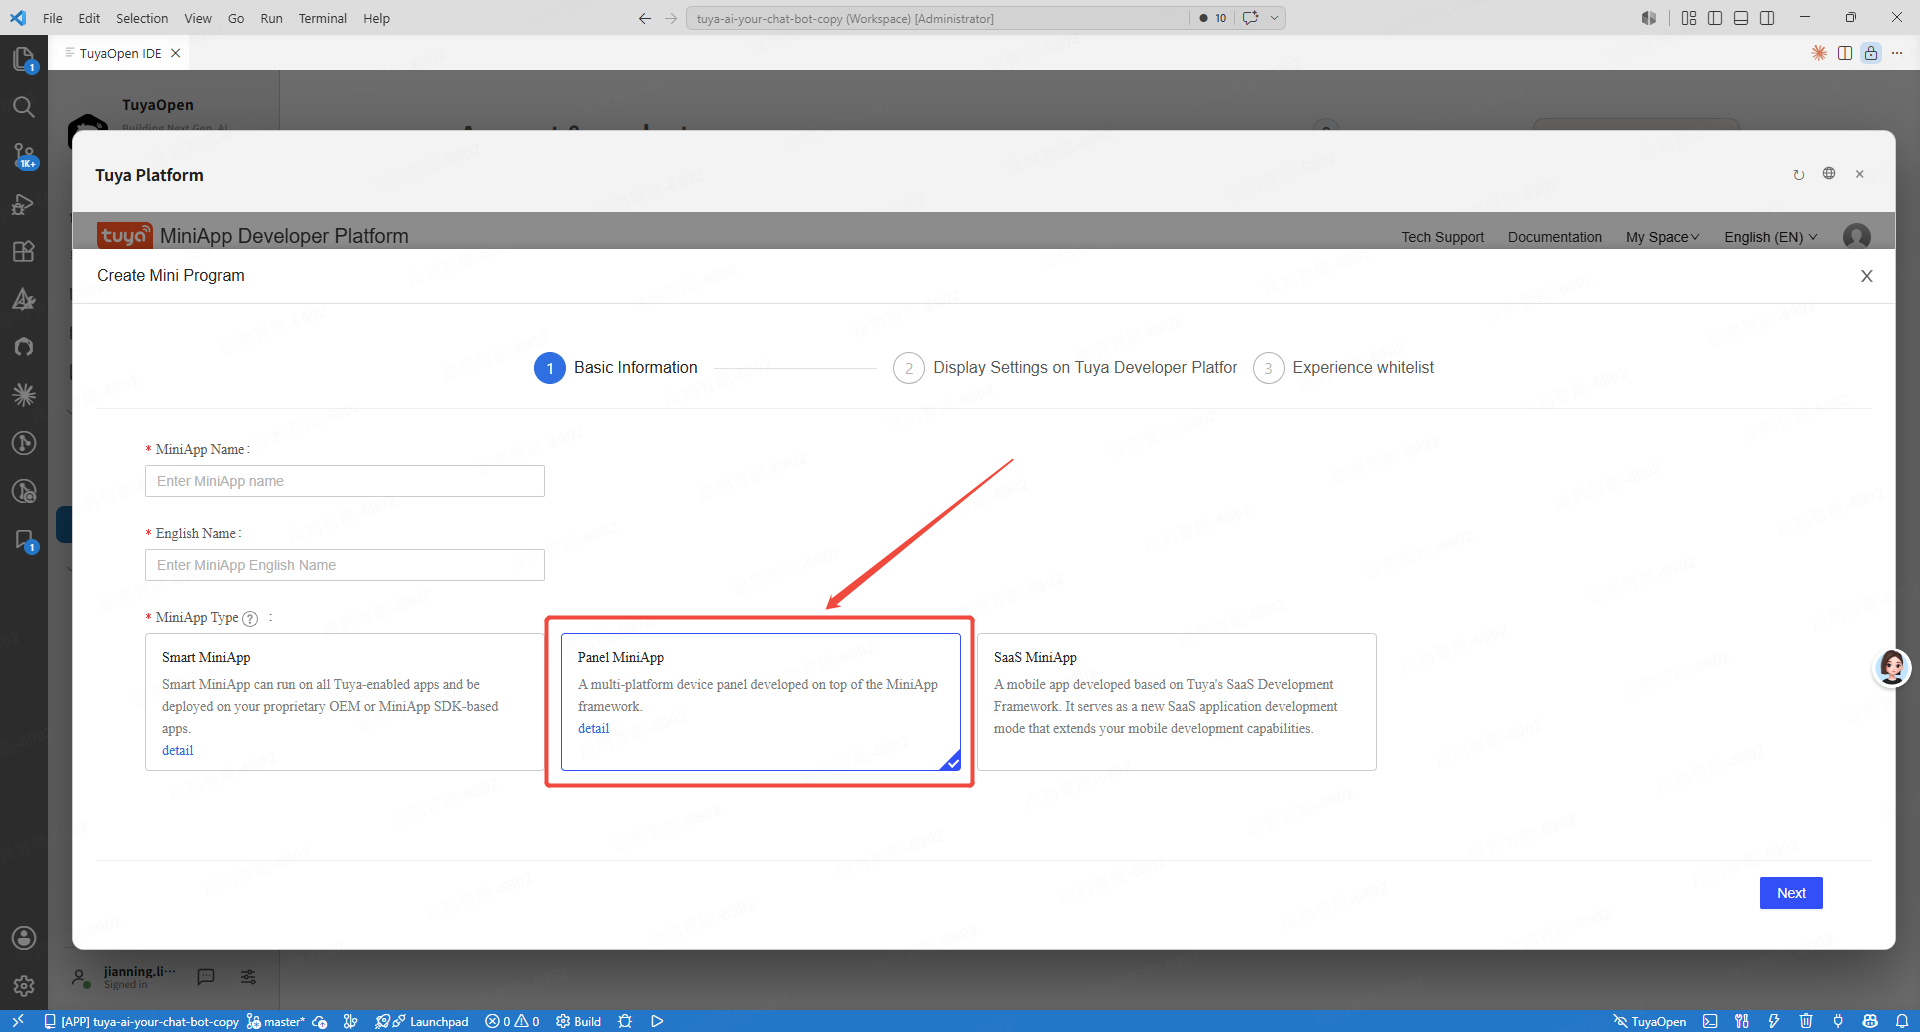
Select the panel mini-app type -
After creating it, close the page and return to the IDE, then click Refresh. You see the panel mini-app you just created on the developer site — click Select.
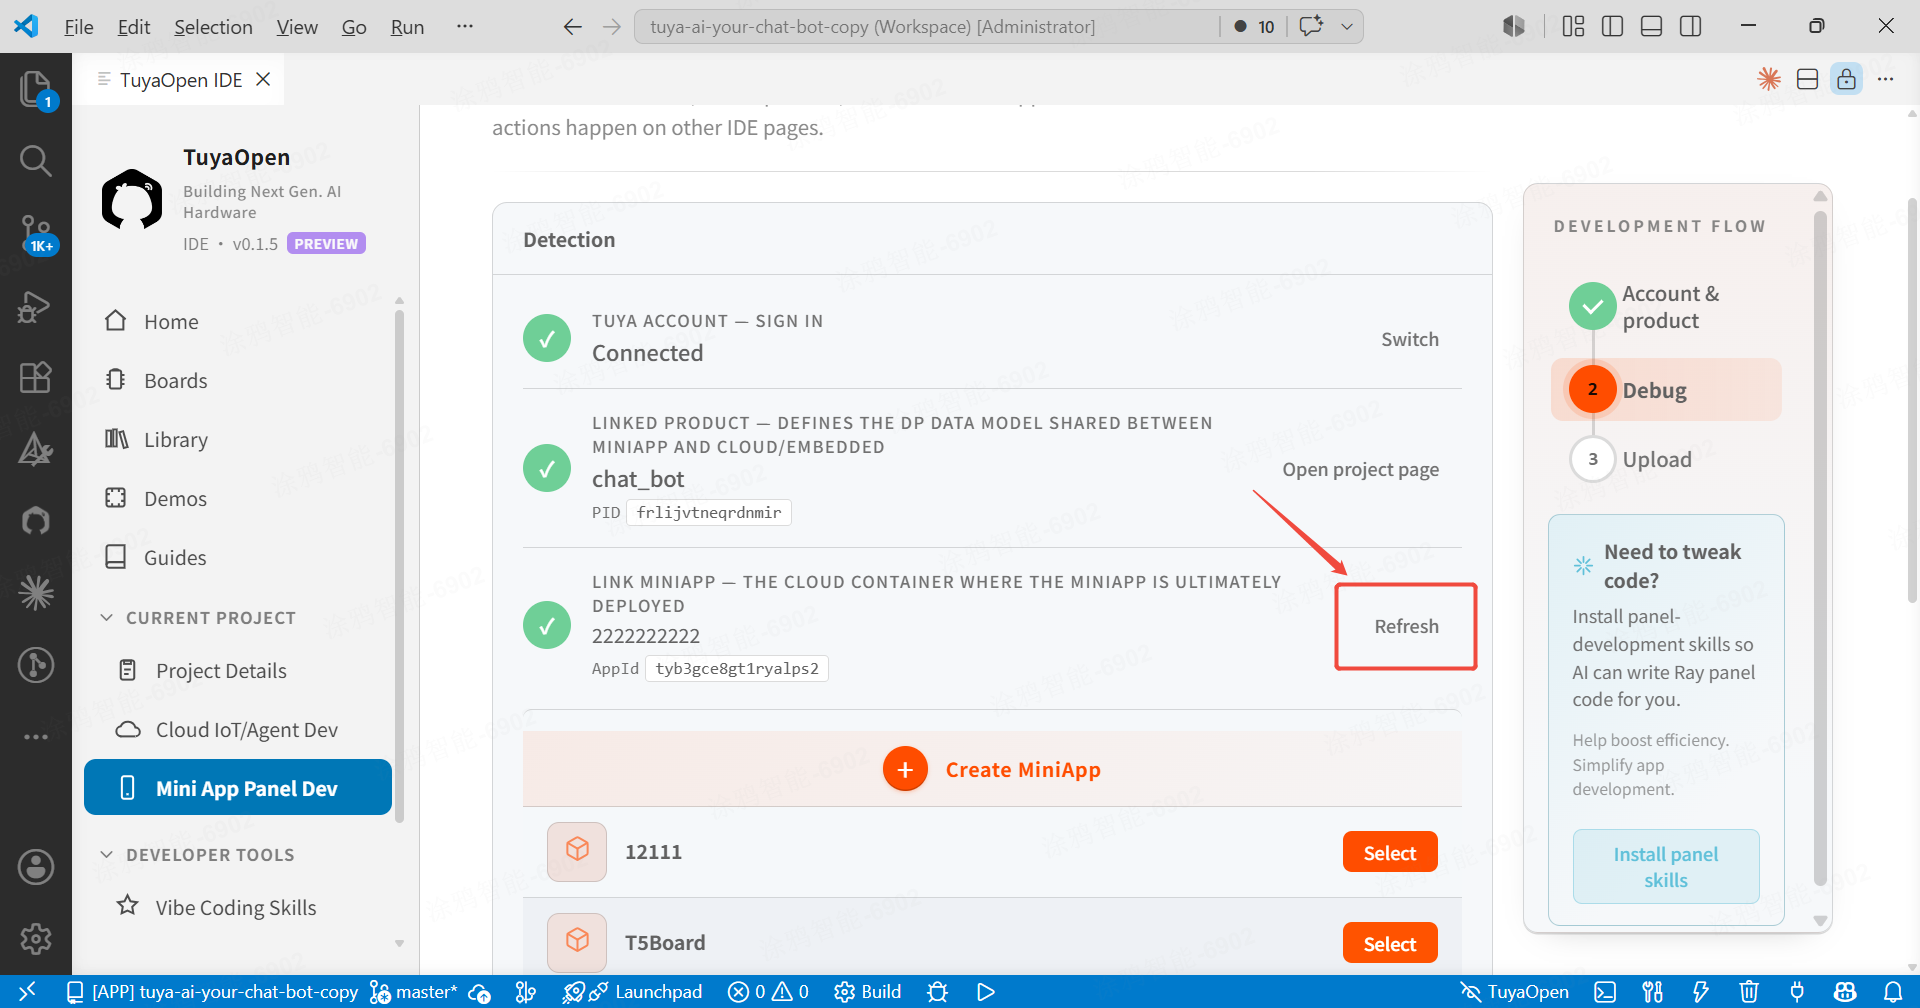
Bind the panel mini-app
Step 2: Debug and preview
-
Click Build MiniApp on the right to build the mini-app and render the panel. The panel appears below on a virtual device.
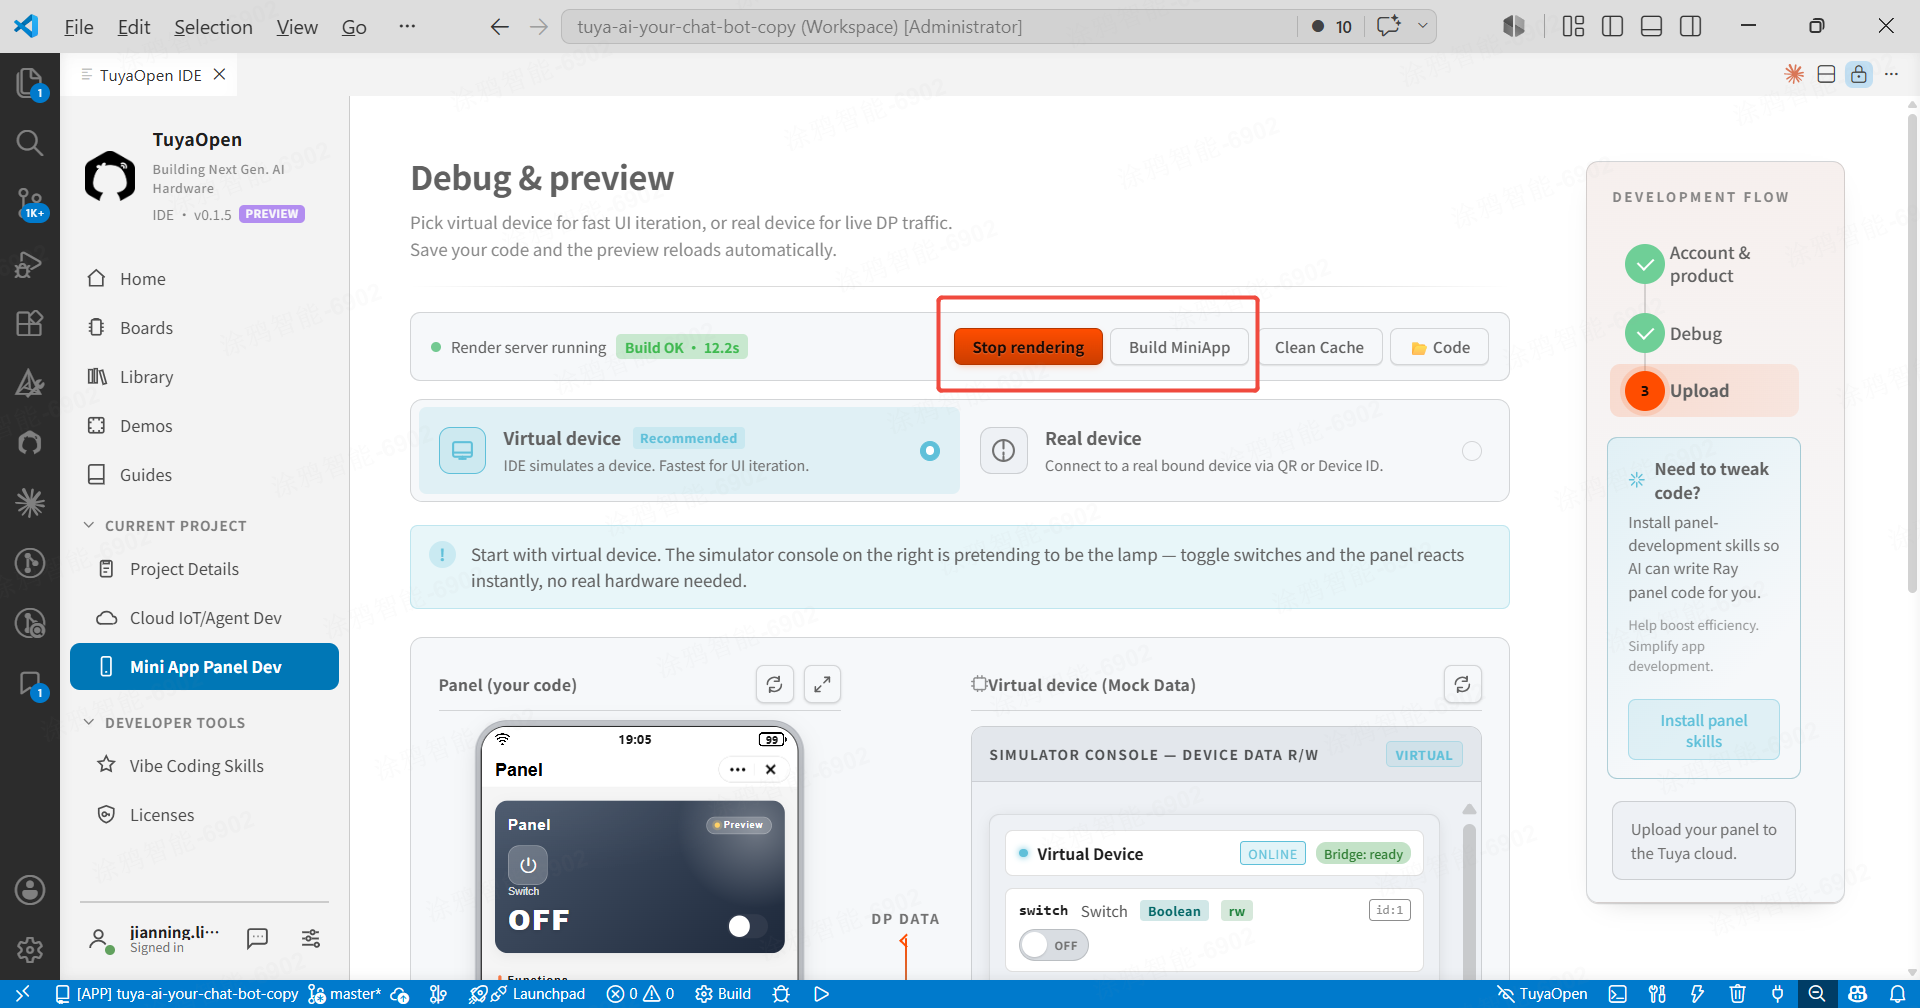
Mini-app debug and preview -
Click the virtual panel on the left to interact; the right side shows the DP data for the virtual device interaction.
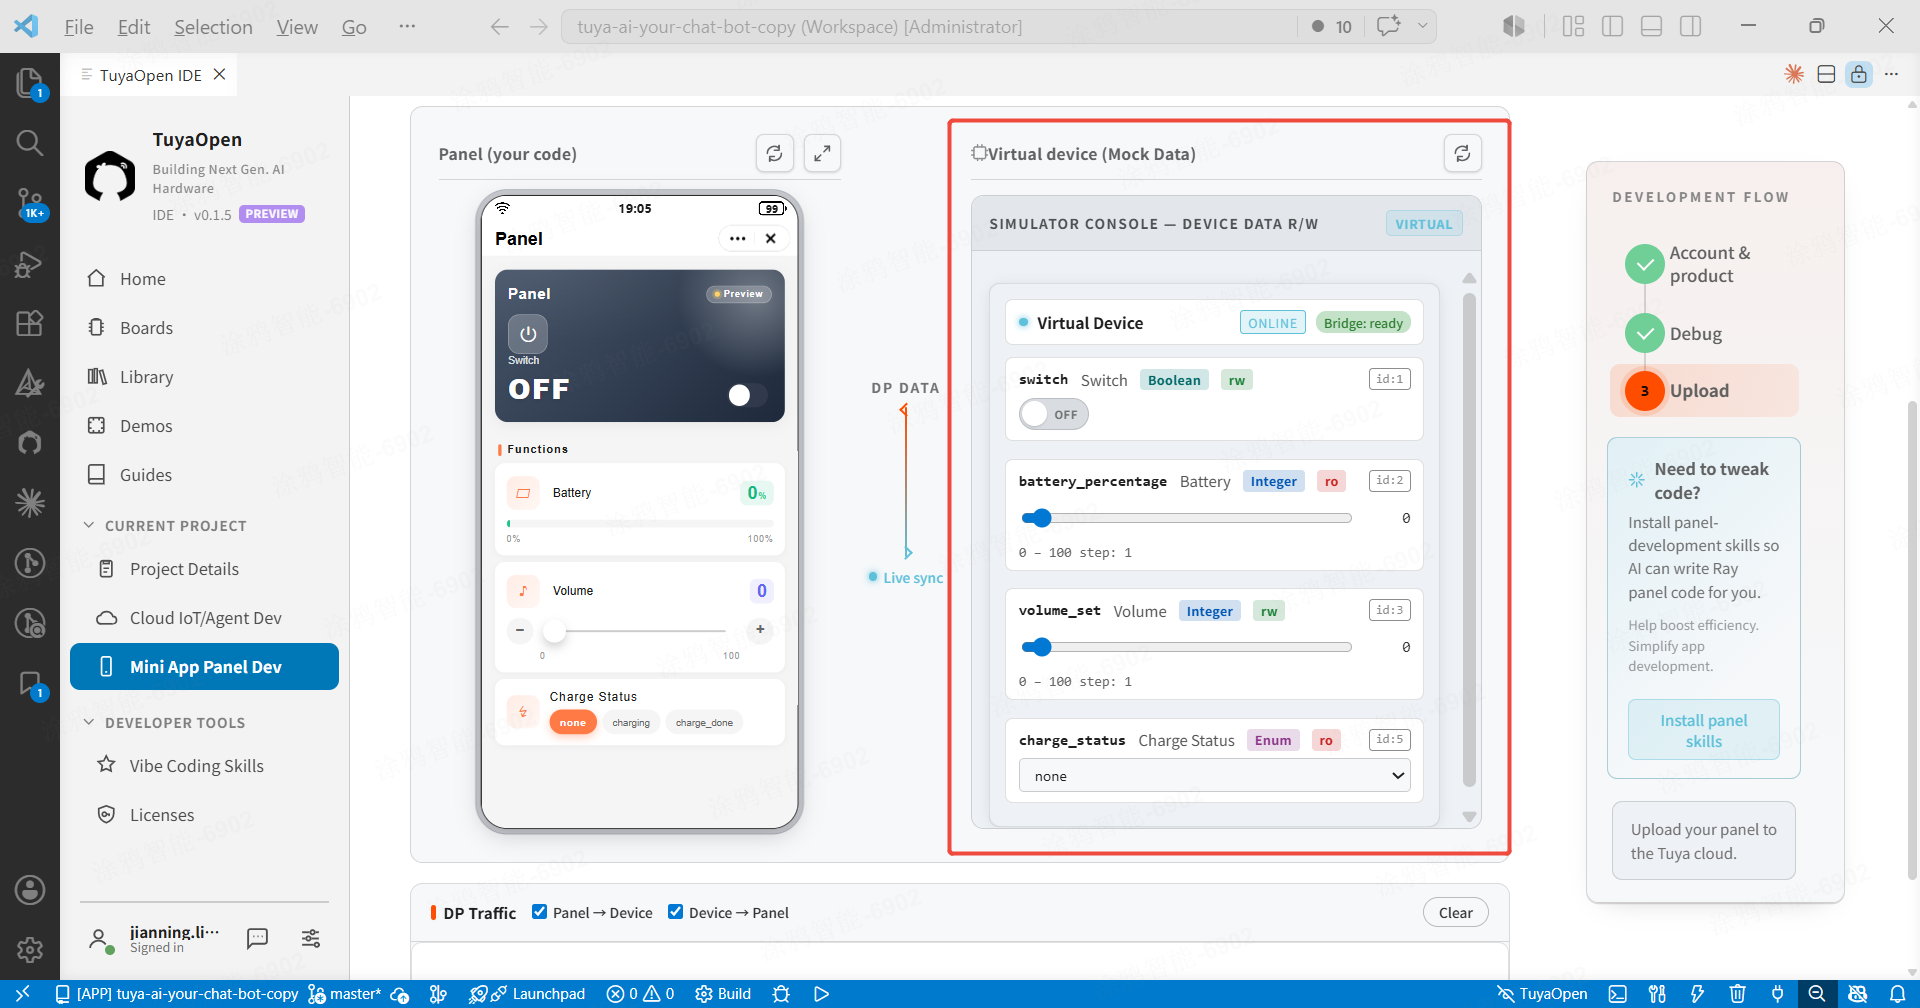
Virtual panel and DP interaction -
Now you can personalize the mini-app code. After editing, rebuild and re-render to preview. Installing the IDE-provided skills speeds this up — see Vibe Coding skills.
Step 3: Upload and publish
-
Click Upload to Cloud on the right to upload the mini-app. Once it uploads, go to the Tuya Developer Platform to submit it for review and publish.
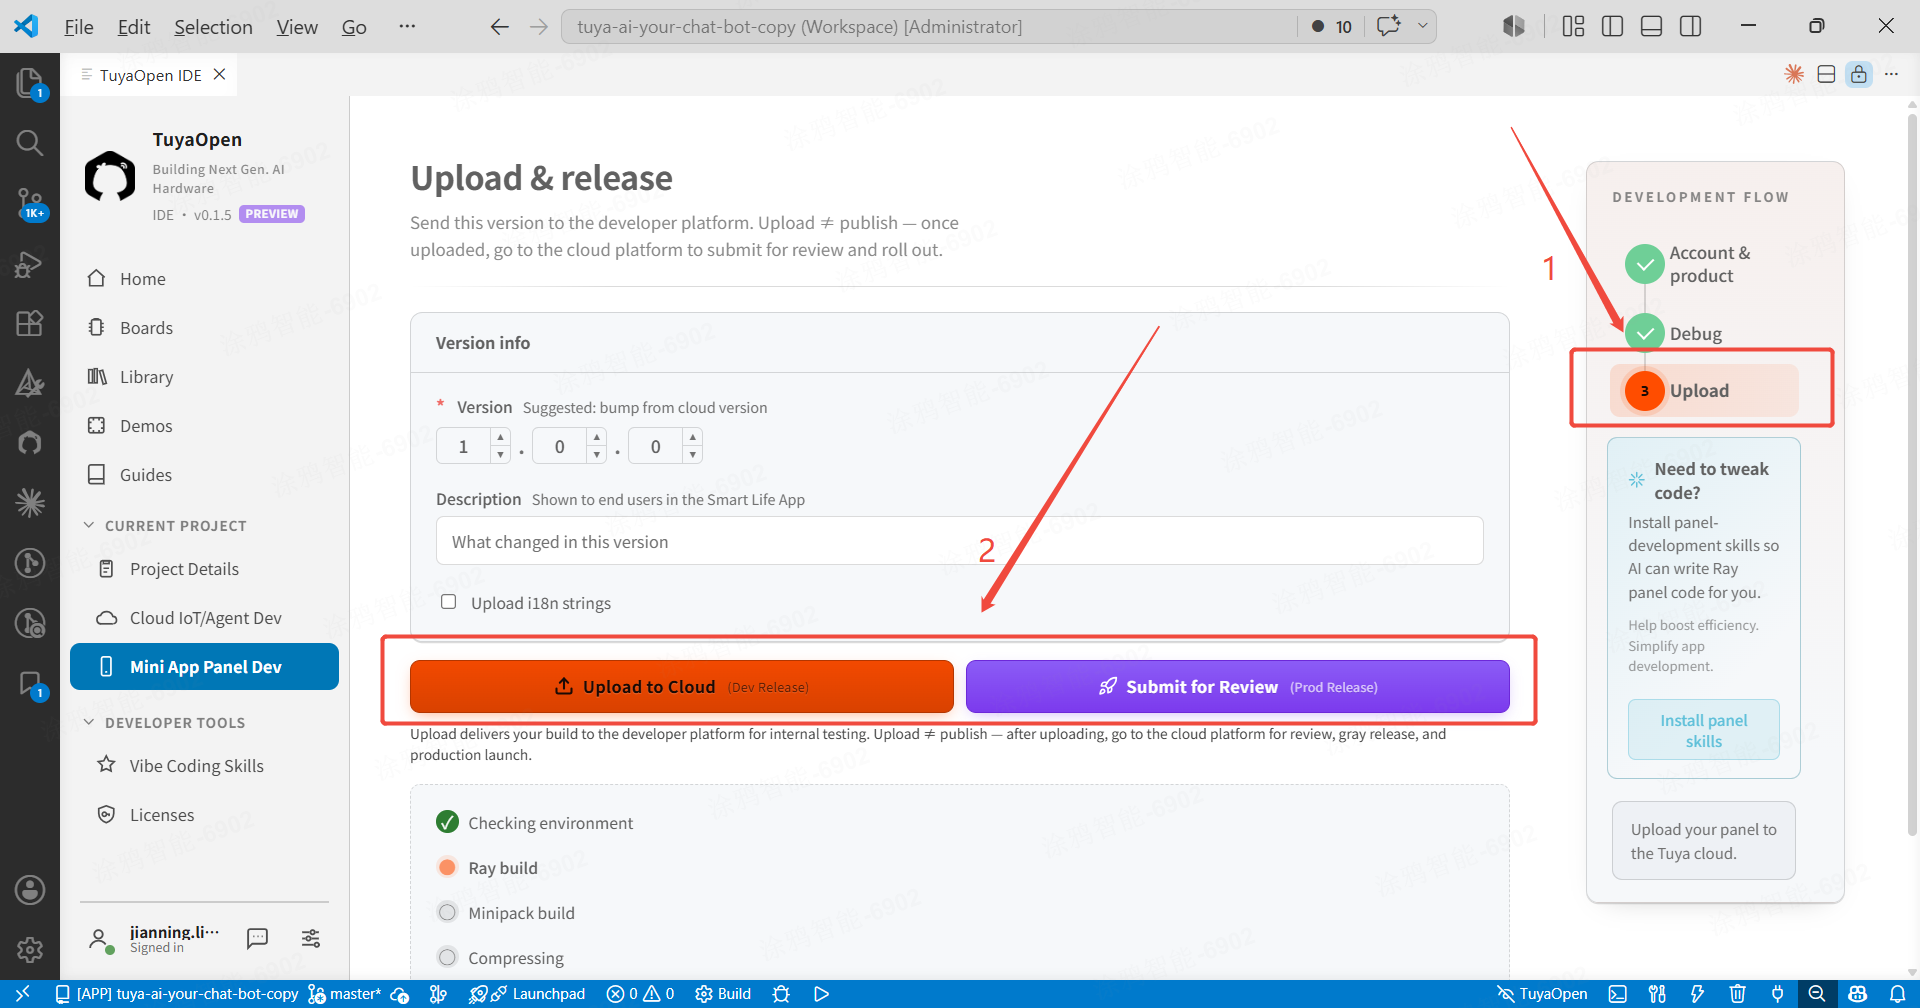
Upload the mini-app to the cloud -
Open Basic settings, fill in the mini-app description and English display name, and upload a preview image.
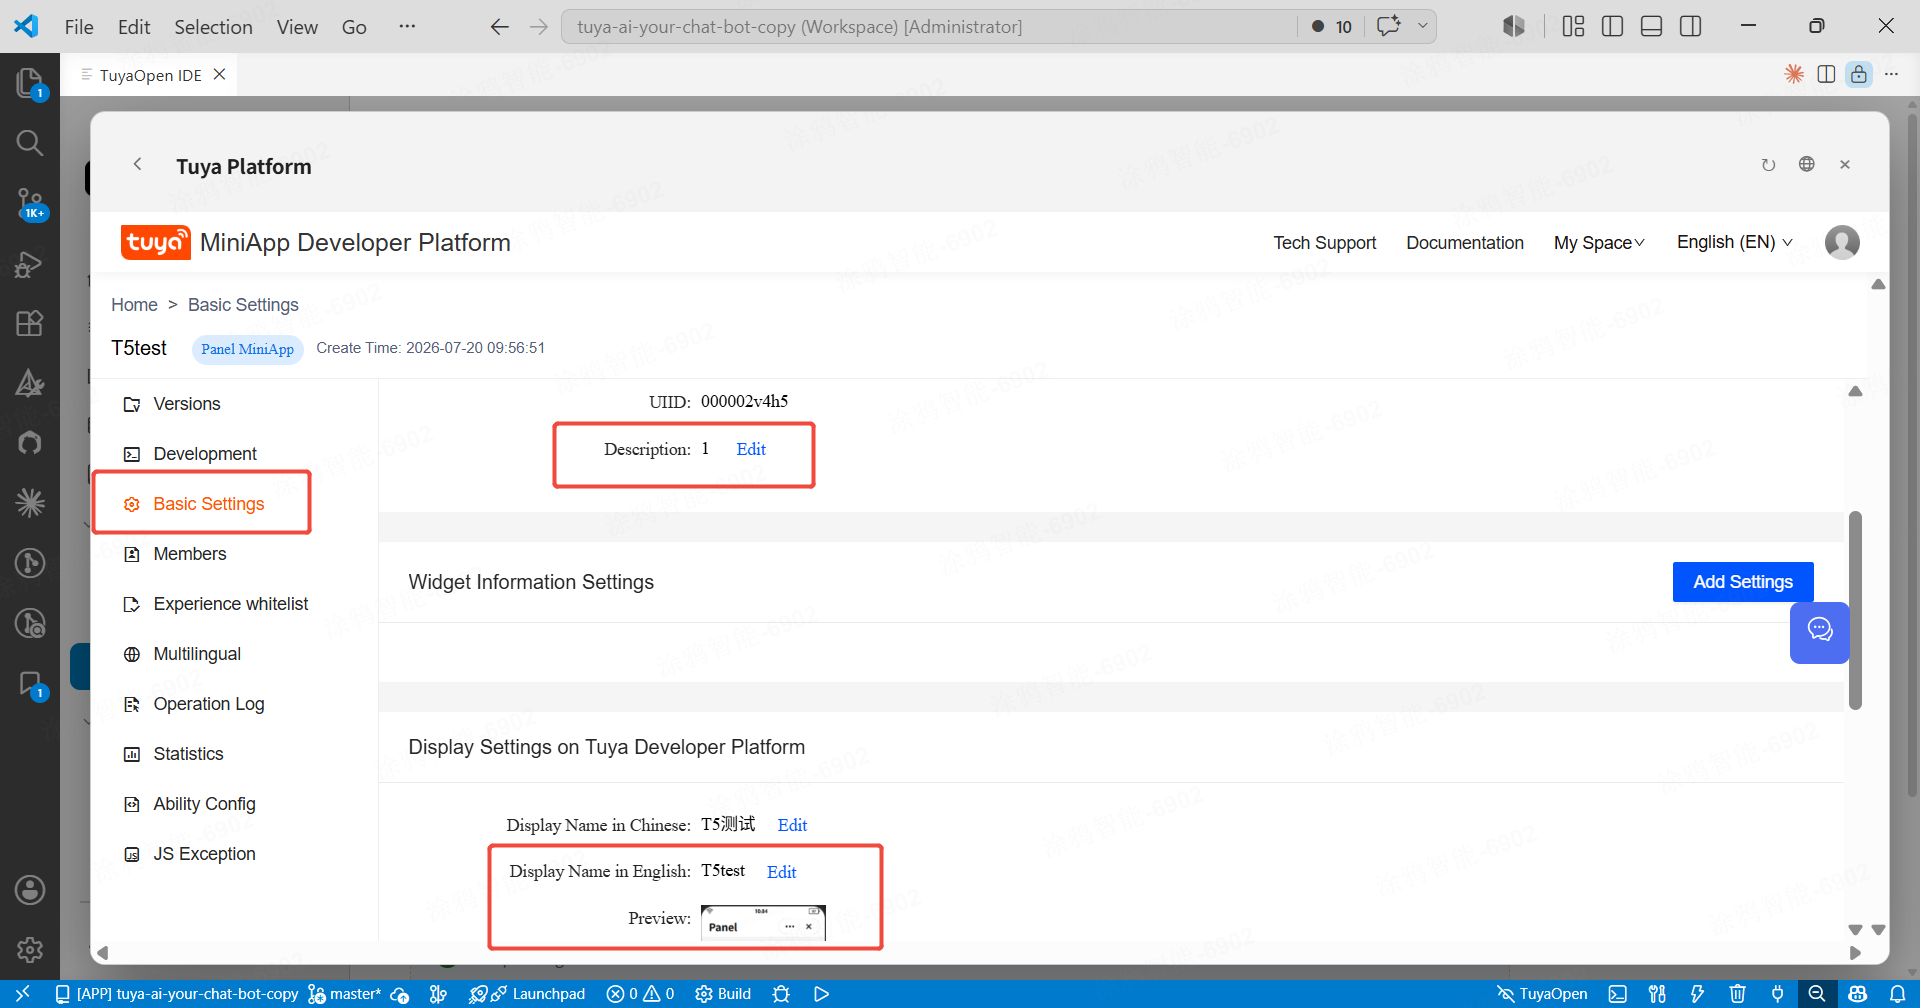
Panel basic settings — intro and preview image -
Open Version management and submit for review.
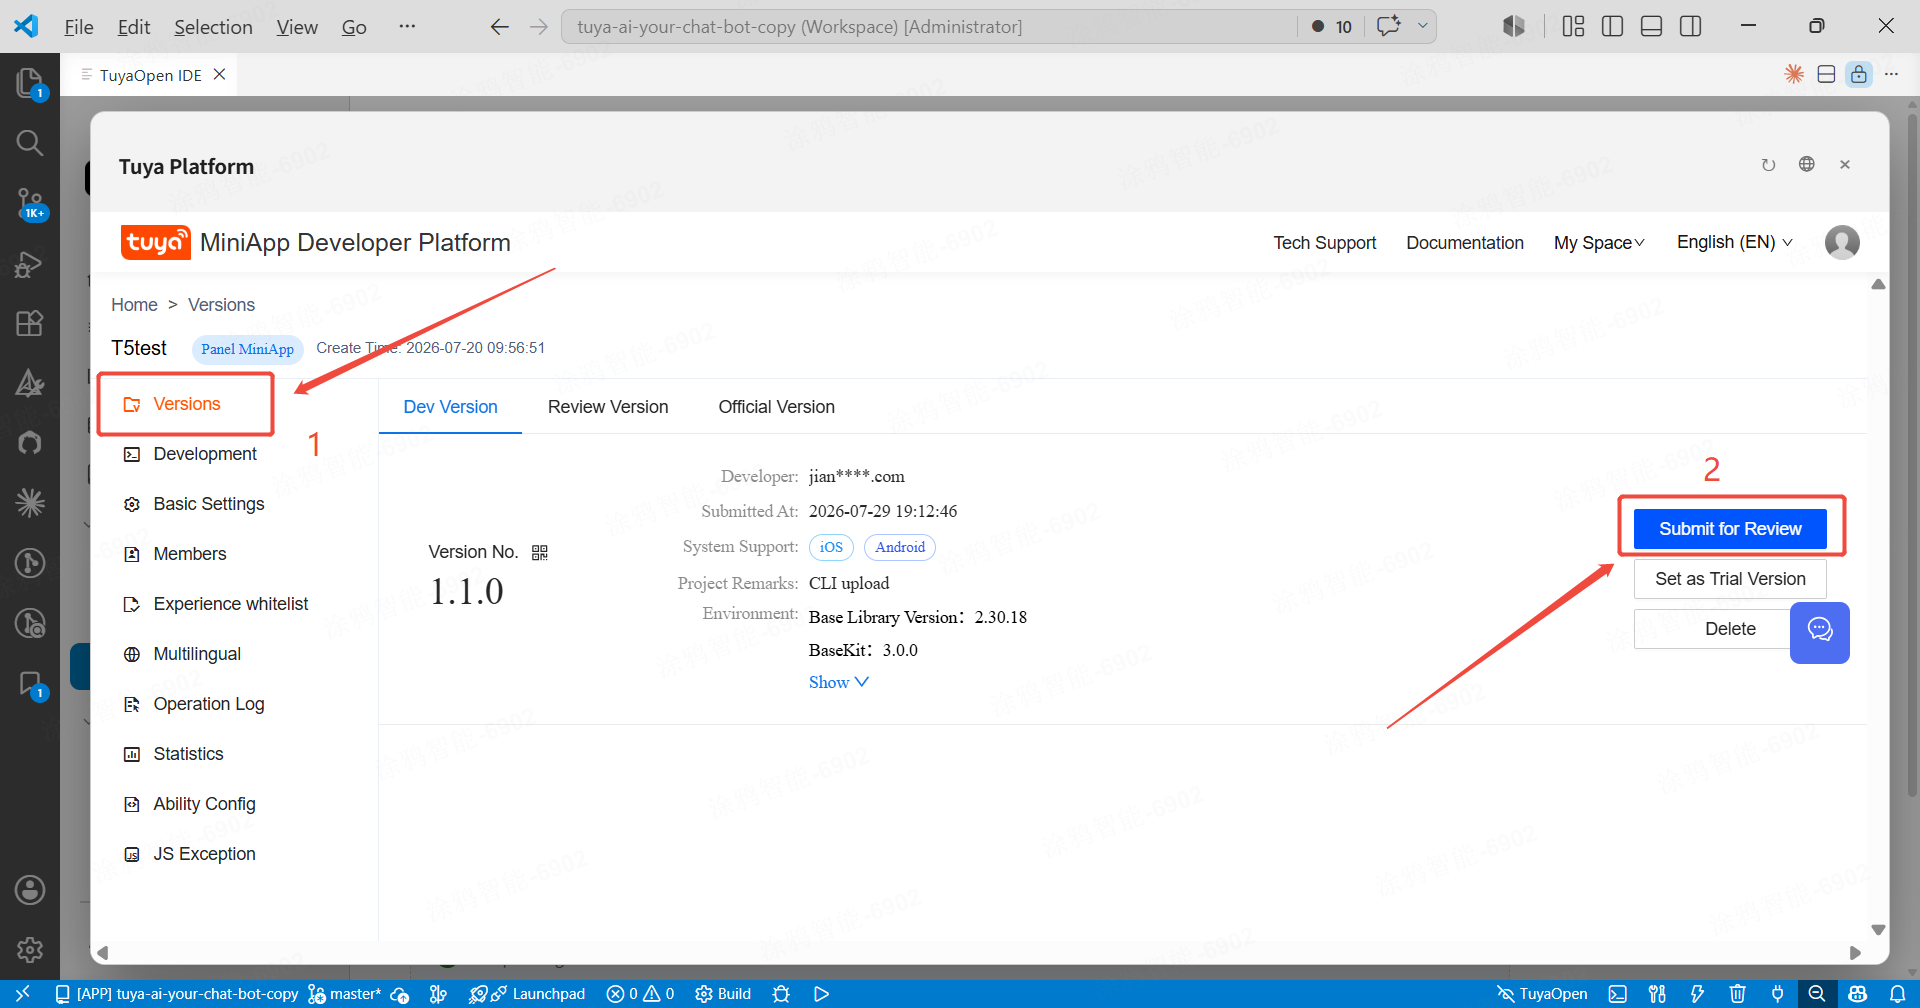
Version management — submit for review -
Open the review version and wait. After a few minutes, refresh to see it approved, then publish.
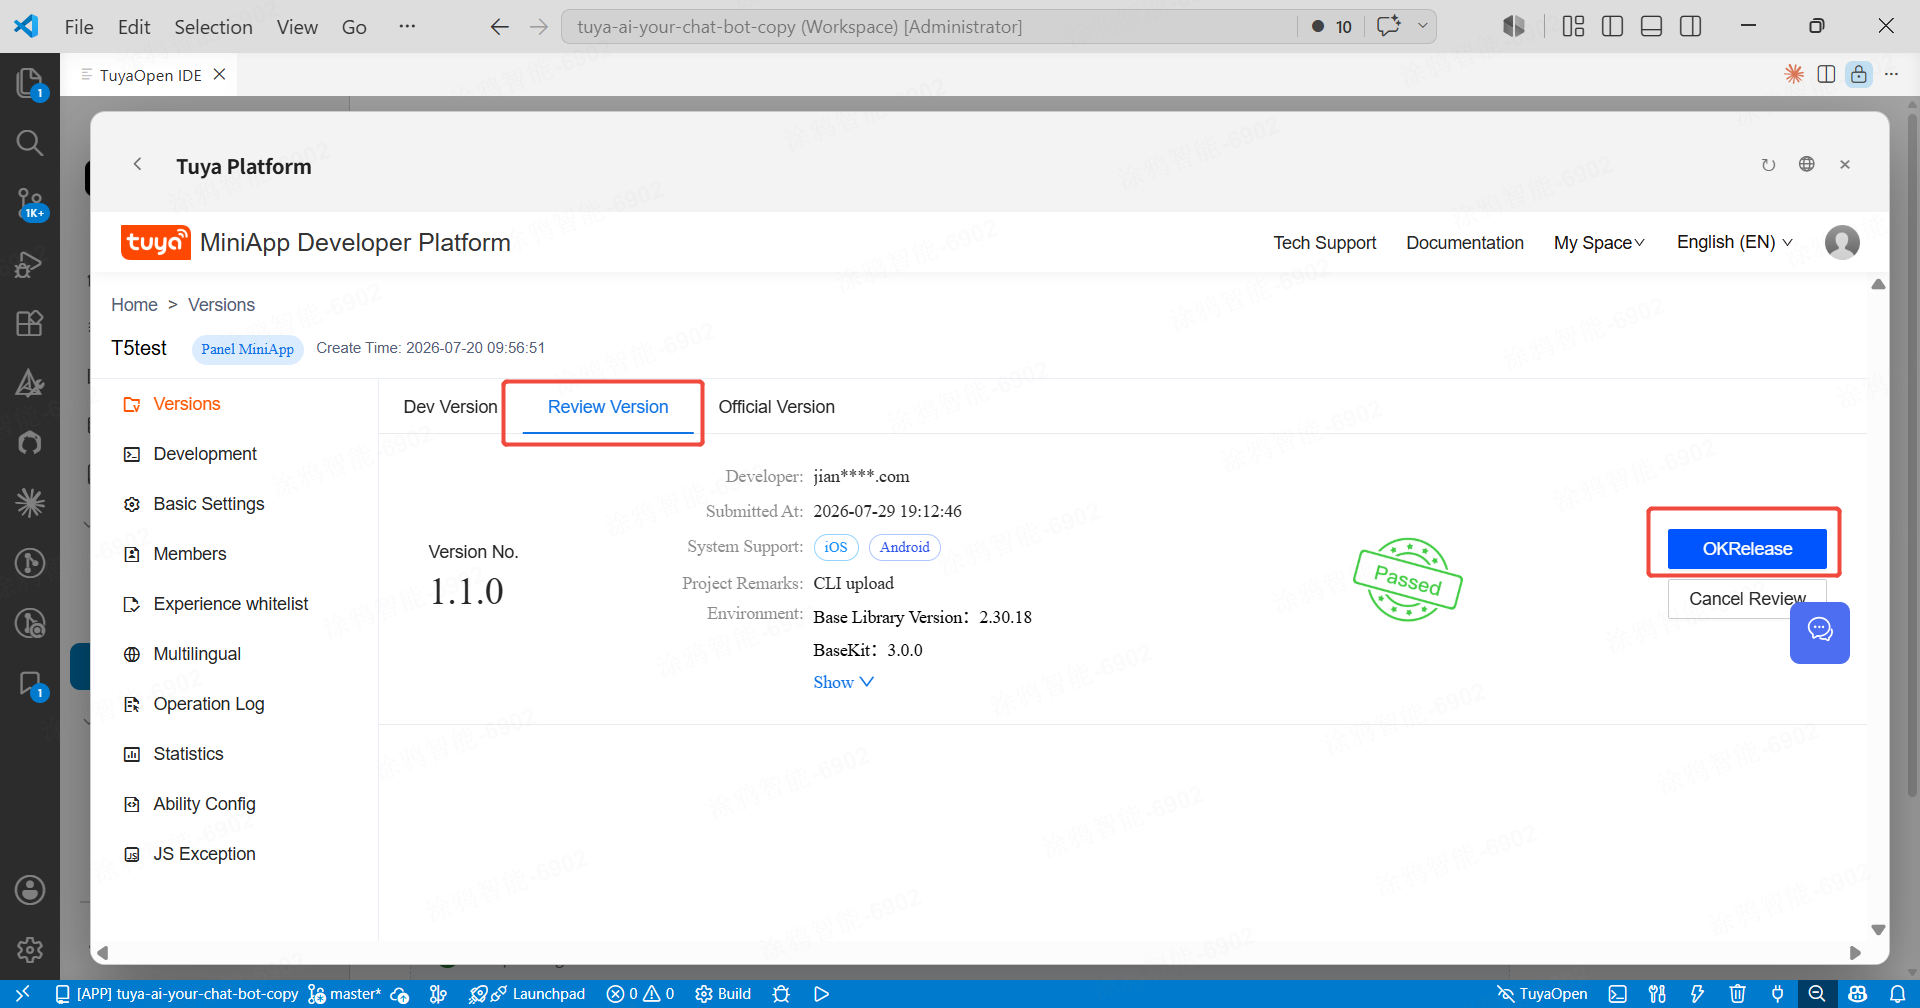
Review approved — publish
Step 4: Bind the mini-app to the product
After developing the mini-app, to use the panel in the phone app you need to bind it to the product.
-
Back in the IDE, open Project Details and click Rebind MiniApp.
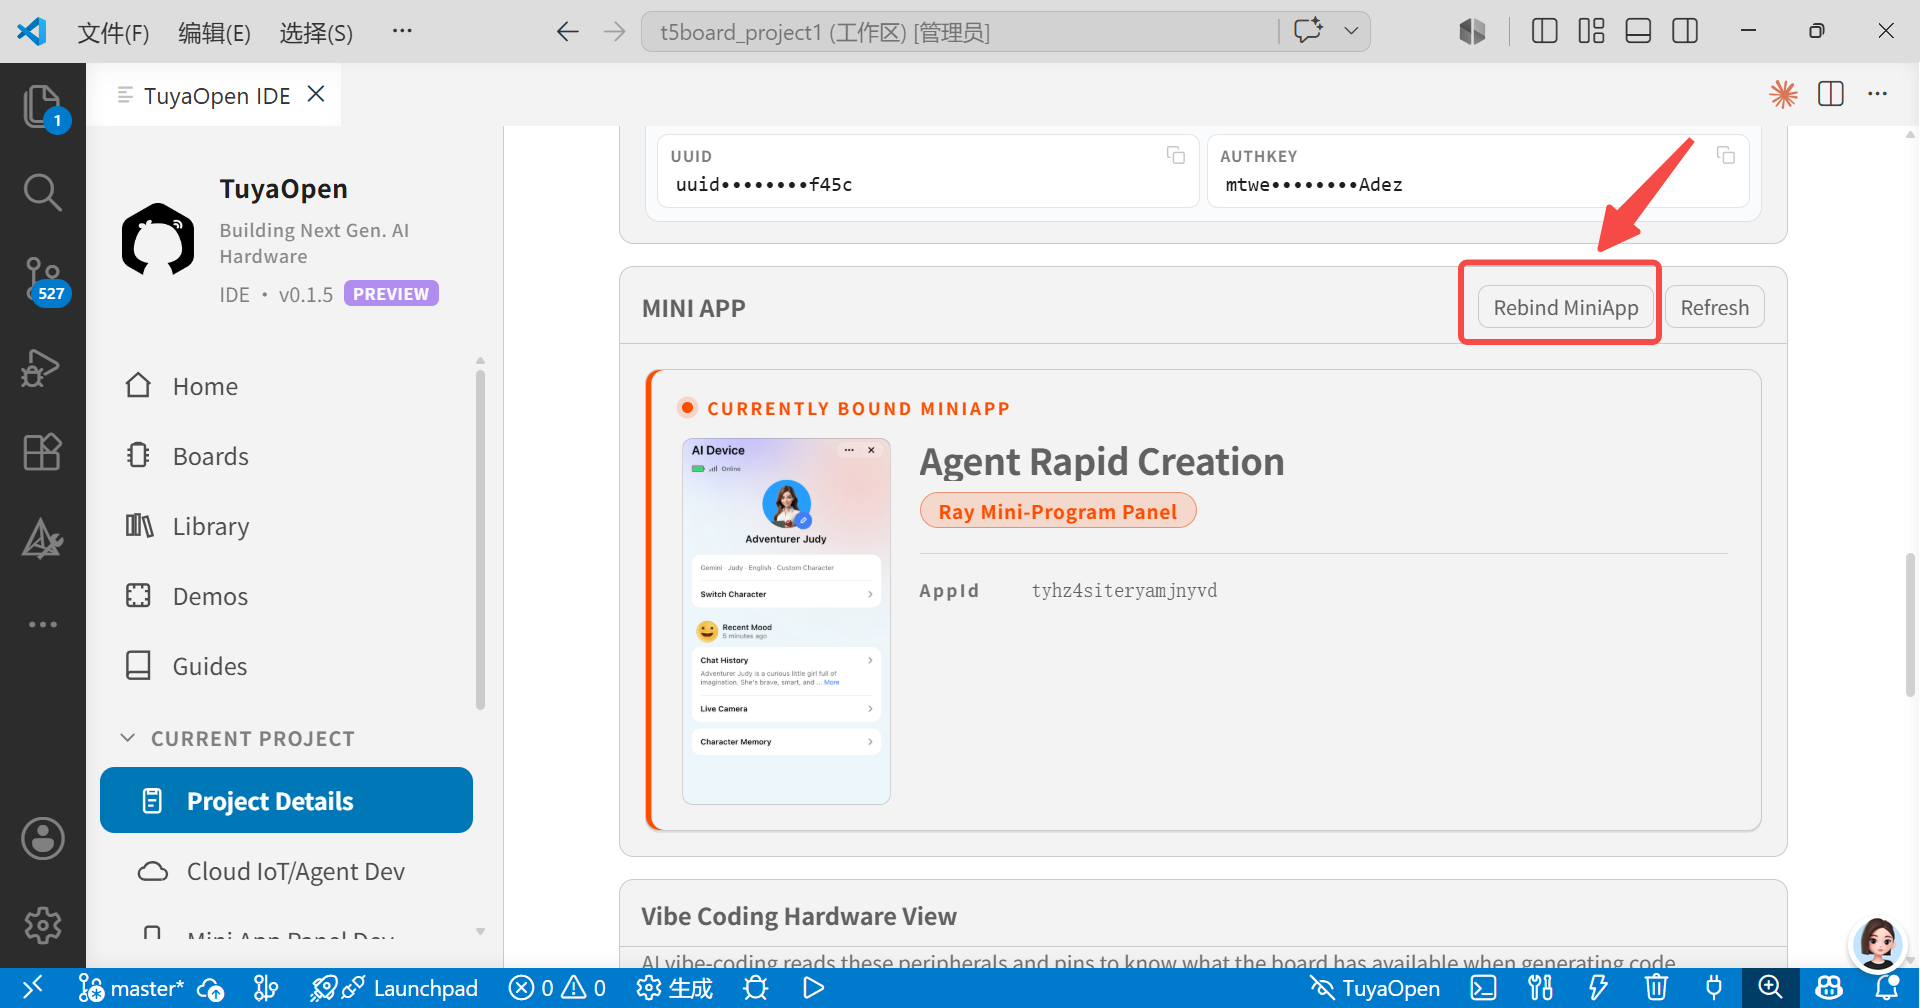
Rebind MiniApp in Project Details -
Click Change Panel and choose the custom panel.
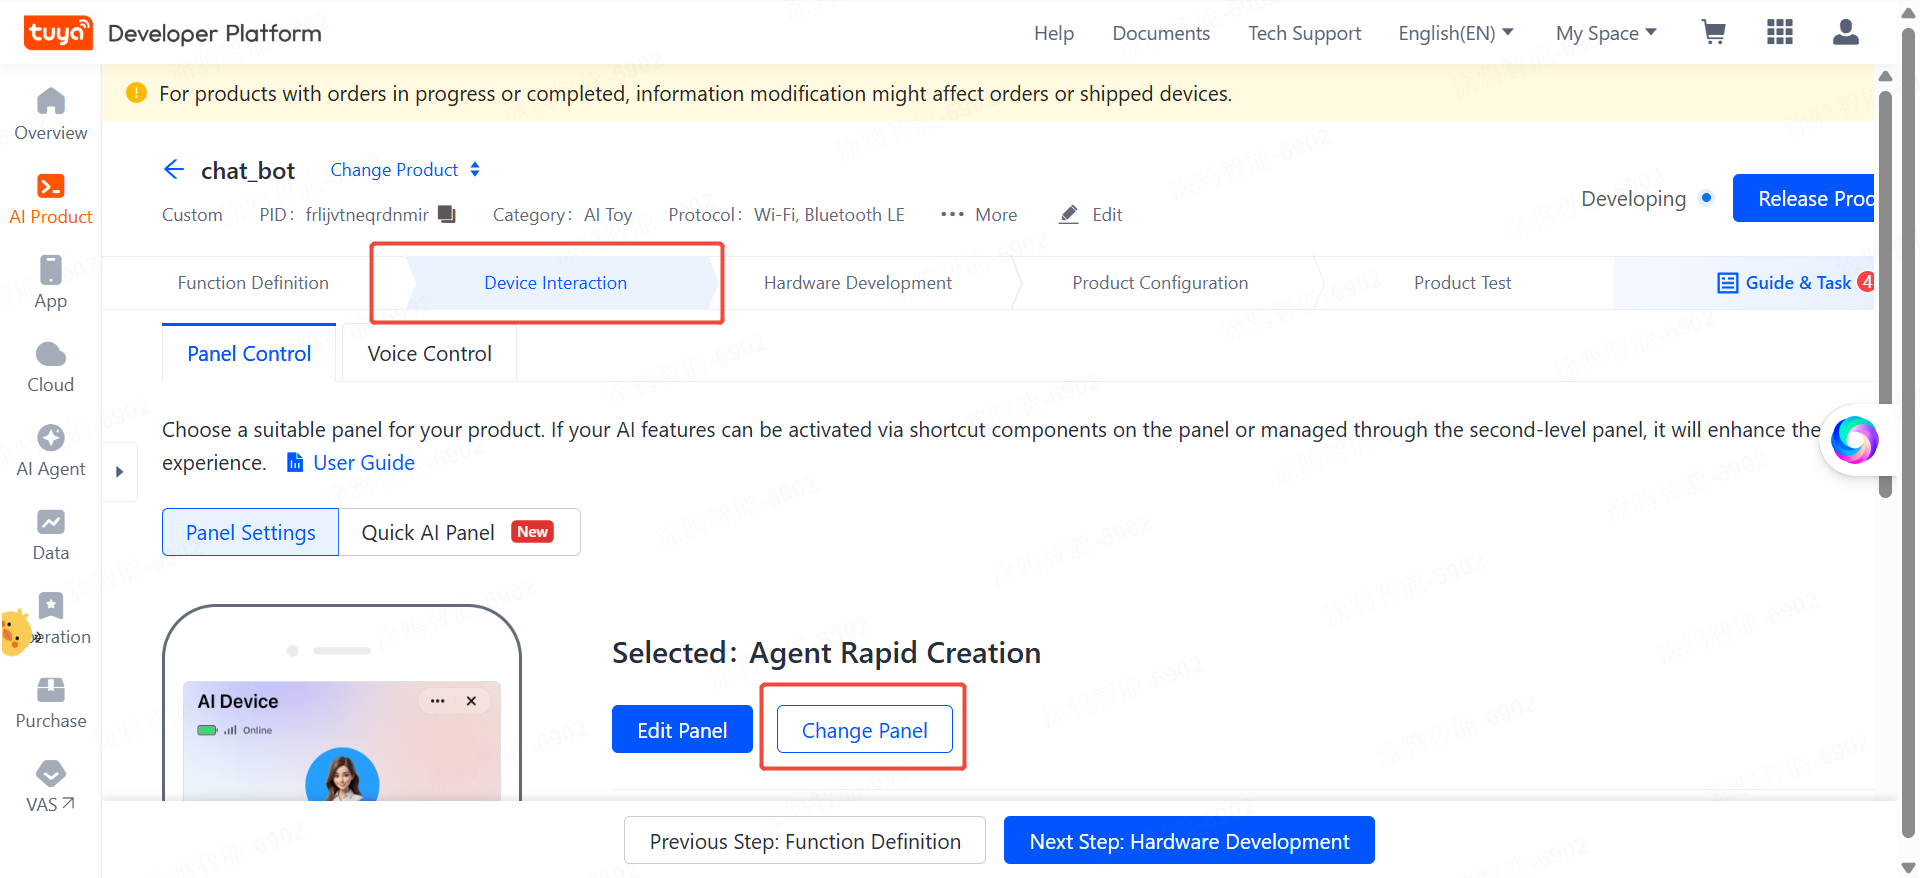
Change the custom panel in the IDE -
Select the custom panel — you can now see the published mini-app panel.
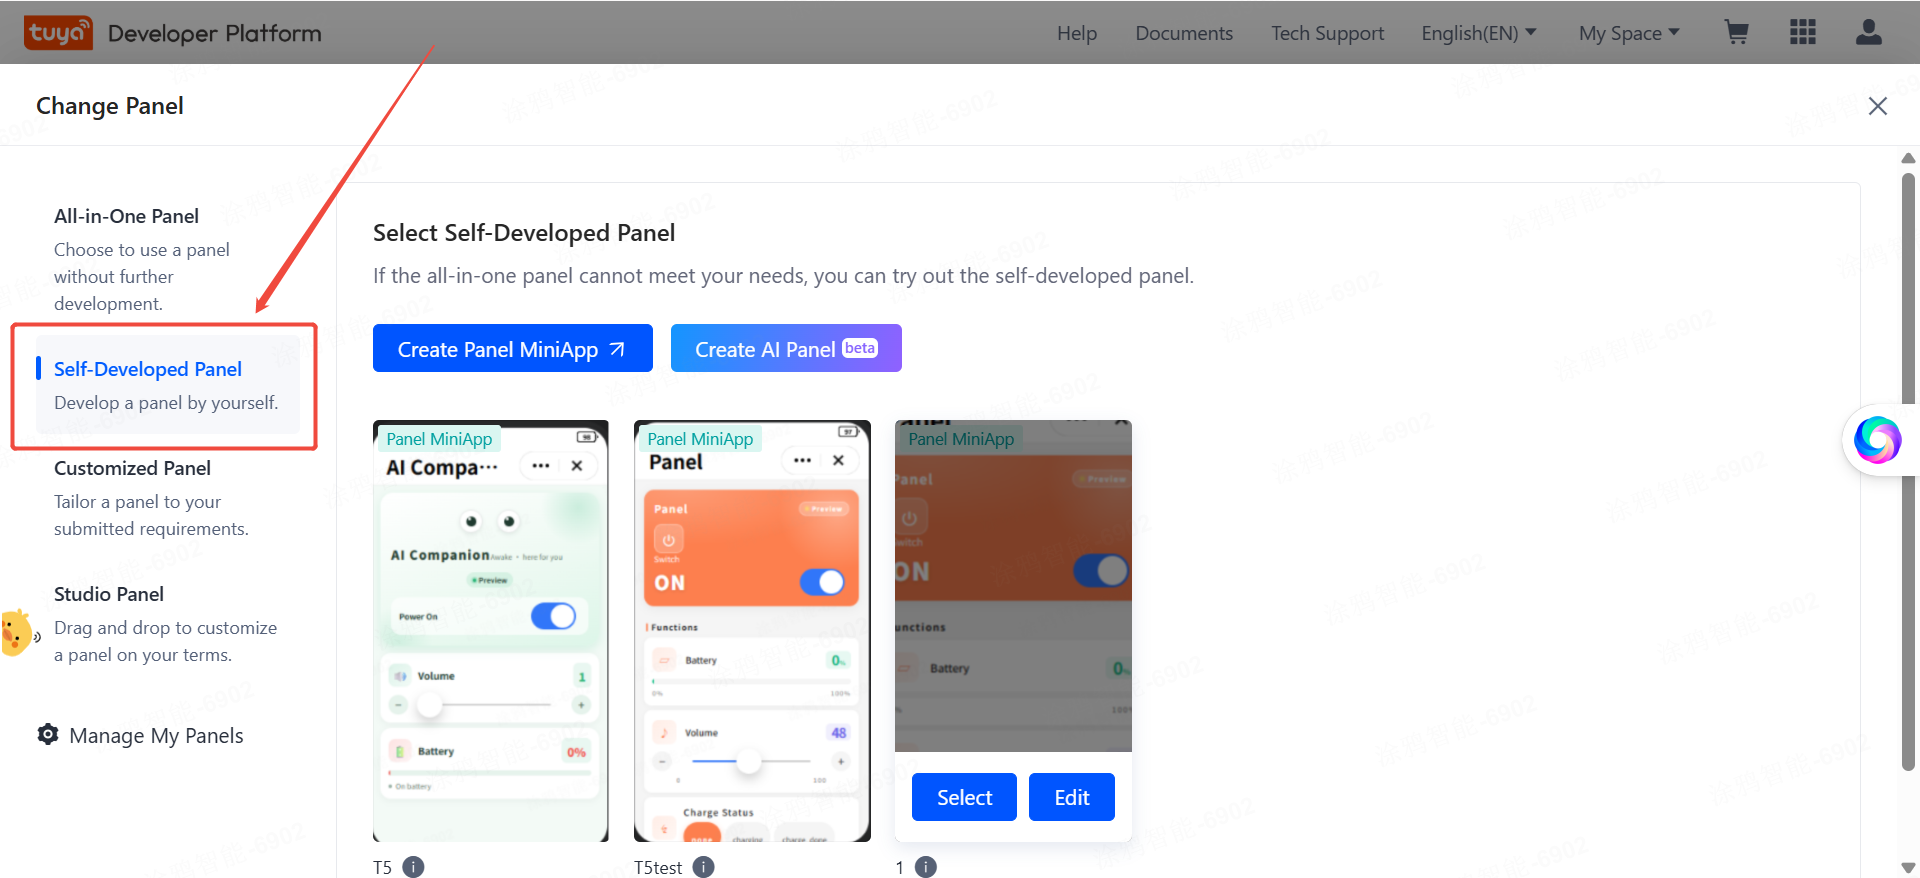
Published custom panel -
You can now see the latest panel in the SmartLife app.
Where to go deeper
| Want to | Go here |
|---|---|
| Speed up development with AI | Vibe Coding skills |
| Build your own cloud Agent | Agent Development Guide |
| Build device control panels | Panel Mini-App portal |
| Learn the mini-app technology / API | Tuya Mini-App docs |
| Build a panel with no code | Panel Studio |