tyutool guide
Install the tool, flash your first board, authorize it for Tuya IoT, and fix the common hiccups — GUI and CLI side by side.
Install
Download the latest build for your platform from the releases page. The recommended (★) packages support in-app auto-update.
Open GitHub releasesWindows
- Download the NSIS installer (*.exe) and run it, or grab the portable .zip and unzip it.
- Launch tyutool from the Start menu (installer) or the extracted folder (portable).
macOS
- Download the Universal .dmg (★), open it, and drag tyutool to Applications.
- First launch is blocked because the build is not Apple-signed — see Troubleshooting below for the one-time "Open Anyway" step.
Linux
- Download the AppImage (★), then make it executable: chmod +x tyutool-gui_*.AppImage and run it.
- Or install the .deb / .rpm for your distribution, or unpack the portable .tar.gz.
Working headless or in CI? Download the standalone CLI build from the same releases page, extract it, and put tyutool_cli on your PATH — no runtime required.
Flash your first firmware
With the GUI
- Open tyutool and stay on the Flash tab.
- Select your chip (for example T5AI or BK7231N).
- Click Browse and choose the firmware .bin (for TuyaOpen, the file containing _QIO).
- Pick the serial port. On Tuya boards, hovering a port shows whether it is the flash/auth or the log port.
- Click Start flash and watch the progress through erase, write, and verify.
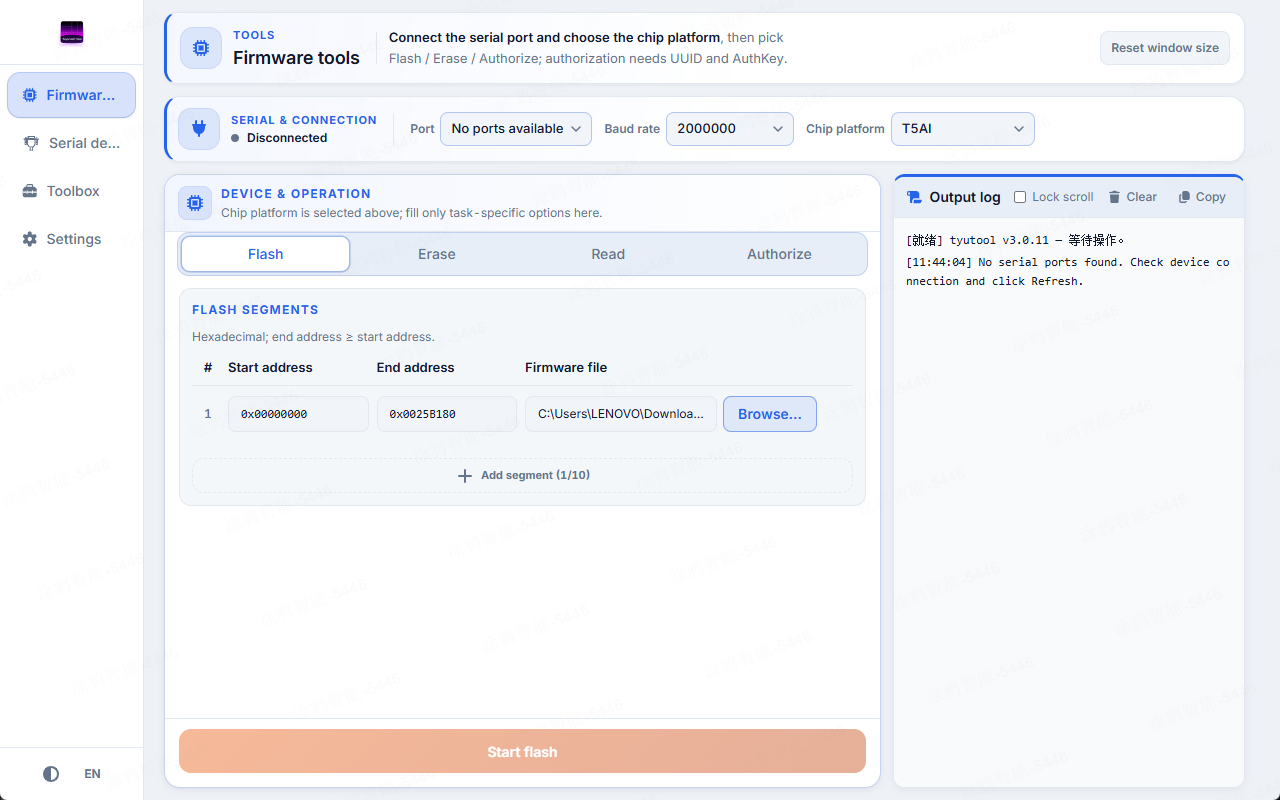
The default flash baud rate is 921600. If flashing is unreliable, lower it; if it is slow, raising it can help but may fail on long cables.
With the CLI
The same flash, from a terminal — the port is auto-detected when only one is connected:
# Auto-detect the port
tyutool write -d t5ai -f app_QIO.bin

# Or name the port explicitly
tyutool write -d bk7231n -p /dev/ttyUSB0 -f firmware.bin
Authorize a device
To use the Tuya IoT cloud, a device needs a UUID + AuthKey written to it. tyutool writes and verifies them over the same UART you flash with.
- Open the Authorize tab.
- Select the authorization serial port.
- Keep the default UART settings (baud 115200, 8 data bits, 1 stop bit, no parity).
- Enter the UUID and AuthKey.
- Click Start authorization, then read back the state to confirm.
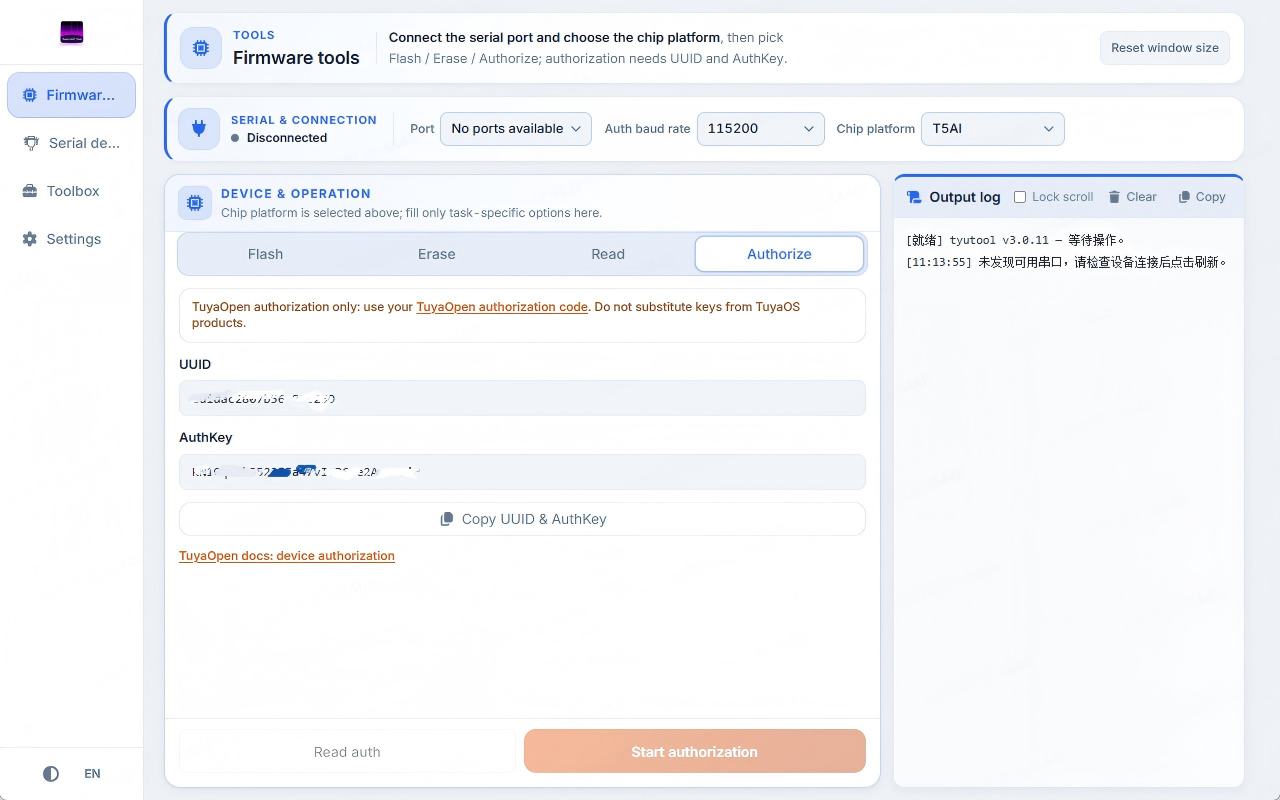
CLI equivalent
# Read the current authorization state
tyutool authorize -p /dev/ttyUSB0

# Write a new UUID + AuthKey (both required)
tyutool authorize -p /dev/ttyUSB0 \
--uuid <UUID> --authkey <AUTHKEY>TuyaOpen UUID/AuthKey pairs come from the Tuya Developer Platform, or can be purchased in bulk. The authorization codes for TuyaOpen and TuyaOS are not interchangeable. Tuya Developer Platform.
Devices that only need a license (already flashed) can use the auth-only "other" chip option — it skips flashing entirely.
Watch logs with serial debug
The Serial debug tab is a full serial monitor for bringing up and debugging a board without a second tool.
- Real ANSI color rendering, plus hex and ASCII views.
- Per-line timestamps and TX/RX direction badges.
- Send data as text or hex, with selectable line endings.
- Capture the session to a .txt file, or export logs for a bug report.
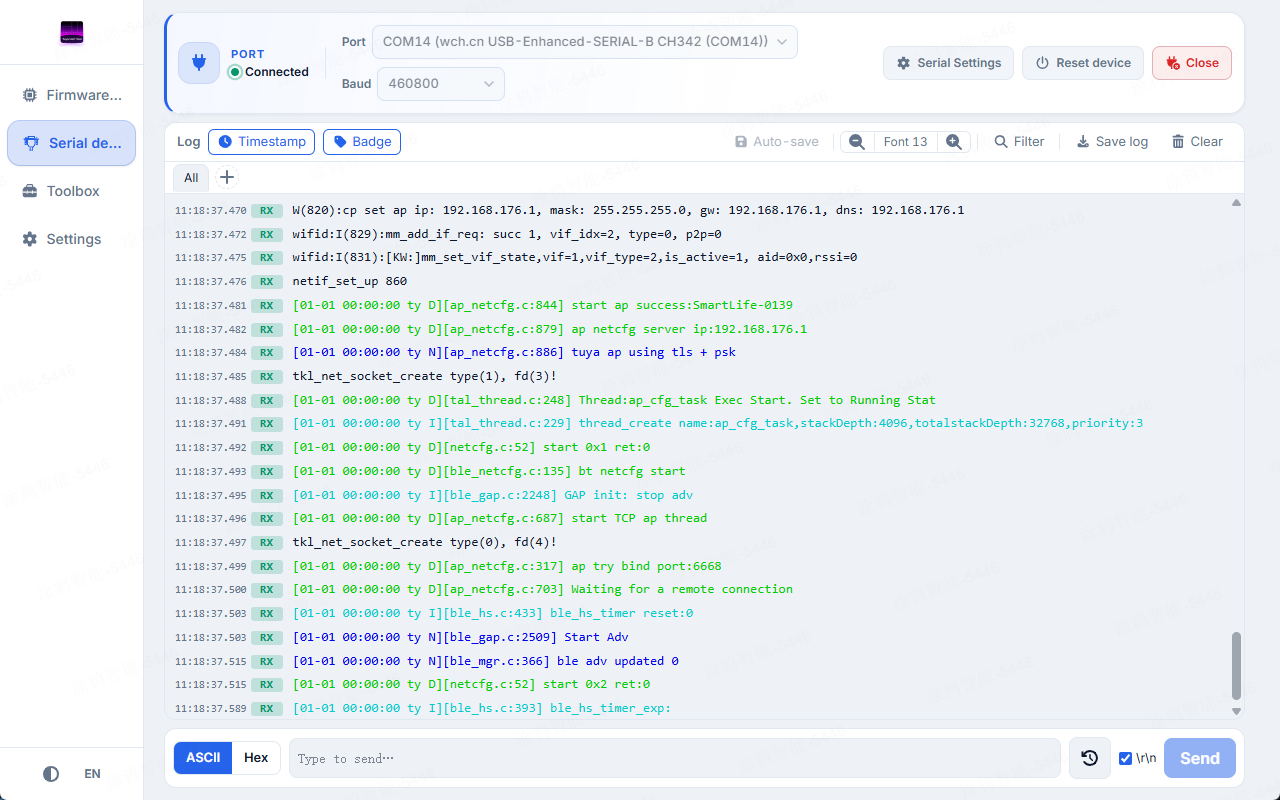
The serial monitor releases the port automatically when you start a flash, so the two never fight over the connection.
Batch flash & authorize
For small production runs, the batch tool drives many ports at once from a single window.
- Auto-detect connected ports, or filter out the ones you do not want to touch.
- Flash the same firmware to every port in parallel, each with its own progress.
- Authorize from a spreadsheet — one UUID / AuthKey row per device.
- Cancel or retry an individual slot, and keep a running success / failure tally.
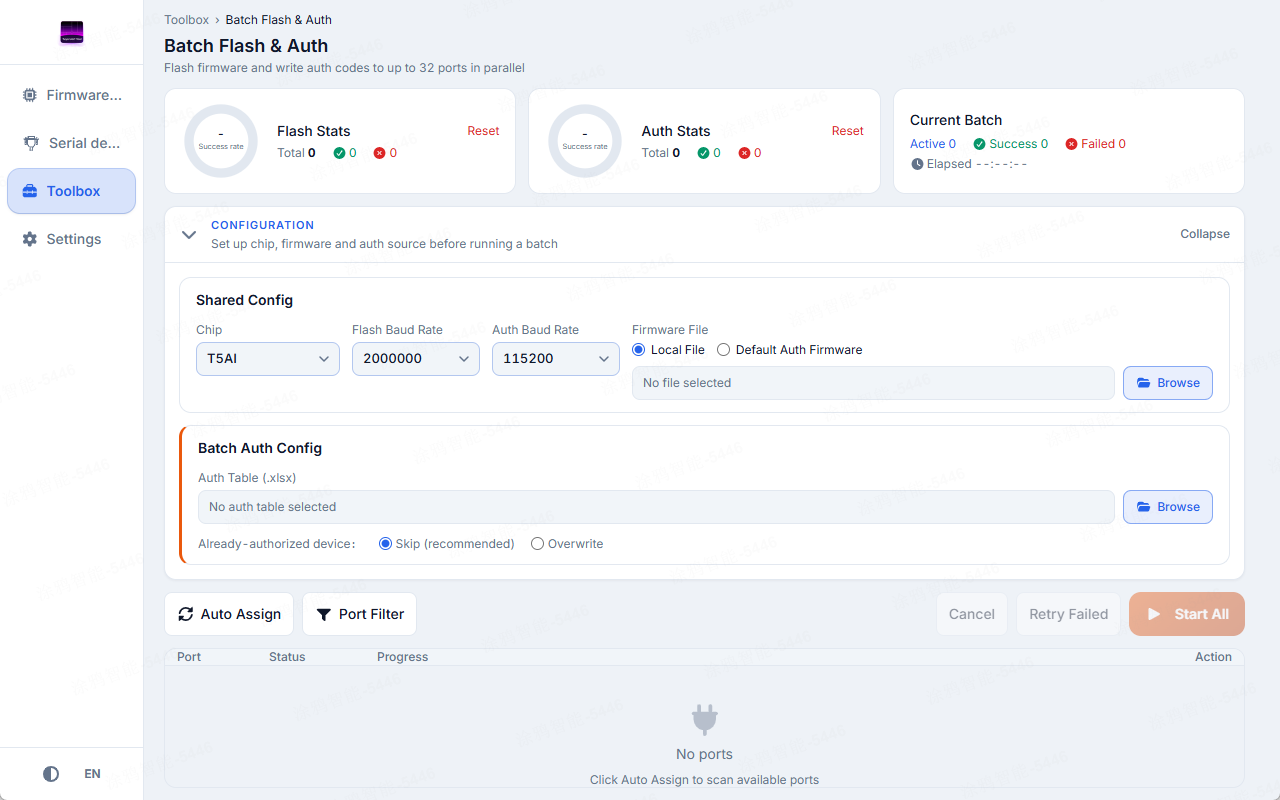
CLI quick reference
Every command auto-detects a single port; pass -p to choose when several are present. Full details live in the repository.
| Command | What it does |
|---|---|
write -d <chip> -f <file> | Flash a .bin to the device |
read -d <chip> -f <file> | Dump flash contents to a file |
erase -d <chip> | Erase a flash region |
authorize --uuid <U> --authkey <K> | Write or read UUID + AuthKey |
reset -p <port> | Hardware-reset via DTR/RTS |
list-ports [--json] | List available serial ports |
update [--check] | Self-update the tool |
completions <shell> | Generate a shell completion script |
Global flags
--verbose | Also print developer diagnostics to stderr |
--plain | ASCII-only output for CI / piping |
Troubleshooting
macOS: "tyutool can't be opened because the developer cannot be verified"
Builds are not Apple-signed — this is expected. Open System Settings → Privacy & Security and click Open Anyway, or Control-click tyutool.app in Finder and choose Open.
macOS: no serial port appears
Grant access under System Settings → Privacy & Security → Accessories (the label varies by macOS version).
Linux: blank / white window (common in VMs)
This is a WebKit2GTK GPU compositing issue. Launch with compositing disabled:
export WEBKIT_DISABLE_COMPOSITING_MODE=1
./tyutool-gui_linux_x86_64_*.AppImage
Flashing always fails during "write" (CH34x boards)
Install or update the CH34x USB-serial driver, then retry. After installing on macOS, allow the driver in Security settings — a working install shows the device as cu.wchusb*.
Getting help
Still stuck? A good bug report makes it fixable.
- Export logs from the GUI (or attach the CLI log file) so the maintainers can see what happened.
- Note your OS, the chip, and the exact command or steps you ran.
CLI log file: ~/.local/share/tyutool/tyutool.log (Linux), ~/Library/Application Support/tyutool/tyutool.log (macOS), %APPDATA%\tyutool\tyutool.log (Windows).