GUI Flashing Tool Guide
Windows GUI Environment
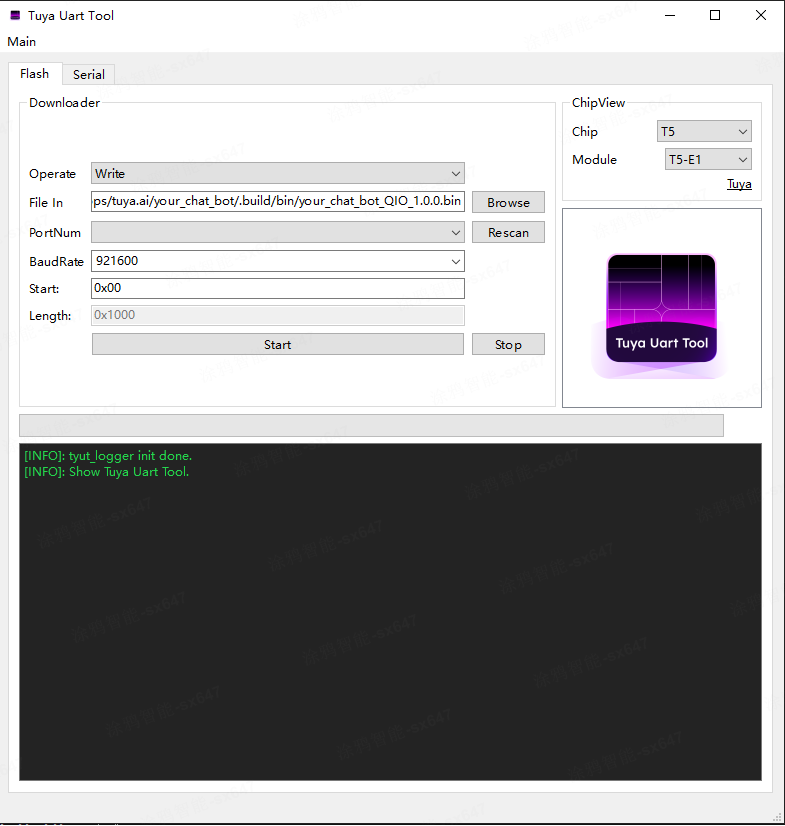
Firmware Flashing Module
Operation Process:
-
Firmware Selection
- Navigate to
.build/bindirectory and select target firmware (recommended to useQIO.bin)
- Navigate to
-
Parameter Configuration
- Port scan: Auto-detect available COM ports
- Baud rate: Default 921600 bps
- Chip platform: Select module model from top-right dropdown
-
Execute Flashing
- Click
Startbutton to begin flashing process, progress bar shows real-time status
- Click
Flashing Log Output:
[INFO]: Write Start.
[INFO]: Waiting Reset ...
[INFO]: unprotect flash OK.
[INFO]: sync baudrate 921600 success
[INFO]: Erase flash success
[INFO]: Write flash success
[INFO]: CRC check success
[INFO]: Reboot done
Serial Port Interface
Provides serial communication debugging solution with real-time data interaction and authorization management.
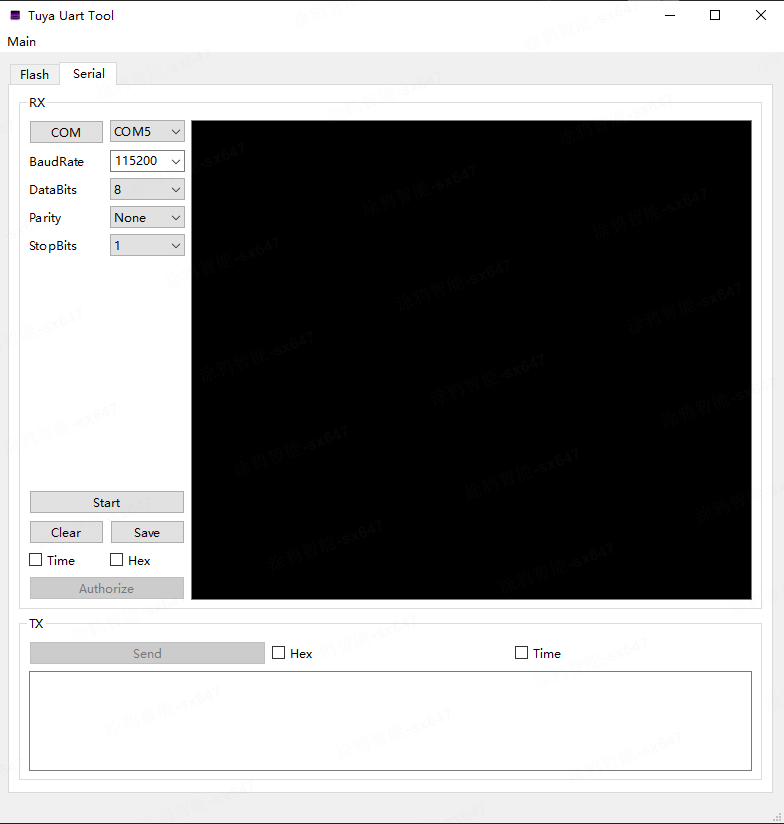
Functional Components
-
Communication Configuration
- Click
COMfor automatic port scanning - Select target device's COM port identifier
- Maintain default settings (Data bits:8, Stop bits:1, No parity)
- Click
-
Session Management
- Start debugging: Click
Startto establish connection - Terminate session: Click
Stopto safely close connection - Session history: Save recent session logs
- Start debugging: Click
-
Data Operations
- Send window: Supports HEX/ASCII dual-mode input
- Receive window: Real-time communication data display
Authorization Code Burning
- Click
Authorizeto activate device authentication mode - Input in security dialog:
- Device UUID: 20-digit unique identifier
- Secure Key: 32-digit encryption key
- Authentication result:
- Success prompt:
Authorization write succeeds.
- Success prompt: