Introduction to tyutool Tool
Overview
tyutool is a flashing and authorization tool provided for the TuyaOpen project. The tyutool tool comes in two versions: GUI and CLI. The GUI version provides a graphical interface, while the CLI version provides a command-line interface.
The authorization function of tyutool is only applicable to the TuyaOpen project and does not support the TuyaOS project. The authorization code for the TuyaOpen project is only valid for TuyaOpen, and the authorization code for the TuyaOS project is only valid for TuyaOS. The two are not interchangeable.
the tyutool tool supports Windows, Linux, and macOS. Developers can choose the appropriate version according to their operating system.
| Platform | Source(Recommend) | Release |
|---|---|---|
| Github | github-source | github-release |
| Gitee | gitee-source | gitee-release |
The tos.py flash command ultimately calls the tyutool_cli tool. The tyutool_gui tool is a graphical interface built on top of tyutool_cli.
The following will introduce the usage instructions for flashing and authorization with the tyutool_gui tool.
Firmware Flashing
After opening tyutool_gui, the interface is displayed as follows:
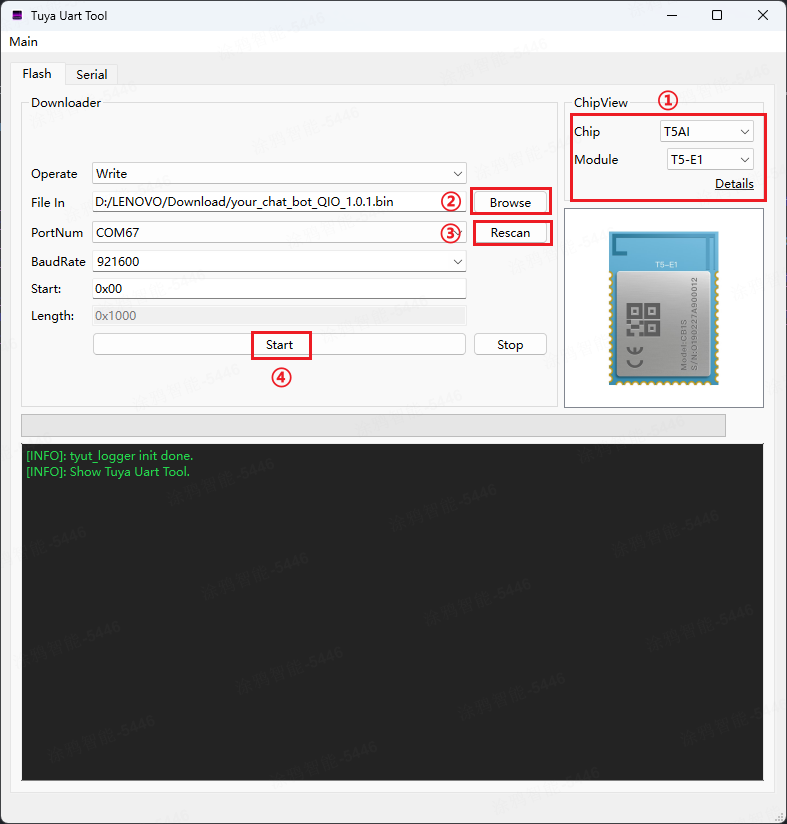
- ① Select the chip/module model to be flashed
- ② Click Browse to select the firmware file to be flashed (the bin file containing
_QIO) - ③ Click Rescan to scan device ports, then select the device port to be flashed
- ④ Click Start to begin flashing the firmware
After the firmware is successfully flashed, the following log output will appear:
[INFO]: Write Start.
[INFO]: Waiting Reset ...
[INFO]: unprotect flash OK.
[INFO]: sync baudrate 921600 success
[INFO]: Erase flash success
[INFO]: Write flash success
[INFO]: CRC check success
[INFO]: Reboot done
The default baud rate for flashing is 921600. If you find the flashing speed too slow, you can increase the baud rate appropriately. However, increasing the baud rate may cause the firmware flashing to fail.
Device Authorization Information Writing
When you need to use the functions of the Tuya IoT platform, you must first authorize the device. You can use the tyutool_gui tool for device authorization. The following are the specific operation steps.
After opening the tyutool_gui tool, click the Serial tab. The interface is as follows:
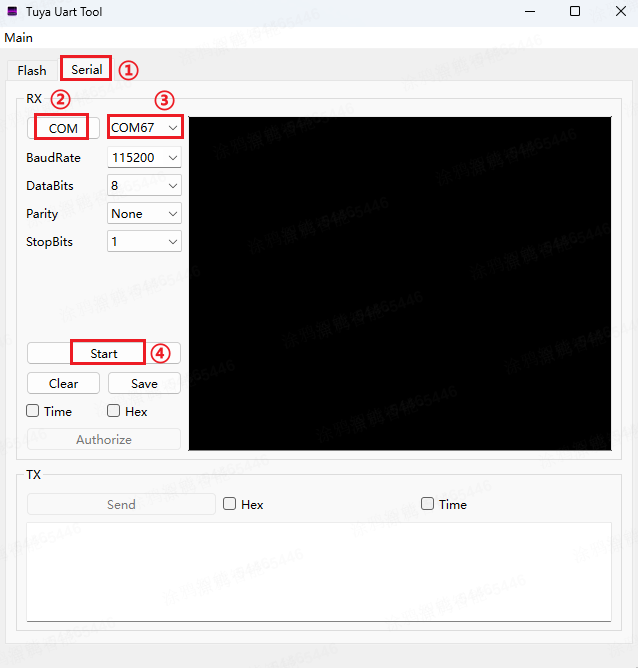
- ① Click the
Serialtab - ② Click
COMto scan device ports - ③ Select the device port to be authorized
- ④ Click
Startto connect the device
The authorization UART and the flashing UART are the same. Keep the UART default configuration (baud rate: 115200, data bits: 8, stop bits: 1, parity: none).
After the device serial port is successfully connected, the Authorize button will become available. Click the Authorize button to pop up the following interface:
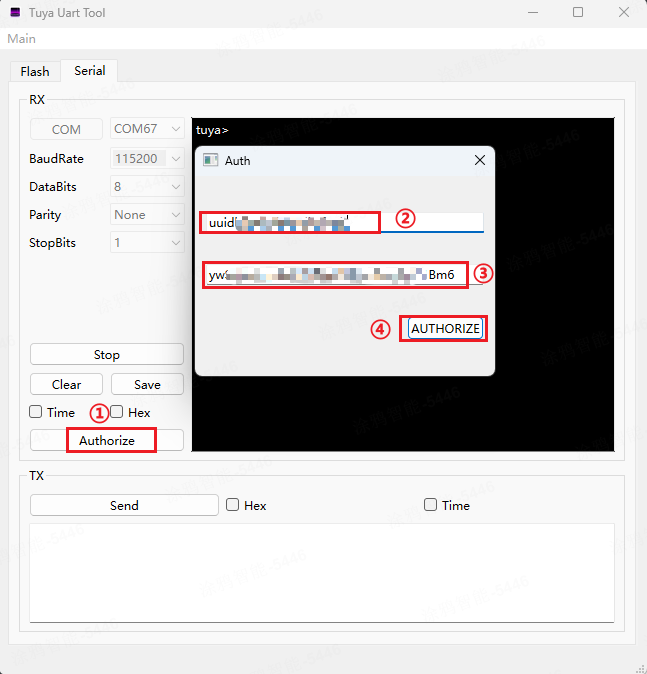
- ② Enter the
UUIDin the authorization information - ③ Enter the
AuthKeyin the authorization information - ④ Click the
Authorizebutton to authorize the device
The TuyaOpen UUID and AuthKey can be obtained from the Tuya IoT Platform or purchased from Tuya's official Taobao store.
After successful authorization, the following log output will appear:
Authorization write succeeds.
Frequently Asked Questions
Always fails during write in the burning process
For the CH34x series, you can try installing or updating the driver.
Windows: https://www.wch.cn/downloads/ch343ser_exe.html
Mac: https://www.wch.cn/downloads/CH34XSER_MAC_ZIP.html
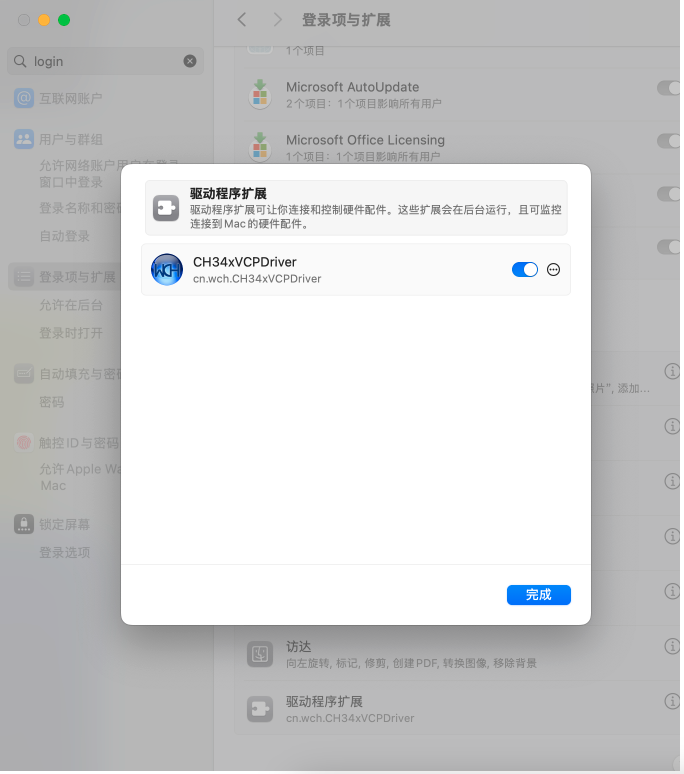
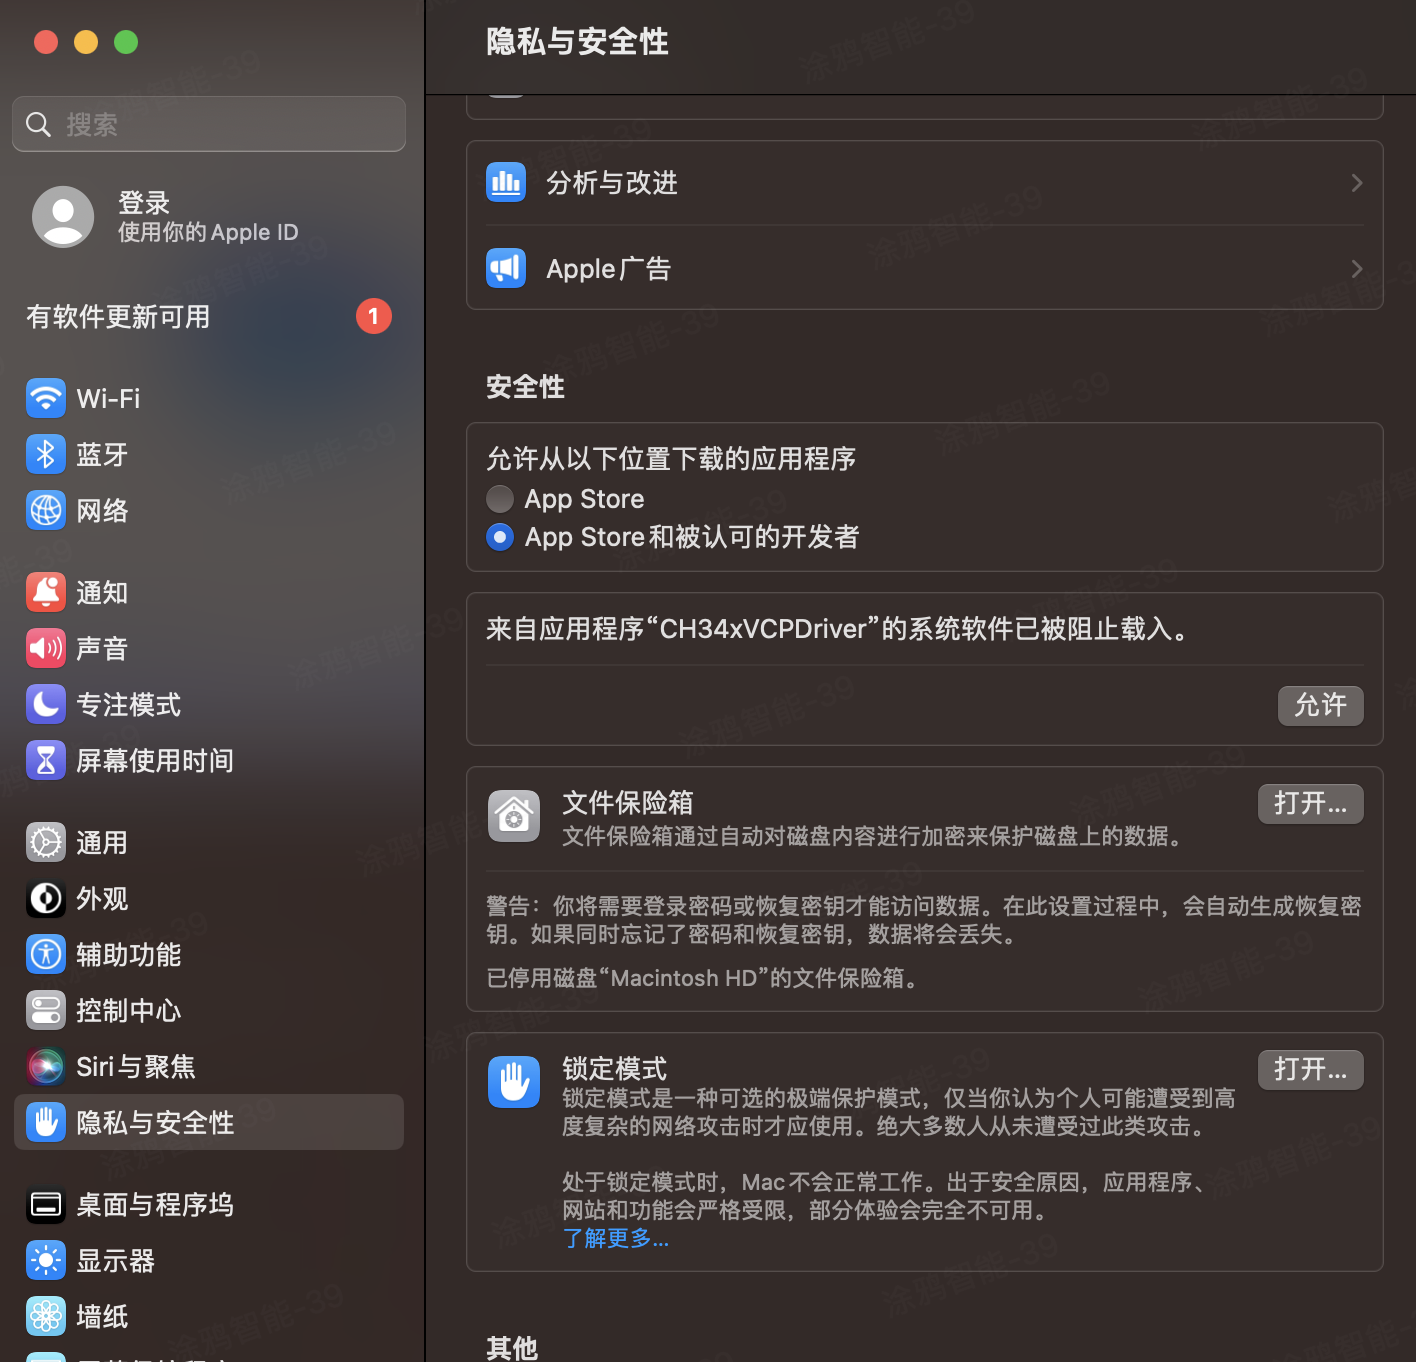
After installing the driver on Mac, you need to allow the driver to load in Security Settings.
If the driver is installed successfully, the CH34x device will be recognized with a name starting with cu.wchusb. Otherwise, the driver installation was not successful.
- MacOS 13
- MacOS 15
On MacOS 13, operate in "Privacy & Security".
On MacOS 15, search for "login" in "Settings" to proceed.